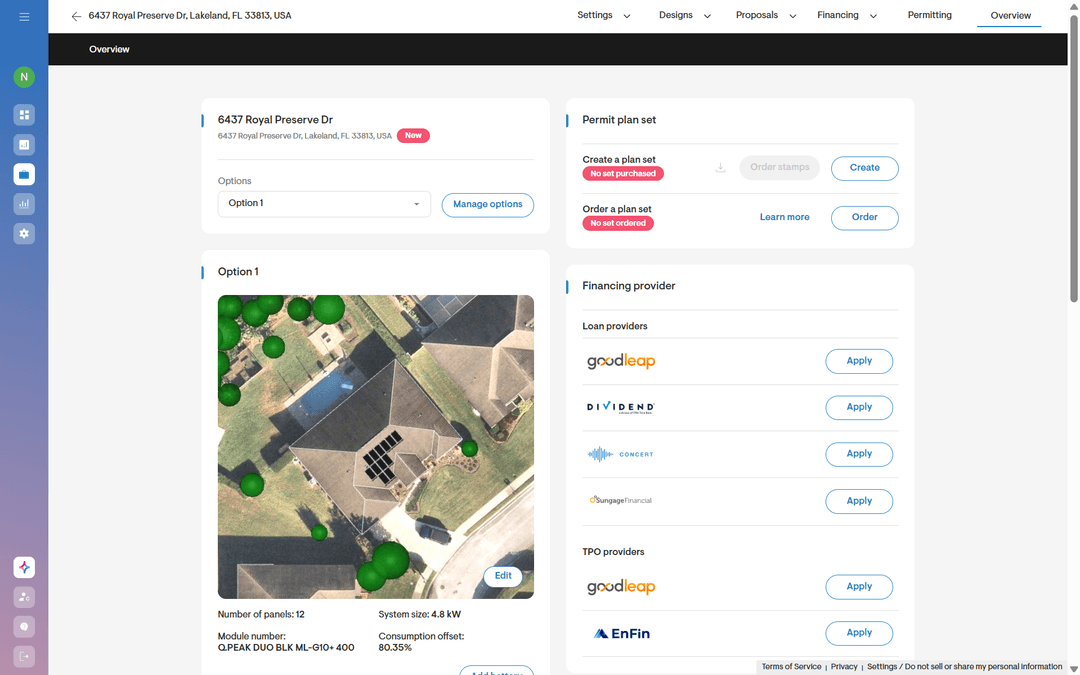
Overview
The guided design experience is Solargraf’s modernized, intuitive workflow for completing roof and solar designs with greater speed, clarity, and accuracy.
It provides step‑by‑step suggestions, context‑sensitive tools, and streamlined access to Solargraf’s AI‑powered capabilities—helping new and experienced users alike produce high‑quality site models and solar layouts more efficiently.
This article explains what the guided experience is, how it differs from the previous experience, and how it improves the accuracy and efficiency of your design workflow.
What is the guided design experience?
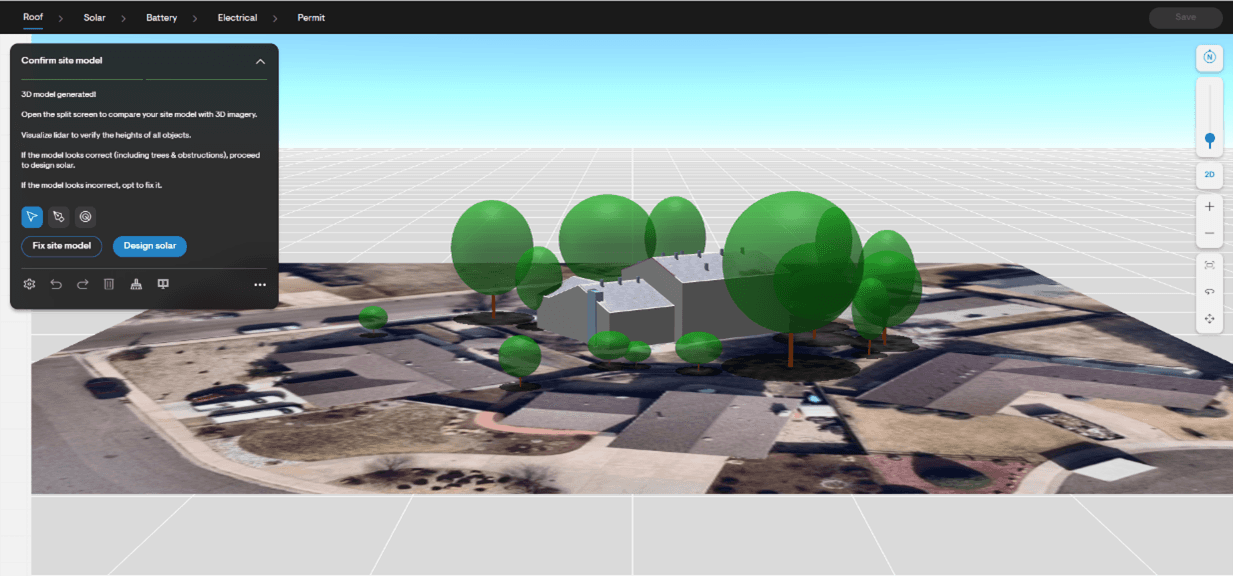
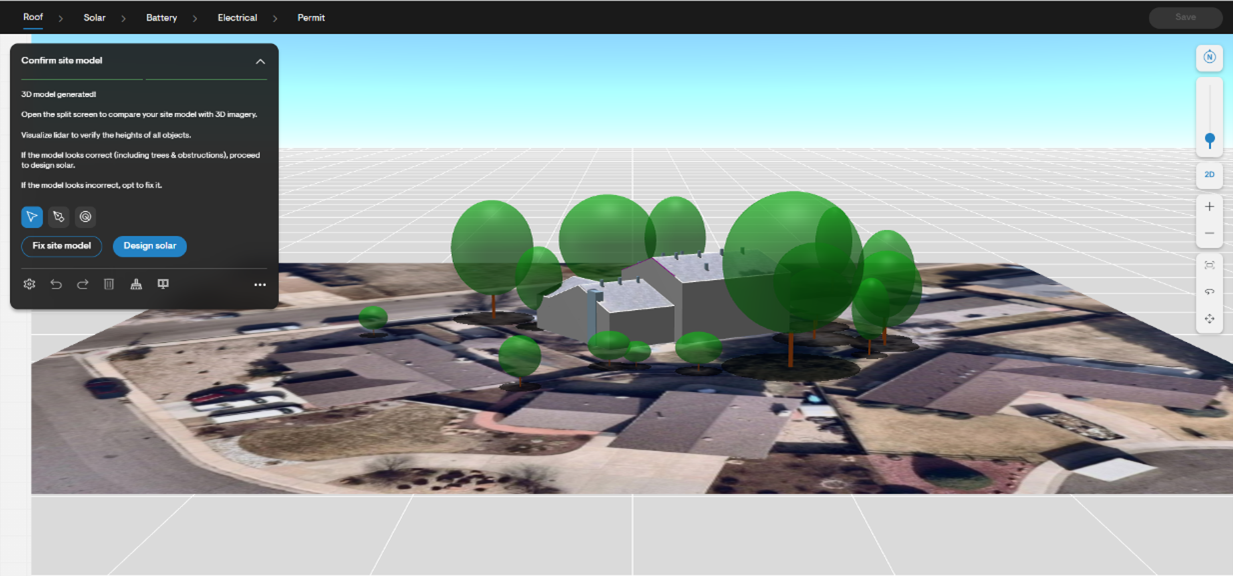
The guided design experience replaces the previous design tool interface with a clean, centralized toolbox located in the top-left corner of the design screen.
This toolbox dynamically updates based on your current action, offering:
- A summary of the current design step (“title”)
- Clear text instructions on how to complete this step
- Primary and secondary call‑to‑action (CTA) buttons for recommended next steps
- Context‑relevant menus or fields
- Primary tools needed to act on the instructions
- Secondary tool icons (undo, redo, settings, etc. – useful at any moment but never mentioned in instructions)
- Tertiary tools (tools that are not relevant according to current instructions - accessible from the three‑dot menu)
The result is a guided, chronological workflow that helps users advance from an empty canvas to a complete roof model with solar—without needing to remember which tool to use next.
How it differs from the expert experience
Previously, Solargraf offered a more open‑ended workflow called the expert experience, where:
- All tools were always visible
- Toolbars appeared on the far left and upper‑right corners of the design tool
- Users were expected to know the correct order in which to apply tools
- AI‑assisted steps were available but not emphasized
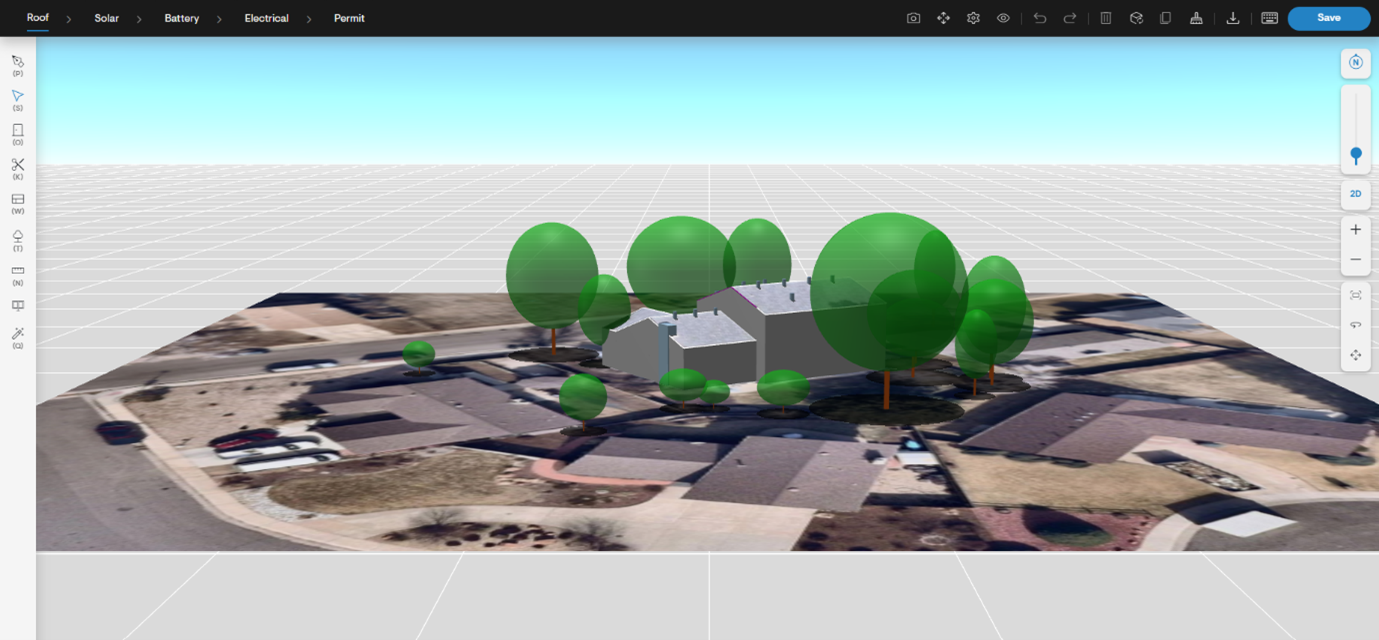
While powerful, the expert experience required deeper familiarity with the system and could lead to inconsistent workflow order.
Key differences in the guided experience
| Feature | Expert experience | Guided design experience |
| Tool visibility | All tools always visible | Only the relevant tools shown |
| Workflow structure | User-driven sequence | Recommended chronological workflow |
| Tool location | Left & top-right toolbars | Single top-left toolbox |
| AI integration | Available but not emphasized | Embedded throughout design steps |
| Keyboard shortcuts | Standard set | Expanded set and accessible via H (Help) |
| Support for new features | No longer updated | Actively developed and expanded |
Why use the guided experience?
The Guided Experience improves speed, consistency, and output quality by helping users follow the optimal workflow. It does this without restricting flexibility: you can still access any tool at any time through the tertiary menu or via keyboard shortcuts.
Key benefits
- Faster design completion due to structured step progression
- Higher model accuracy thanks to prompts to verify imagery, models, and roof geometry
- Better AI utilization (roof detection, tree detection, 3D rendering, shading tools, etc.)
- Cleaner interface showing only what’s relevant at each stage
- Reduced errors and rework through contextual guidance
- Full access to all tools for expert users who need them
- Streamlined keyboard-first workflow with enhanced shortcuts
How to enable the guided design experience
(Only for users whose Solargraf account was created before March 2026)
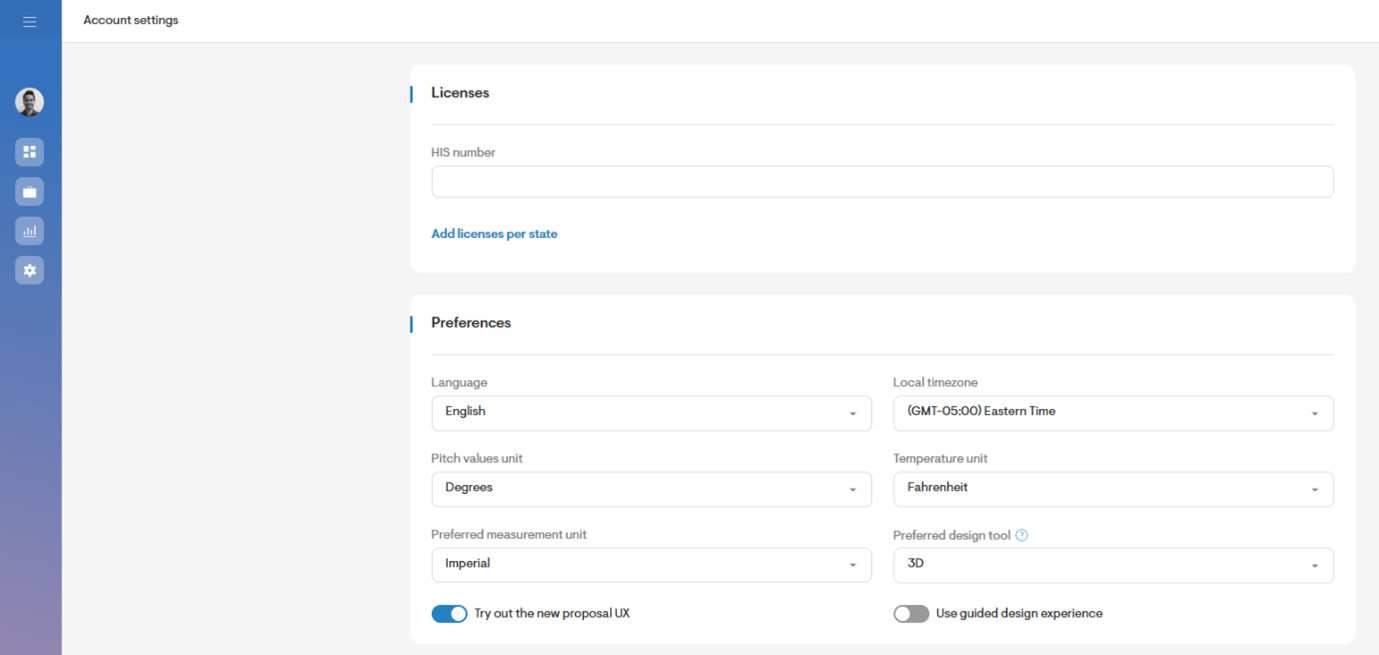
You can enable the Guided design experience in your User Profile → Preferences, using the toggle labeled “Use guided design experience”.
Steps for roof & solar design using the guided design experience
1. Building the Roof Model
The guidance walks you through:
- Detecting or tracing the roof
- Rendering the 3D model
- Reviewing roof geometry using:
- Split-screen imagery
- LIDAR data
- Fixing or confirming the roof model
The toolbox updates dynamically to display the correct icons and the recommended CTAs at each step.
2. Transitioning to Solar Design
Once the roof model is confirmed, you can move the solar tab to define the panel layout. The primary CTA updates to take you into solar design, or you can use the enhanced keyboard shortcut:
+ (plus key) → Switch from Roof to Solar
- (minus key) → Switch from Solar to Roof
Other shortcuts include:
I → Change imagery (roof tab only)
V → Visibility settings
D → Downloads (roof report, shade report, etc.)
H → Keyboard shortcuts help menu
Optional: switching back to the expert experience
Users familiar with the old interface can return to it anytime:
- Go to your User Profile
- Open the Preferences section
- Turn off the “Use guided design experience” toggle
However, note that all new design‑tool features will be available only in the guided experience going forward.
Why we recommend the guided experience
As of February 2026, Solargraf’s product development focuses exclusively on the Guided Design Experience.
To benefit from:
- The latest features
- Improved AI-powered automation
- The most efficient design flow
- The best accuracy in 3D modeling and solar layout
We strongly recommend enabling and using the Guided Design Experience for all projects.
Need Help?
If you have questions or want to explore specific tools, shortcut lists,
or workflow examples, visit additional articles in the Solargraf Support Portal or contact our support team.