Help Center Getting Started
Tailor Your Account
Published on 10 Dec 2021
Welcome to Solargraf! In this guide, you will learn how to tailor your Solargraf account and set up default information that will save you time when creating new proposals.
Your Settings Page
The first place you can visit to start setting up your new Solargraf account is the Settings page. Once you've logged in to your Solargraf account, you will be able to see the Dashboard.
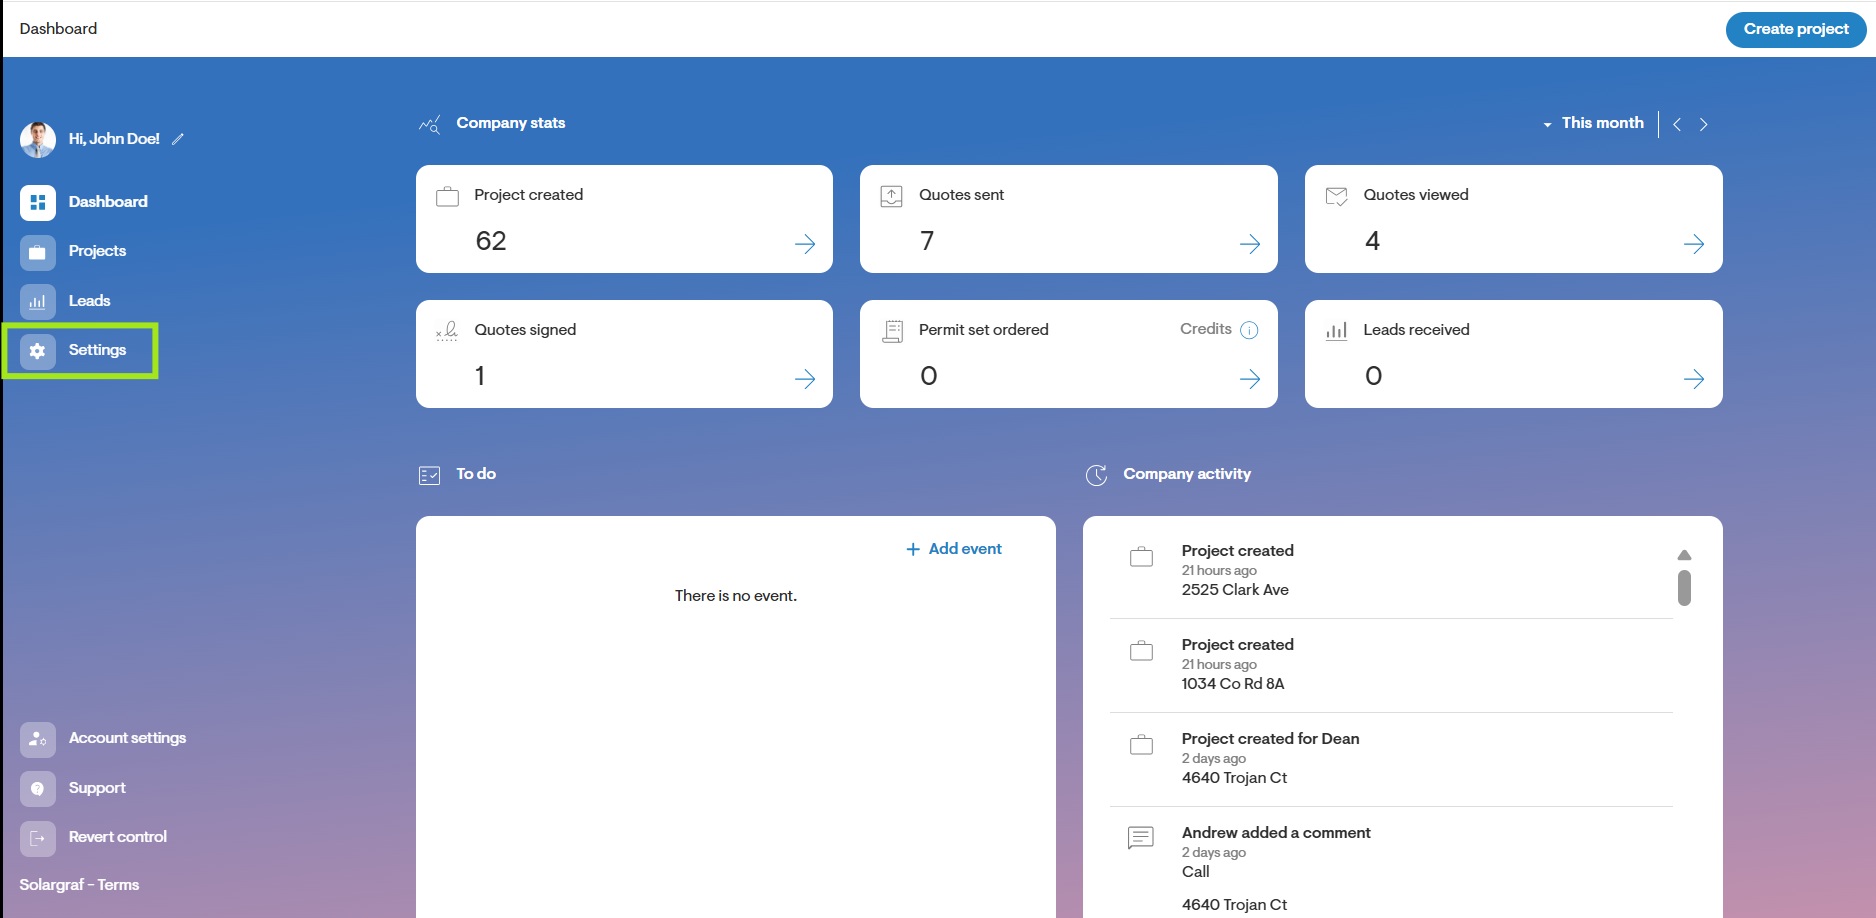
- In the menu options, click Company Settings.
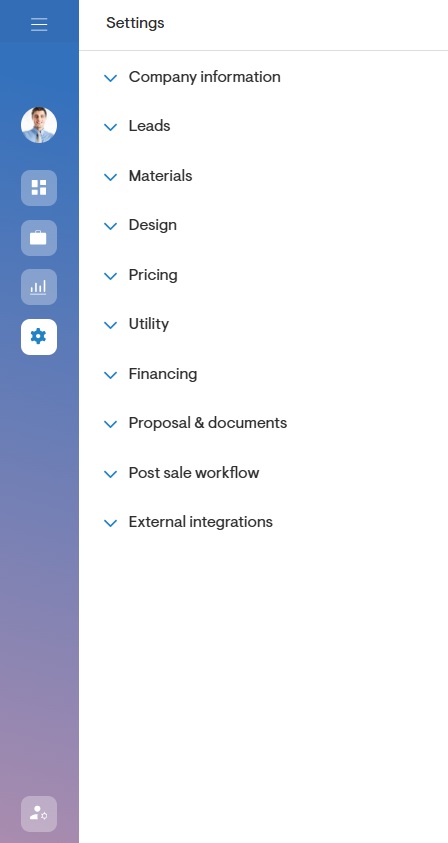
How it Works
The Company Settings page serves as a central hub for streamlining the creation of new proposals by enabling you to pre-populate essential information. This encompasses your Company Information, Materials, Design Settings, Pricing, Financing, Proposal and more.
Completing your Company Settings page is a straightforward endeavour. It's beneficial to gather all necessary information beforehand for a seamless process. Remember, you can revisit the Settings page anytime to update and add further details at your convenience.
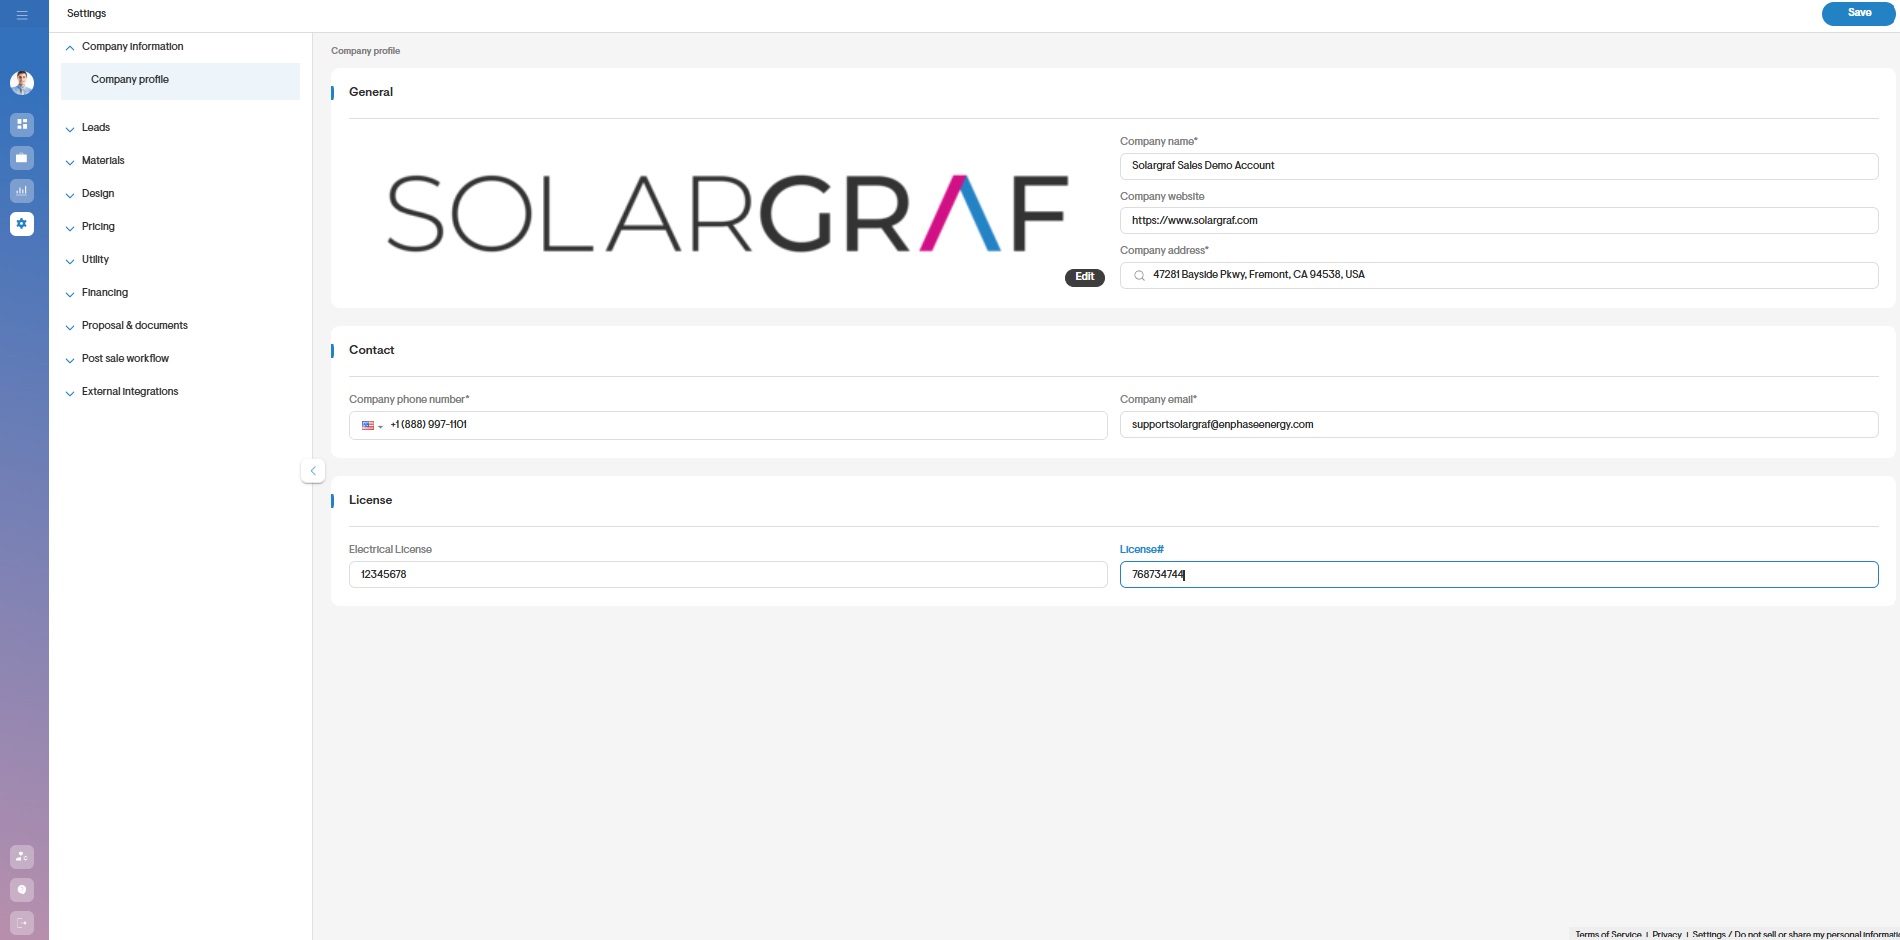
- To update any field, simply click into it and enter your new information.
- Once you're done making edits, be sure to click the Save button located in the top-right corner of the page to apply and store your changes.
Note: If you're unable to edit any fields on this page, it's likely because your account doesn't have the necessary permissions. To learn more about your access level or request changes, please reach out to your account owner or administrator.
As you set up your account for the first time, there are certain fields that are important to update. Of these, any fields that are left incomplete will be marked as so, next to the pencil icon. You can use this as a guide to know which fields to complete first.
Company Info
To get started, update the fields relating to your company profile. This information will appear on the footer of your Solargraf proposals, and the Terms and Conditions and Custom Laws will be added at the end.
- Company Logo: You must upload a compatible image file type (.JPEG, .PNG, .TIFF, and .GIF). The recommended size of the logo to use with Solargraf is 500 x 500 px.
- Company Name: This is your registered company name.
- Contact Information: Add in your company address, number and email information.
- Website: If you do not have a website yet, you can always come back and update this field when your website has been launched. Users will be able to click on the logo on the live proposal to access your company website.
- Company License Numbers: You must include both your company and electrical license numbers.
Leads
This allows you to create and organize lead statuses which you can assign to leads added to your Leads page. To learn more about managing Leads you may refer to the following article:
Materials
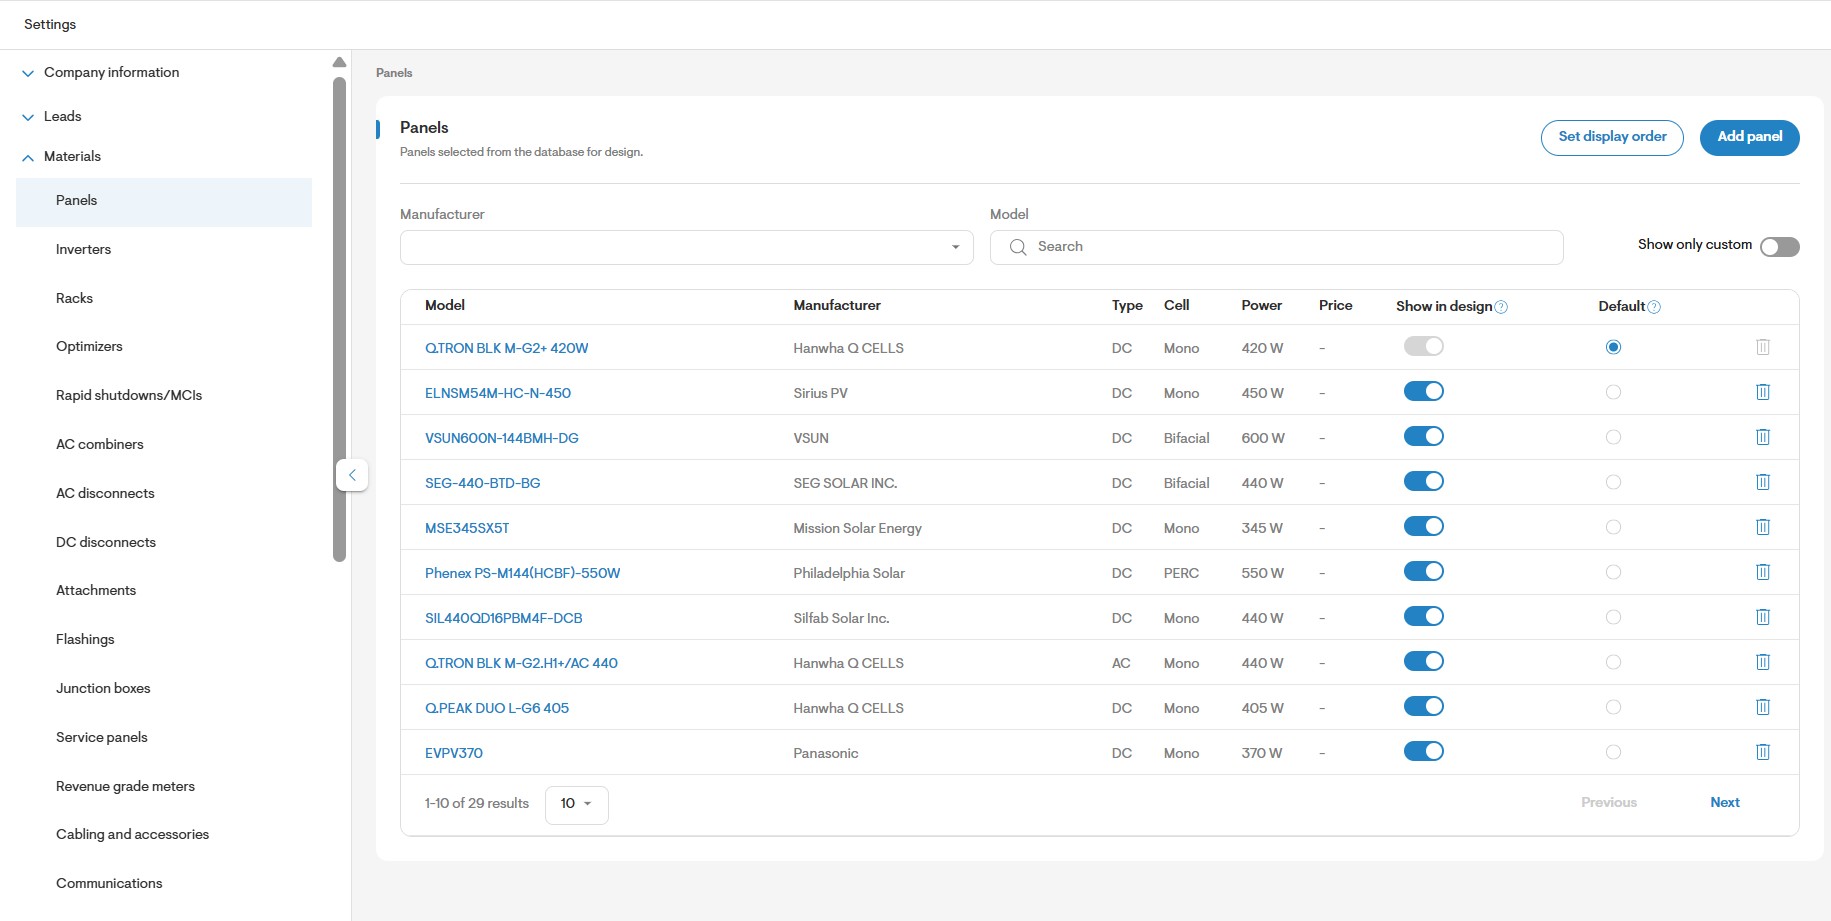
Use this section to add in common materials you will use in your solar projects. You can also add in default settings relating to material performance and the design tool.
You can add a variety of materials to this section ranging from modules to charge controllers and automatic transfer switches. We highly recommend adding your solar modules and inverters first before moving on to create projects.
Design Settings
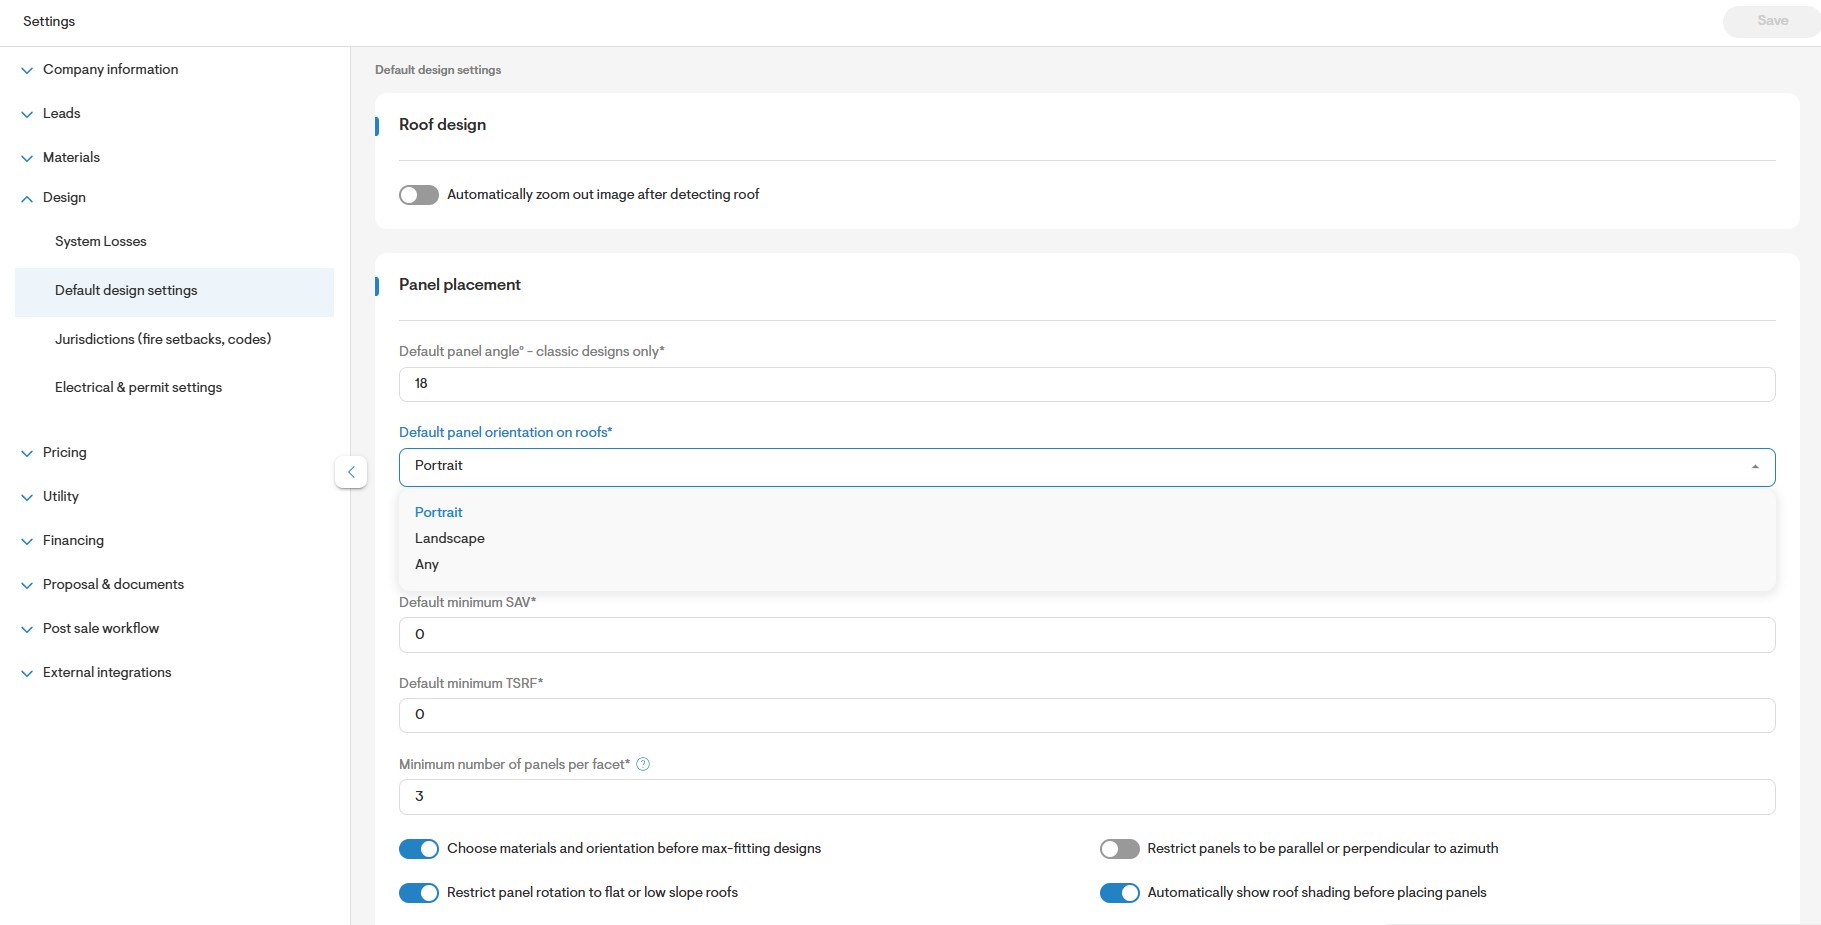
Use this section to add in default settings relating to material performance and the design tool.
Default System Losses: In this section, you will be able to create losses templates for the Soiling, Shading, Snow, Mismatch, Wiring, and Connections losses. You can also update the losses associated with Light-Induced Degradation, Nameplate Rating, Availability, and Age. To learn more about creating losses templates you may refer to the following article:
Jurisdiction (Fire setbacks, Codes): You may use this to define default fire setbacks per state for all your Solargraf designs. You will have the option to select the applicable fire setback from the design tool. To learn more about defining setbacks, you may refer to the following article:
Design Tool Default Settings: Use this to define the default settings for your design tool. This includes settings related to the panel placement, tilt and spacing, flat roof definition for setbacks, keepouts, electrical design, and documentation.
- Electrical and Permits Settings: Customize your preferences here for electrical line diagram and permit planset generation.
Your Pricing
Enable BOM-based pricing: This allows you to enable BOM-based pricing, which allows you to set pricing per unit. You will need to define the unit price on the individual settings of the materials added to your project. This may be done at the company level to define default unit pricing used on all future projects. To learn more about BOM-based pricing you may refer to the following article:
Solar Pricing: This is used to determine the base price of the system using a $/W setting. You can assign a different $/W price to each system size (kW DC) range. You may also define different price range tables per state.
Battery Pricing: You may define storage pricing for pre-existing manufacturers and battery configurations. If you do not add pricing for the predefined batteries, they will not be available for use in your battery design.
- Incentives & Rebates: You may use this page to select from the pre-defined incentives in Solargraf's database, or to create your own. You may choose which incentives to apply as a default to all future projects created.
Discounts and Extra Costs: In addition to the PV and storage base price, you can add Extra Costs and Discounts to each project to adjust the system price as needed. It is recommended you add in a complete list of possible adders you may need before creating projects.
Operating & Maintenance Costs: You may use this page to define the default operating and maintenance costs for future projects created.
Tax & Depreciation: You may use this page to set up the default federal and state tax rates, as well as depreciation for the MACRS incentive. You may also select whether to include the tax on savings.
Utility
Utility and Tariff Settings: You may use this page to define your own custom utility settings. There is no limit to the number of utility tariffs you can add, but keep in mind these will be displayed in all new projects created. You may also define the default buy and sell rate inflation rates, as well as choose whether to include agricultural tariffs from Genability. To learn more about defining custom utility settings you may refer to the following article:
Note:You will have the option to use Automatic Usage Rates, which will not require you to add your own utility settings. To learn more about using automatic usage rates you may refer to How to: Setup Automatic Utility Data.
Custom Consumption Profiles: You may use this page to define additional custom consumption profiles that will be applied in the utility settings page to model daily consumption.
Financing
- Financing Option: This allows you to include a default list of financial options you plan on offering to clients.
- Managing Various Fintech Partner Integrations
You may use this section to setup partner integrations with any of the financing partners on Solargraf. To learn more about setting up your financing partner integrations you may refer to the following articles:
- Financing Partner Settings: Allows you to apply to become a Partner and to manage the visibility of the FinTech Partner.
Proposal
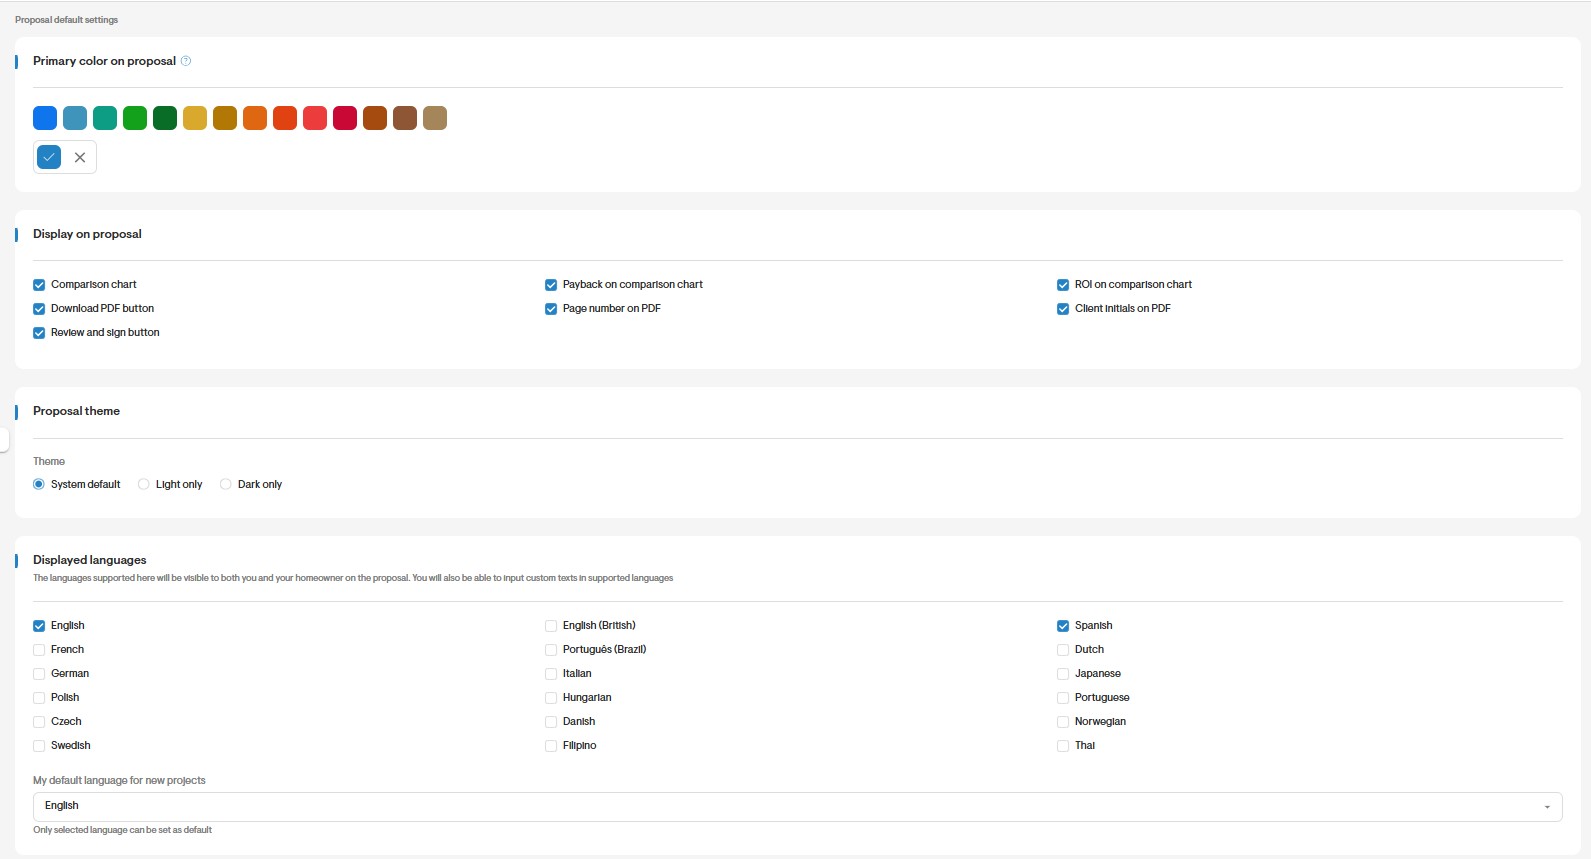
- Proposal default settings: You can select the Primary color on proposal, Display on Proposal, Displayed Languages and set a default language for new proposals.
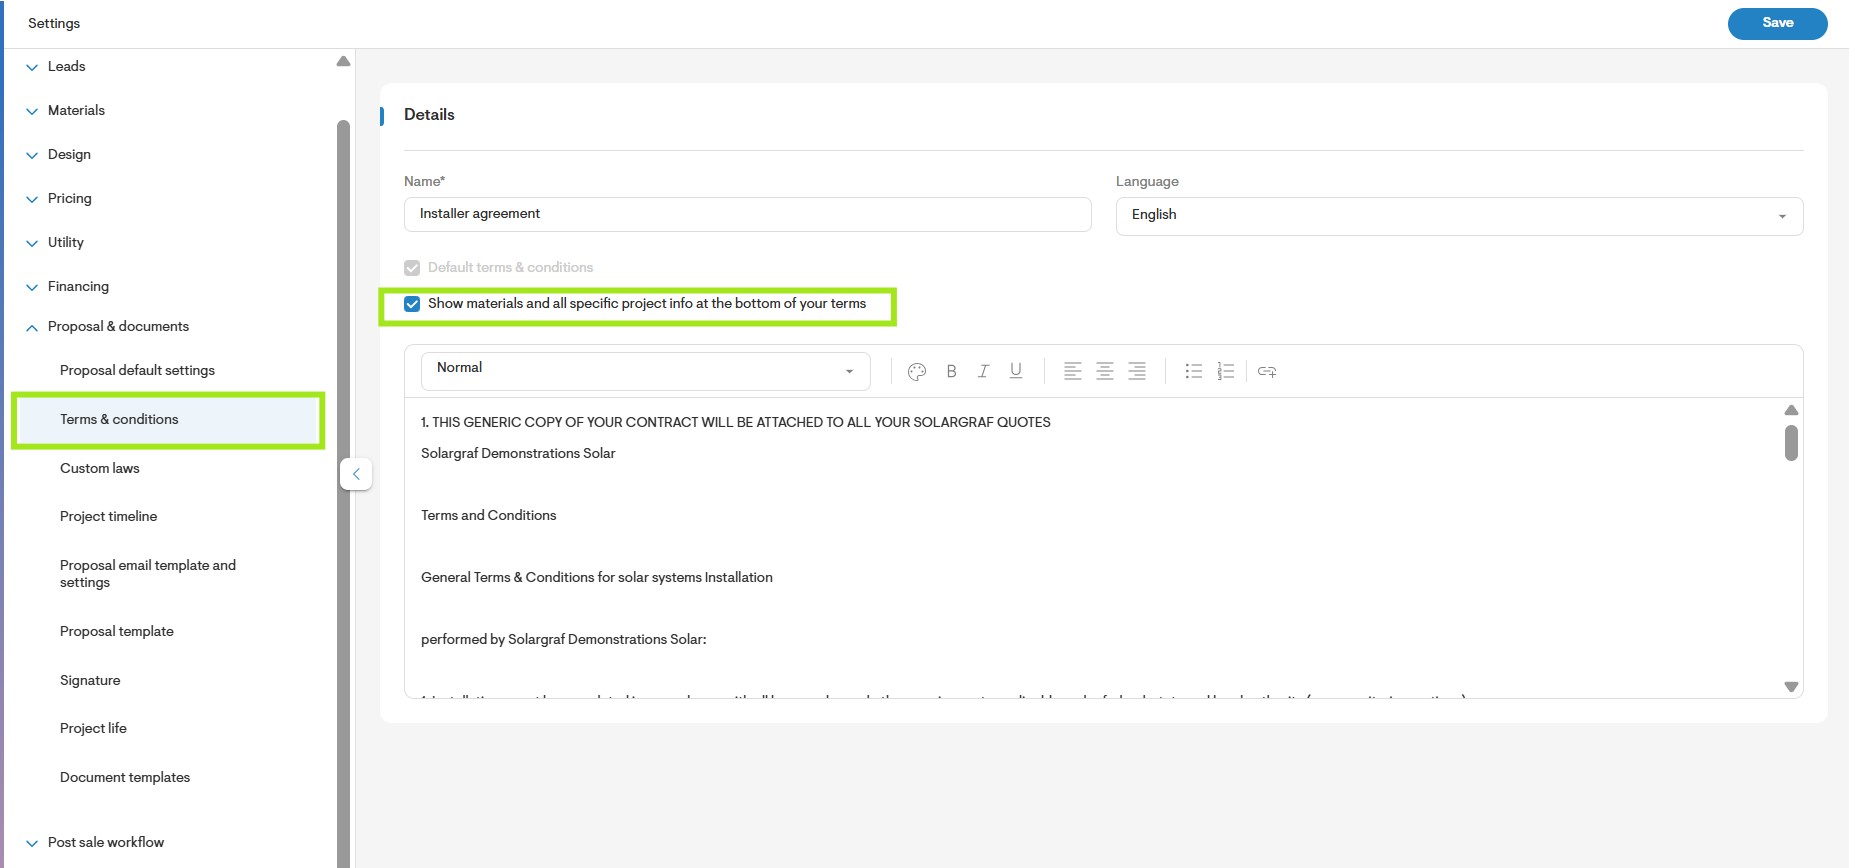
- Terms and Conditions. You can use the existing template for the Terms and Conditions in your Solargraf Account. You will also have the option to display project-specific information, such as materials. You will find this option by scrolling to the bottom of the page.
Custom Laws: If you have additional information you would like clients to consent to, you can include this as an additional custom law.
- Project timeline: In this section, you can make changes to your default project timeline. The project timeline is a great tool for informing clients and keeping track of project steps. You can add, remove, and reorder steps according to your own workflow. You may create a project timeline for Residential and/or Commercial projects.
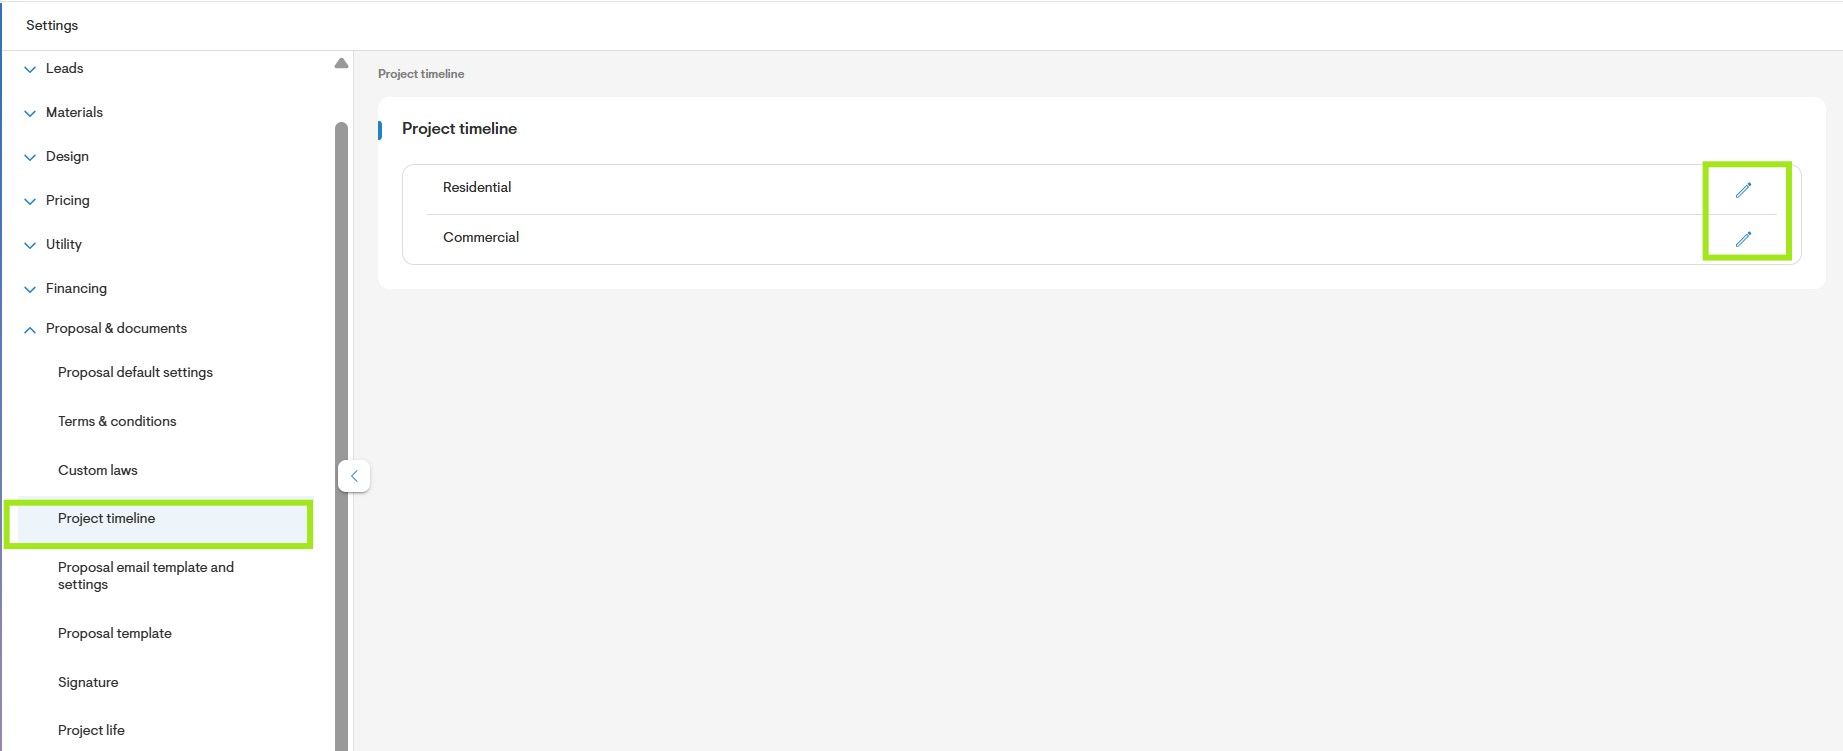
You are also able to select the financing option (Loan, Lease, PPA, or Buy) to which each step applies, as well as add an expected payment amount to each step.
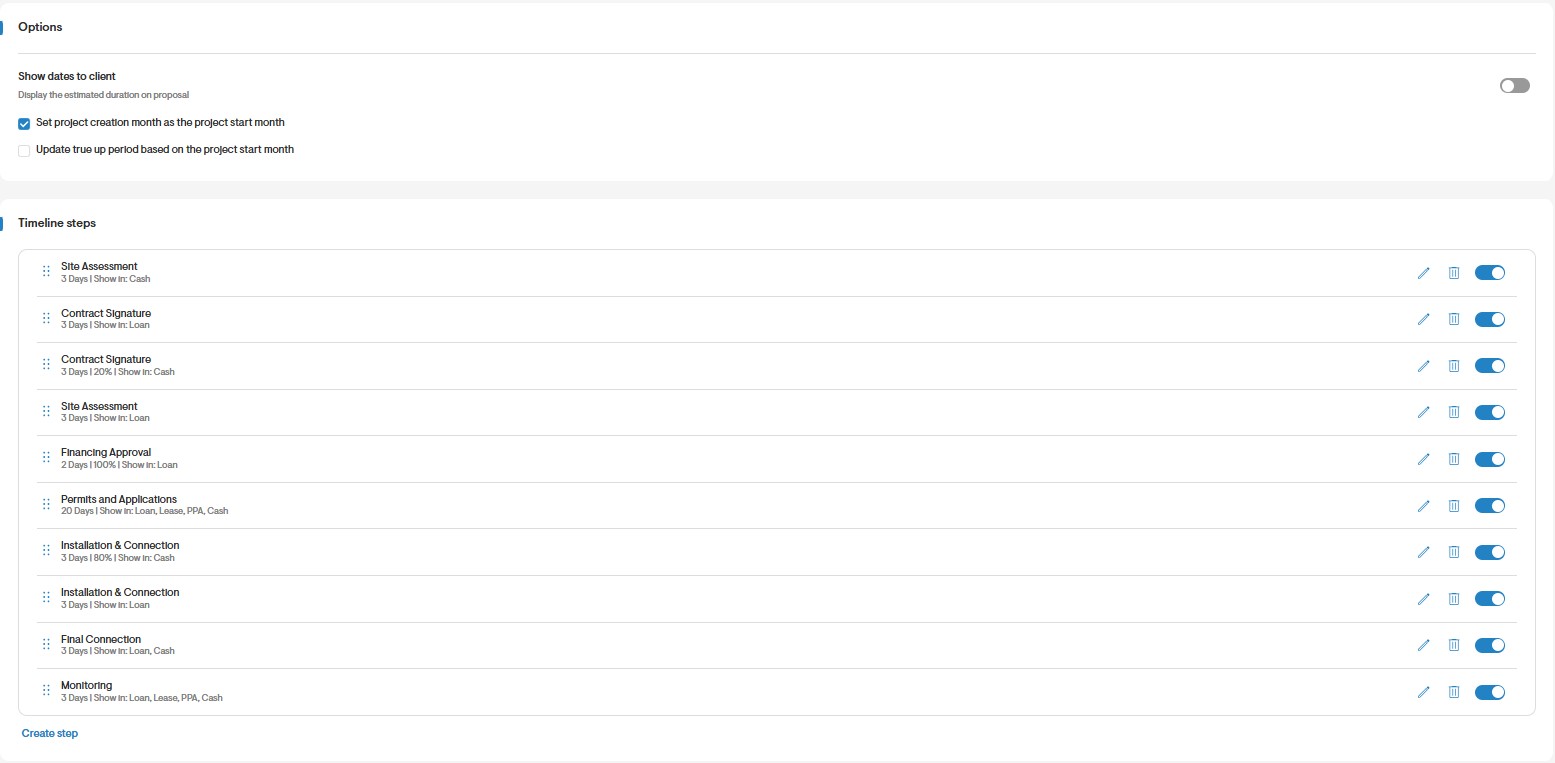
Note: Keep in mind that after projects have been created using these default settings, you can always modify them further through the individual project settings. Once a residential or commercial project has been created however, you will not be able to switch the default project timeline that was applied (whether it was residential or commercial)
Proposal email template and settings: This allows you to customize the email which will be sent to clients with a link to the online version of the solar proposal. You may also cc additional users to be include in the email by default.
- Proposal Template:
The Proposal Template Dashboard displays all templates created within your company. By default, it includes:
- Solargraf's Proposal Template
- Create New Template
You can customize these templates to better suit your company’s needs. Additionally, you have the flexibility to:
- Create multiple unique proposal templates
- Make these templates available for future use by your team
- Clone Existing Templates
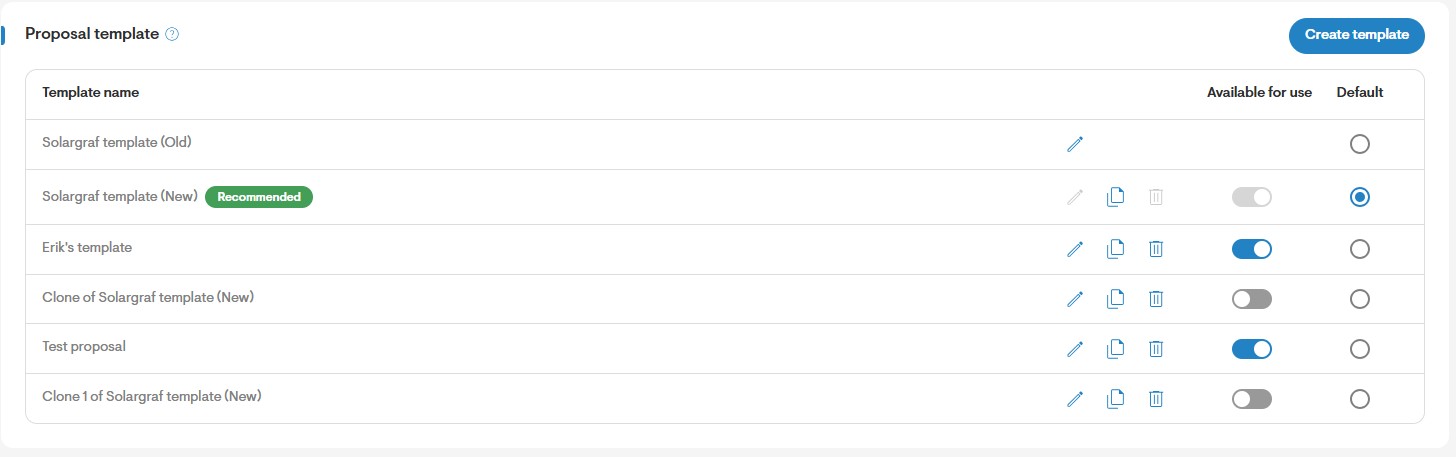
To learn more about Proposal Templates you may refer to any of the following article:
Solargraf’s new proposal experience:
Signature: Use the Signature section to control which signatures are required on your proposal. You can include multiple client signatures as well as installer signatures—perfect for capturing cosigners and countersigners all in one place
- These signatures will appear in the Review and Sign section of the proposal for easy collection.
- To personalize the document, use the placeholder {ProjectOwner}, which will automatically be replaced with the actual name of the project owner when the proposal is generated.
- Project Life (years): This is the lifetime of the installed solar system. Savings will be calculated for the duration of the project lifetime.
Document Templates: This allows you to create additional documents that may be sent through DocuSign or Solargraf, along with your proposal and terms and conditions. To learn more about Docusign you may refer to any of the following articles: