Help Center Permit
Submit a New Permit Set Application
Published on 10 Dec 2021
This article describes how to submit a new permit set application for a Solargraf project. Ideally, you should wait to submit an application once you've confirmed that there will be no further changes to the project design or material.
- Navigate to the project Overview page.
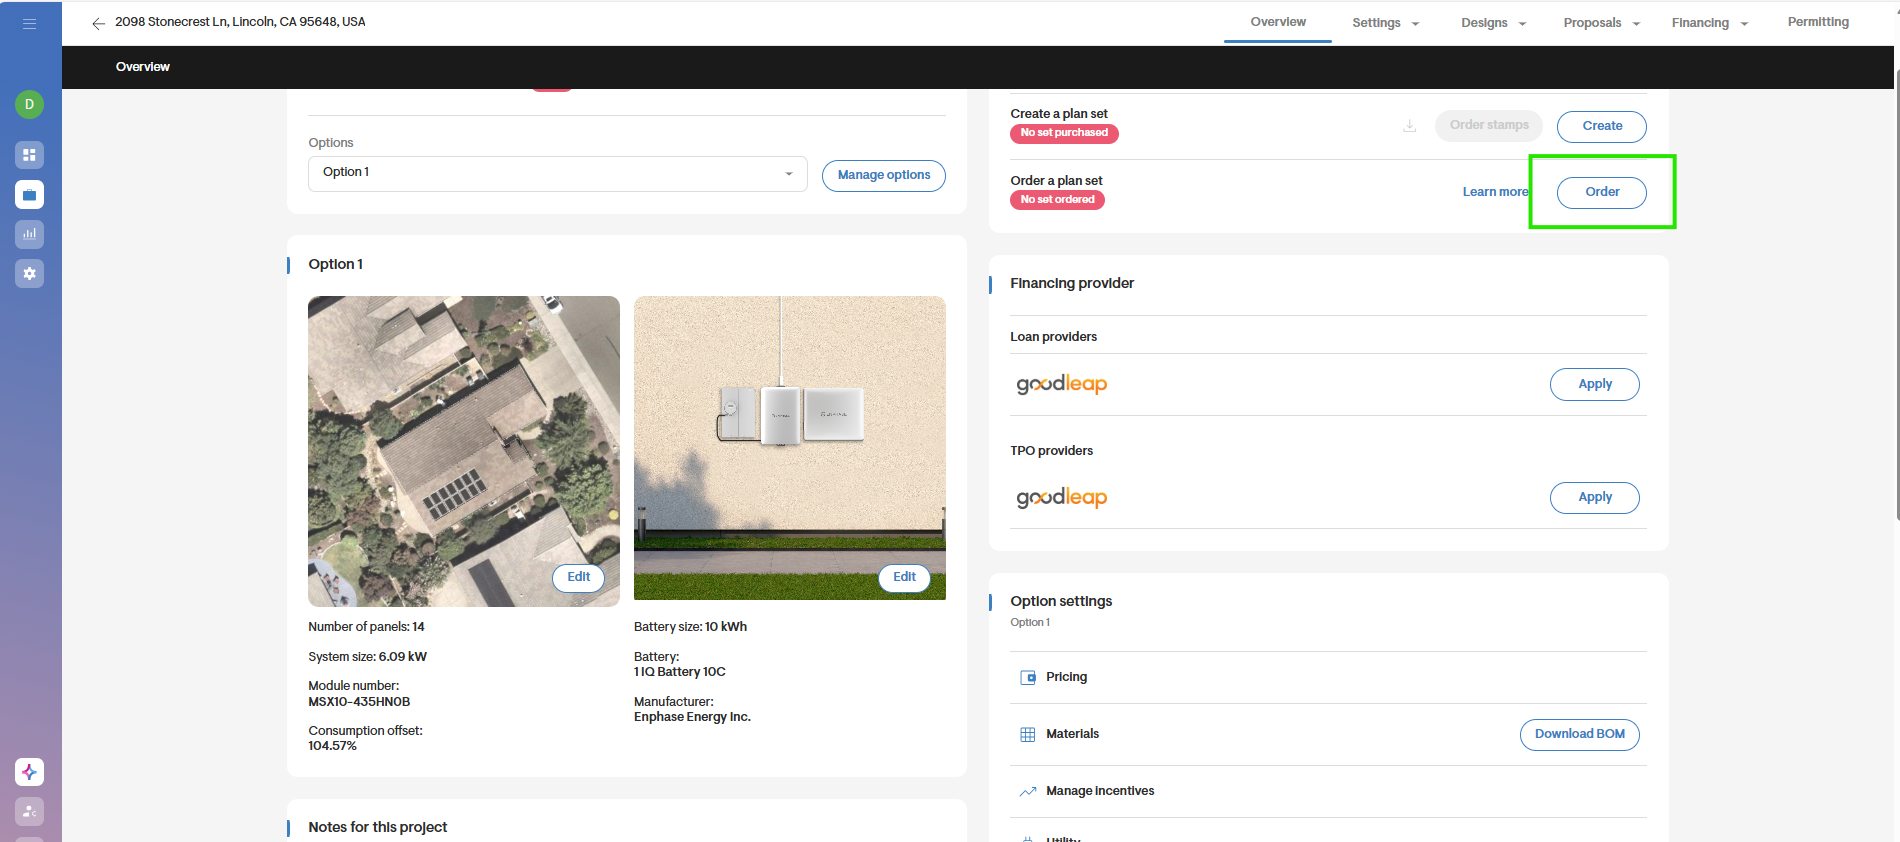
- Click Order next to Order a plan set.
Note: A warning message will prompt you to confirm that you are submitting this permit set application with your client's consent and that they have signed the proposal.
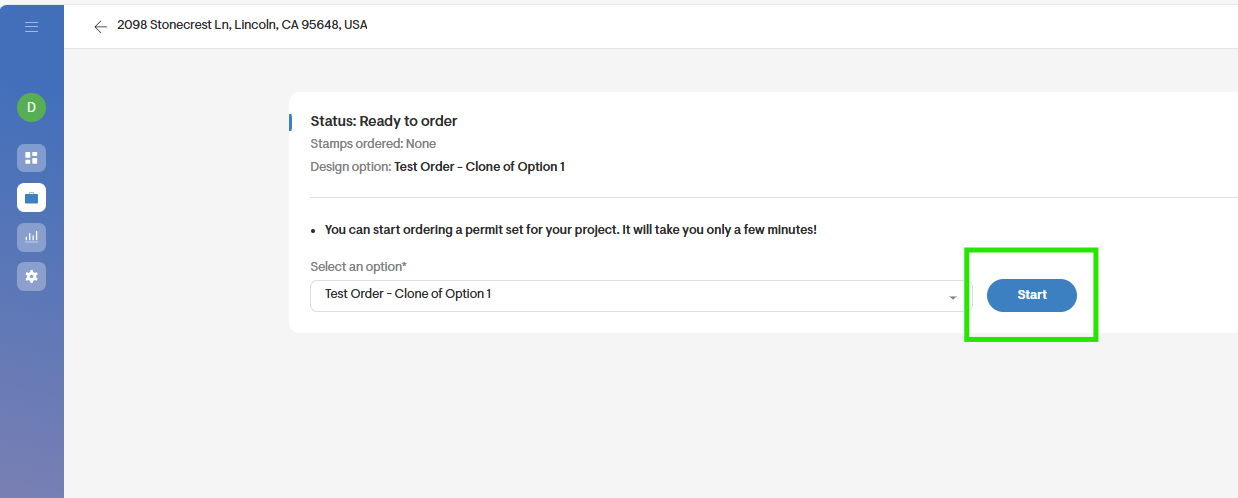
- If you've created multiple design options for the selected project, make sure to select the one you intend to use for the permit set. Once the correct option is selected, click Start to continue.
Step 1 : Confirm layout
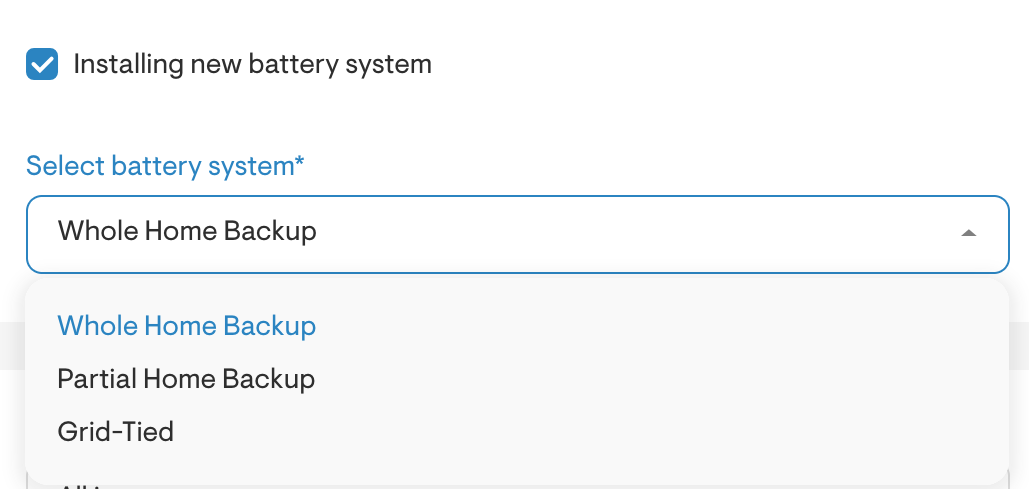
Indicate if this is a new battery system
Use the checkbox to specify whether the system includes a new battery.Select the battery system type
If a new battery system is selected, choose the appropriate type from the dropdown menu:- Whole home backup
- Partial home backup
- Grid-tied
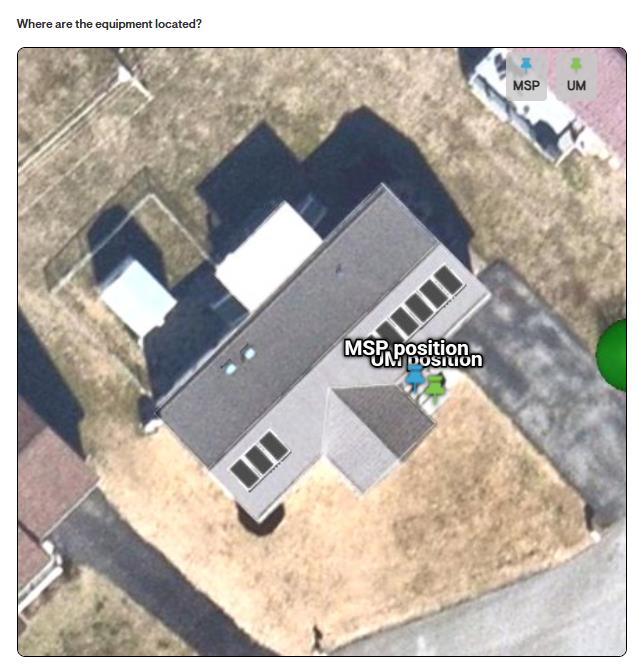
- Locate the main service panel and utility meter
Use the available map imagery to mark the locations of the main service panel (MSP) and utility meter (UM). You can do this by clicking directly on the image.
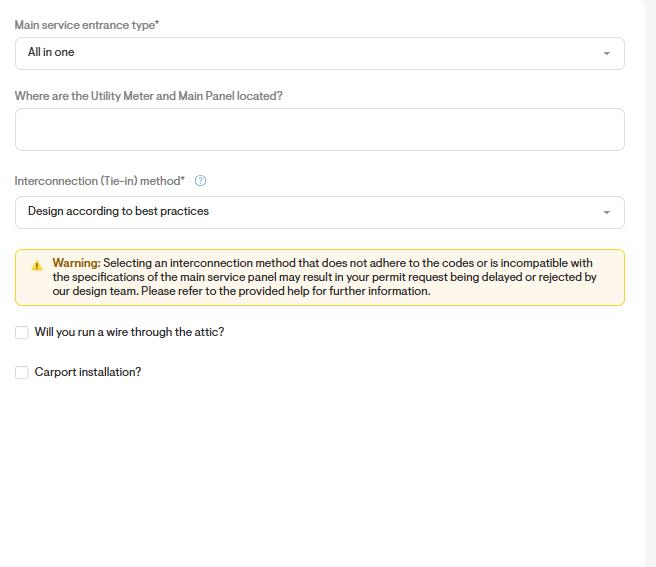
- Select the main service entrance type
Choose the appropriate option from the list: All in one, Detached, or Adjacent near. - Describe the location of the utility meter and main panel
Use objects visible in the layout above to describe their relative positions. - Specify the battery system location
Select the location of the battery system from the drop-down menu from the list: Inside Garage Wall, Outside Garage Wall, Near MSP/Utility meter. - Choose the interconnection (tie-in) method
Select the appropriate option, or request that the permit set team design the method based on best practices. - Additional installation details
If you plan to run wiring through the attic or complete a carport installation, make sure to select the applicable option. - Interconnection (Tie-in) Method.
You can choose from the following interconnection methods: PV breaker, main breaker downsize with PV breaker, supply (line) side connection, load side connection, sub-panel tie-in, design according to best practices, or carport installation. - Make sure to select the applicable option by using the checkboxes at the bottom of the page if you are planning to run a wire through the attic or complete a Carport Installation.
Step 2: Complete Confirm Materials
This page will auto-populate with all materials added to the existing proposal. Panels cannot be added manually to the permit set application. They must first be added to the Drawing page before proceeding with the permit set application.
- Under panel details, select the roof type for the surface where each panel model is located using the drop-down located under roof type.
- Add, delete or edit the quantity of inverters.
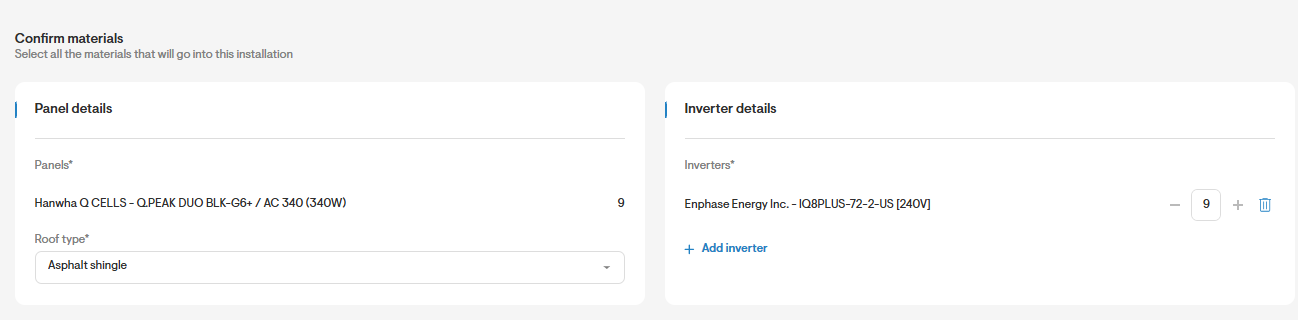
- You can review or delete attachment and rack details. To delete an item, simply click the bin icon located to the right of each entry.

- Next, enter the Rafter/Truss details on this page. Enter the type, size, on-center spacing, and the maximum rafter span.
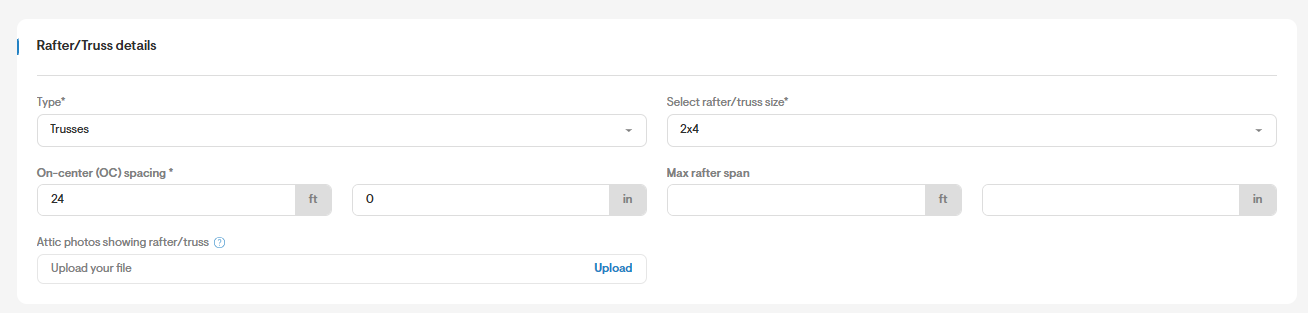
- You may also upload images of the attic to support the specified rafter/truss details.
- If you are installing a new battery, you will be required to provide information on the battery system.
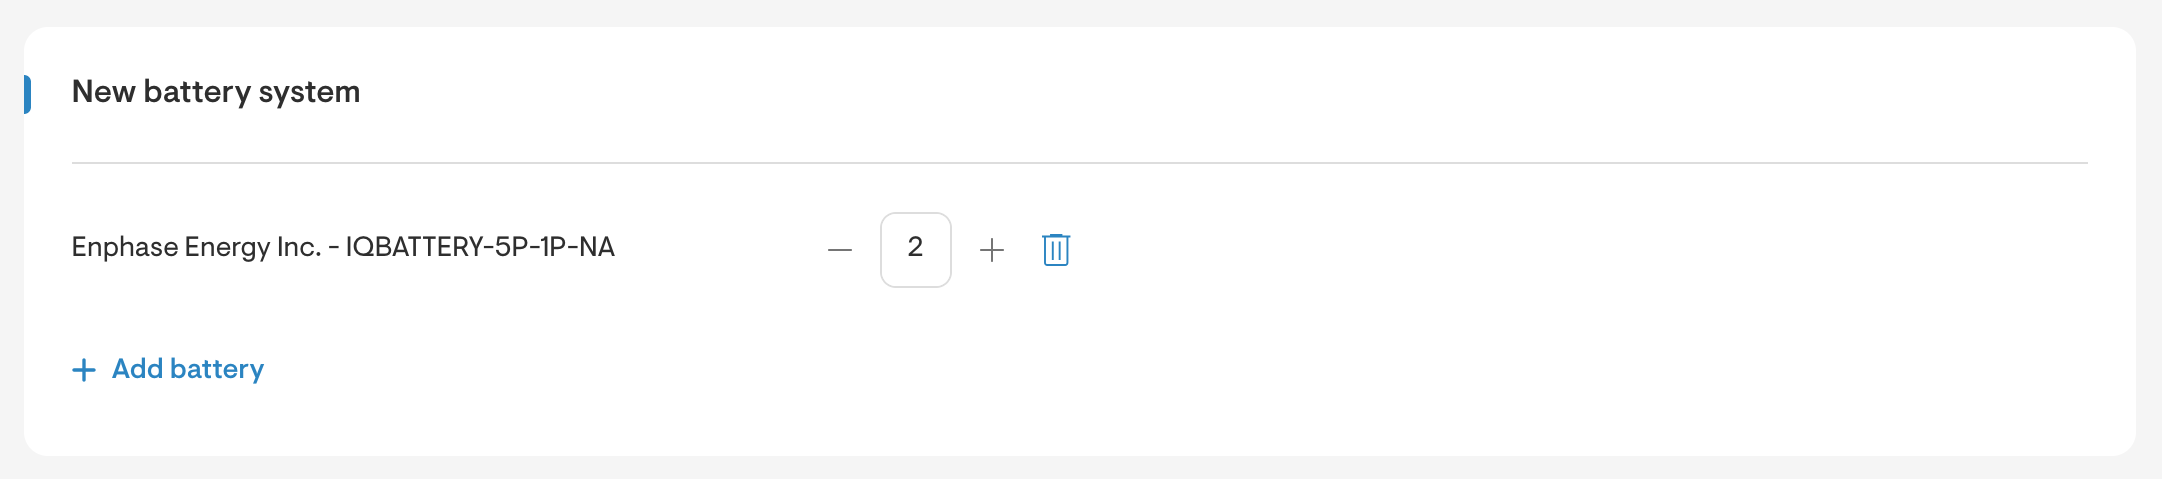
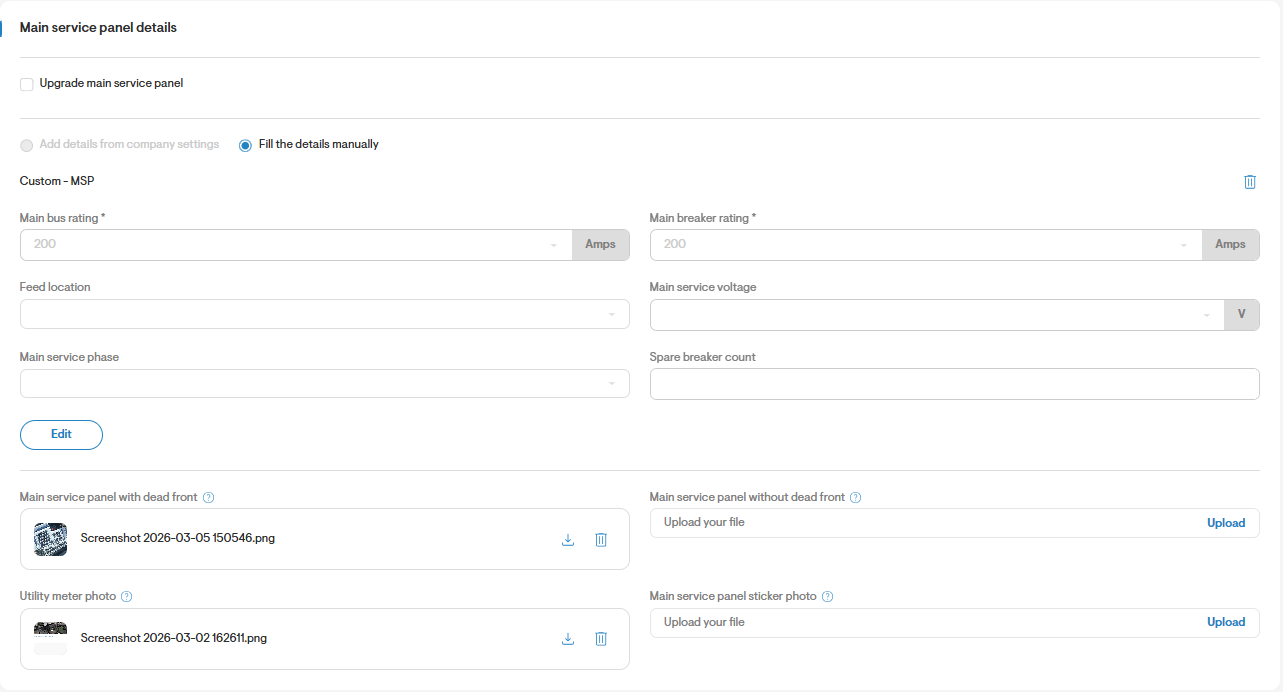
- When adding in the Main Service Panel details, start by specifying whether or not you will upgrade the Main Service Panel.
- Then, enter the Bus Rating, Main Breaker Rating, Feed Location, Main Service Voltage, Main Service Phase, and Spare Breaker count.
- You will be required to upload images of the Main Service Panel with Dead Front, Main Service Panel without Dead Front, and of the Utility Meter. You may optionally upload an image of the Main Service Panel Sticker Photo.
- Determine the sub panel details by clicking Add sub panel.

- You can choose to fill out the subpanel details manually or import them from the company's settings.
- If entering the details manually, please complete the following fields: bus rating, breaker rating, feed location, service voltage, service phase, and spare breaker count.
Bus rating and breaker rating are mandatory fields.
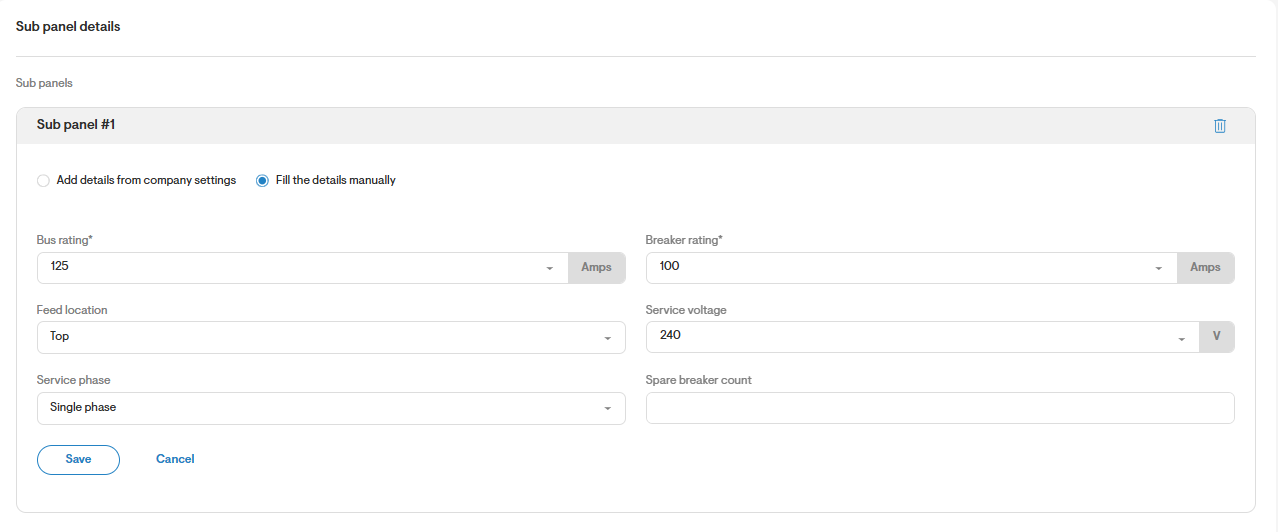
- Save your changes once you're done.
- Complete Additional information by using the checkmark to determine whether you're installing a PV performance meter.

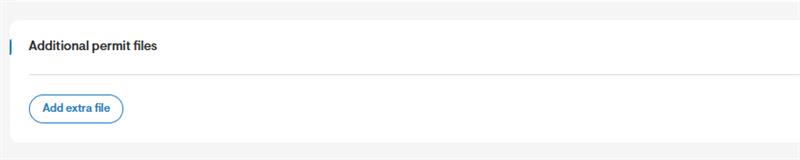
- You also will also have the option to upload Additional Permit Files necessary to complete the permit set.
- Go to Next step.
Step 3: Complete Order Details
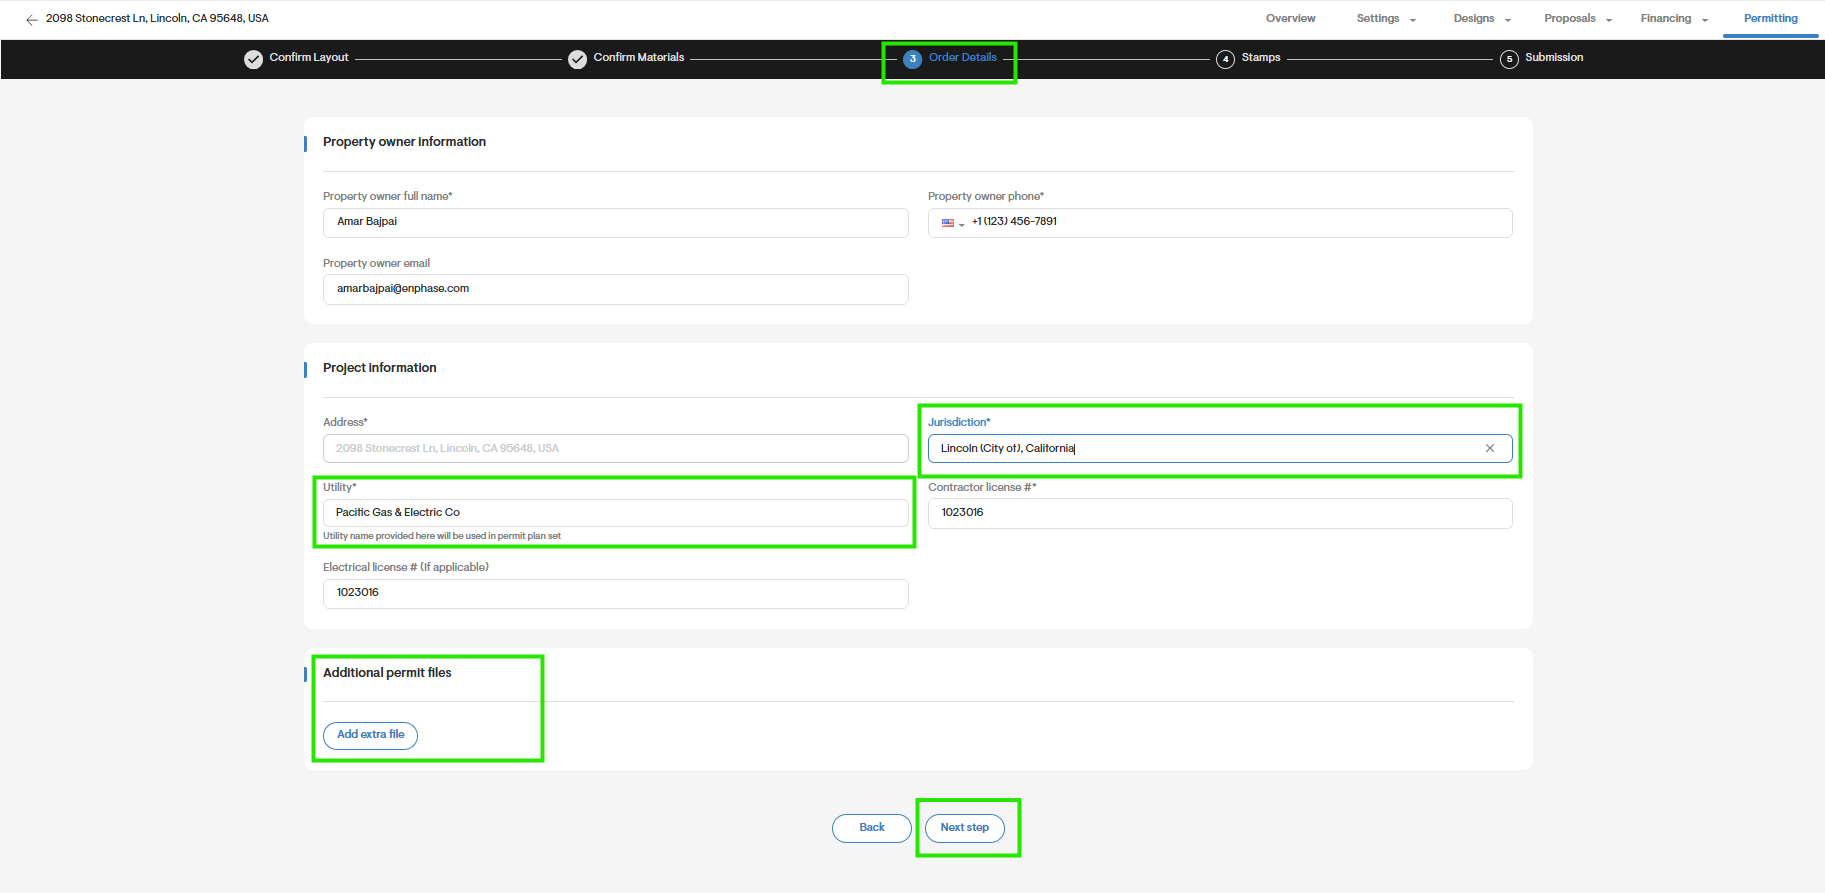
- Enter the property owner's information on this page including full name, phone number and email.
- You must enter the correct project address as it will be added to the permit set.
- Select the correct Utility from the utility drop-down if not already selected.
- Enter the Jurisdiction under which the permit set will be evaluated.
- Enter a valid contractor's license and, if applicable, an electrical contractor's license number.
Step 4: Complete Stamps
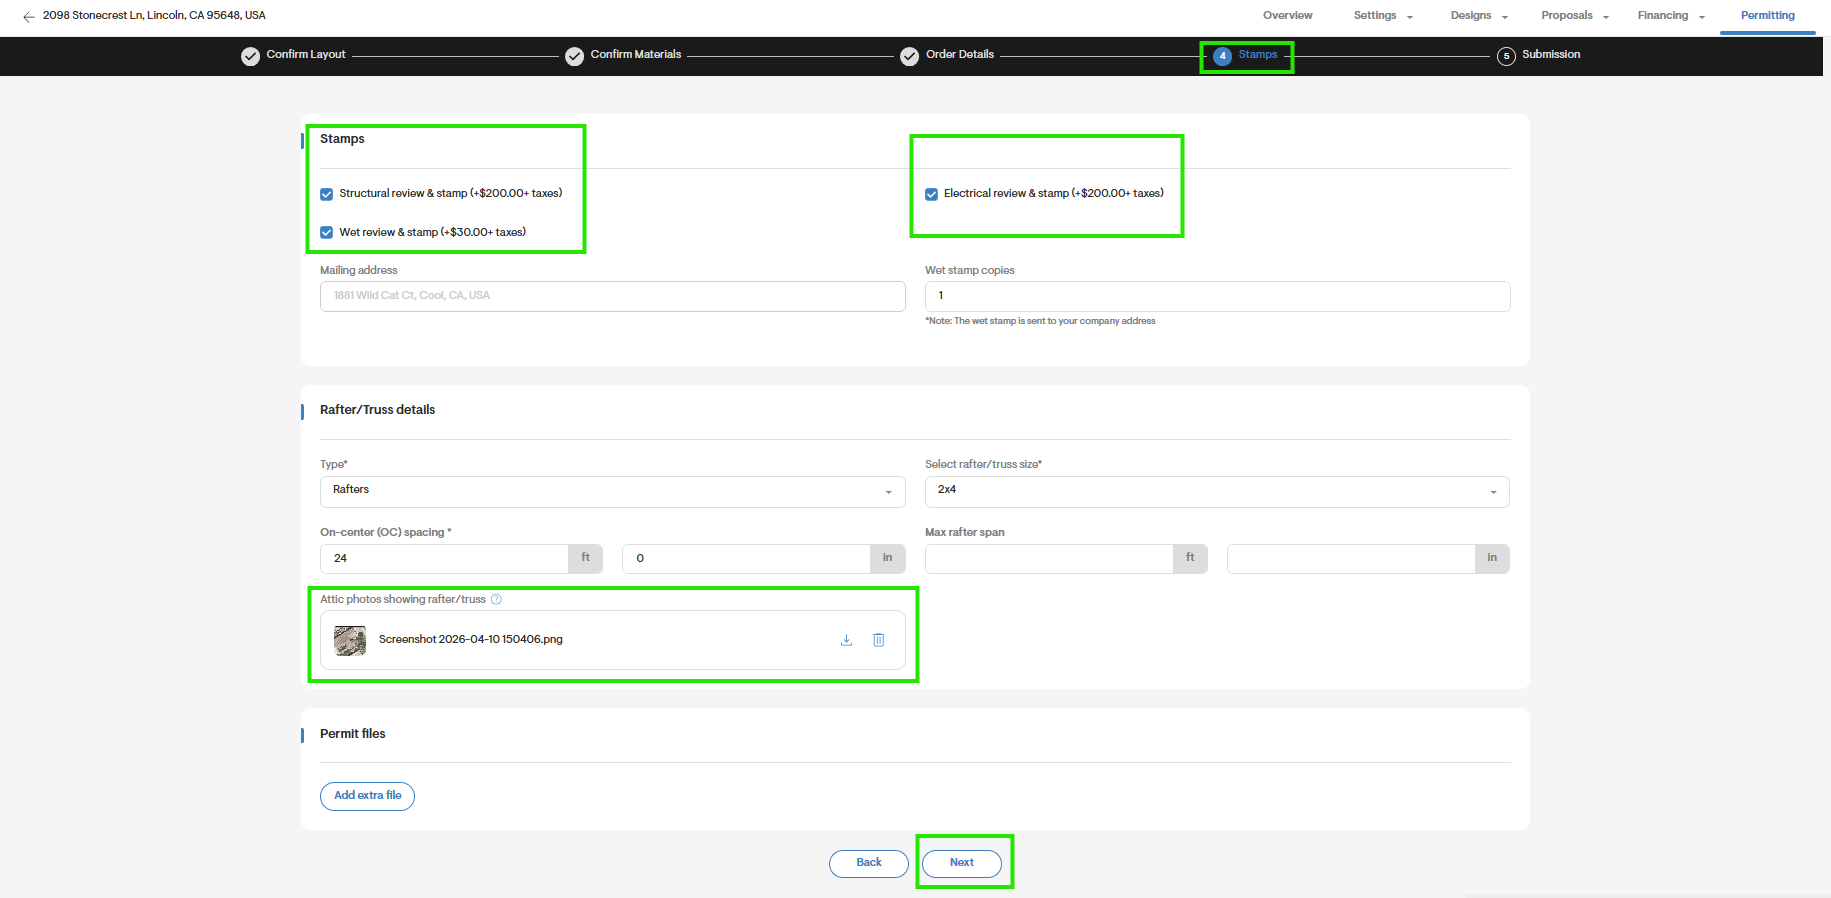
- Use this section to order Structural/Electrical engineering review & stamps for the permit set.

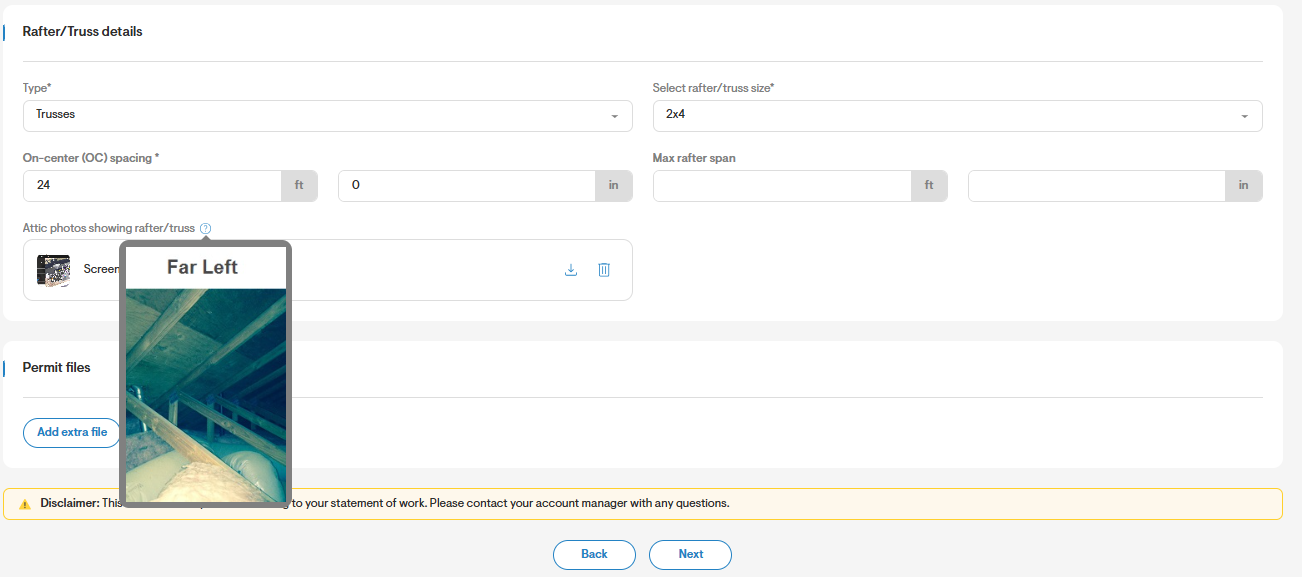
- If you've chosen to order a Structural Review & Stamp, make sure to enter the additional required information. For structural engineering stamp orders, you are required to specify the rafter/truss details, as well as upload an image of the attic photos showing the rafter truss.
- You may click the question mark next to attic photos to view an example of the image to be uploaded.
- For orders of a Wet Review & Stamp, your company address will be used to mail the wet stamped permit set to you.
- Your company address can only be updated from the Settings page.
- You can select the number of copies of wet stamped permit sets you would like to receive through mail.

- If needed, you may upload additional permit files related to your order.

Step 5: Complete Submissions
- Before submitting the permit set application, you may choose to include additional comments in the comments section.
- Click the permit set example hyperlink to view an example of a completed permit set.
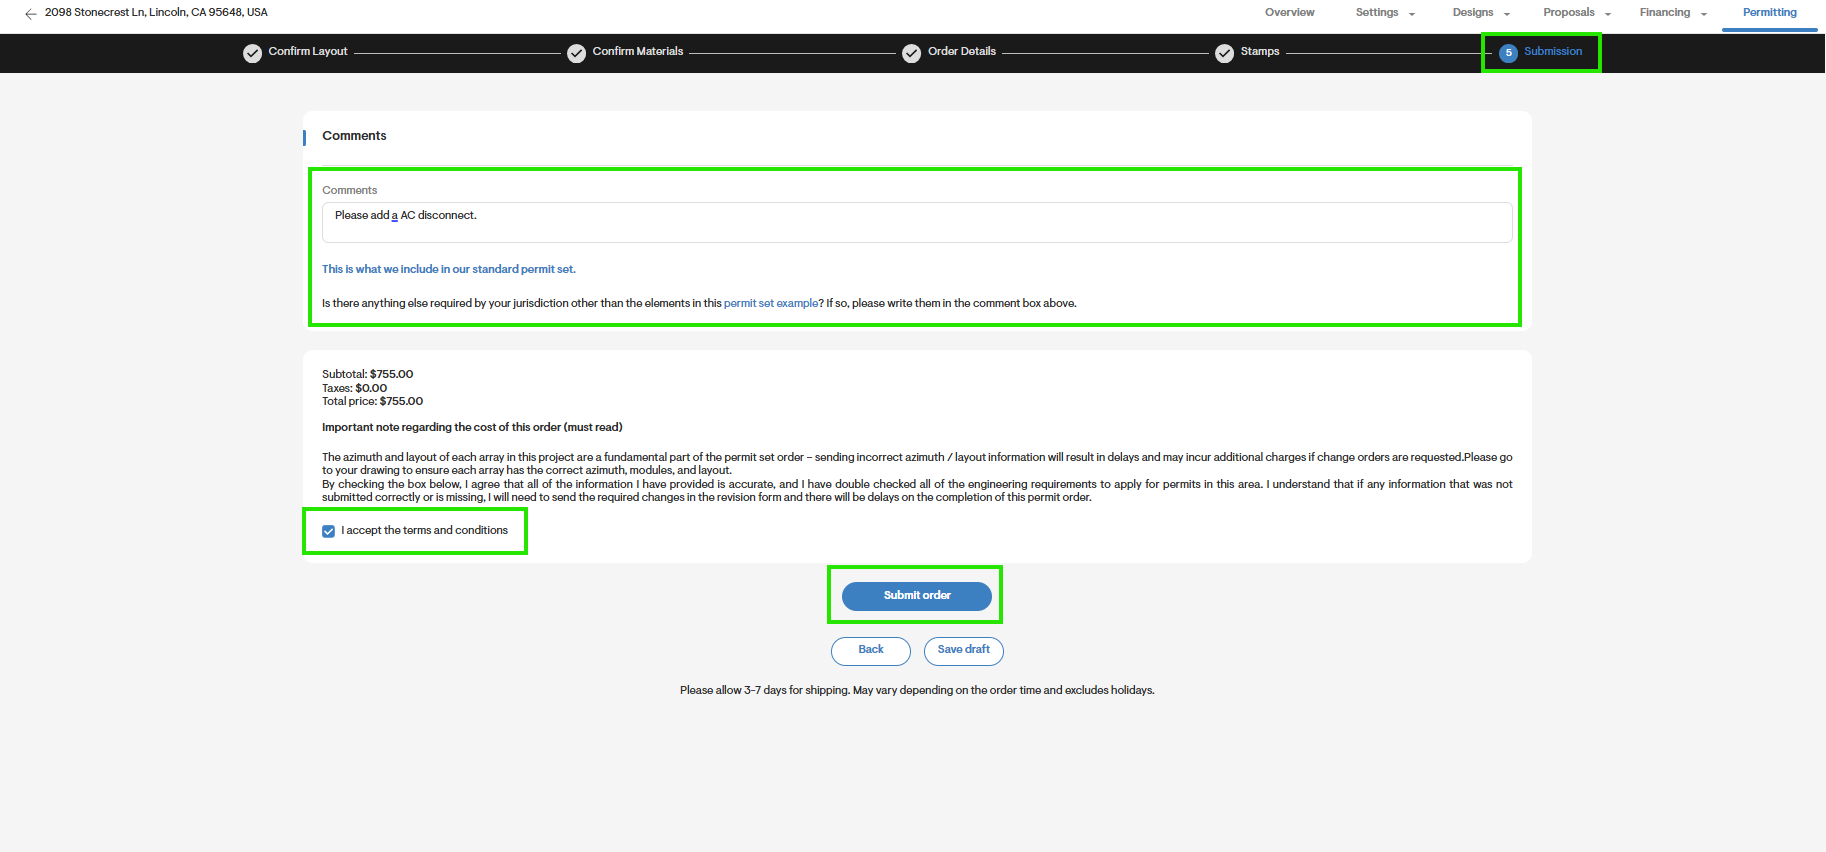
- Finally, once you've read and accepted the terms and conditions, you will have the option to Submit the application.
- Prior to doing so, you will have the option to go Back to a previous page to ensure you have completed the correct information.
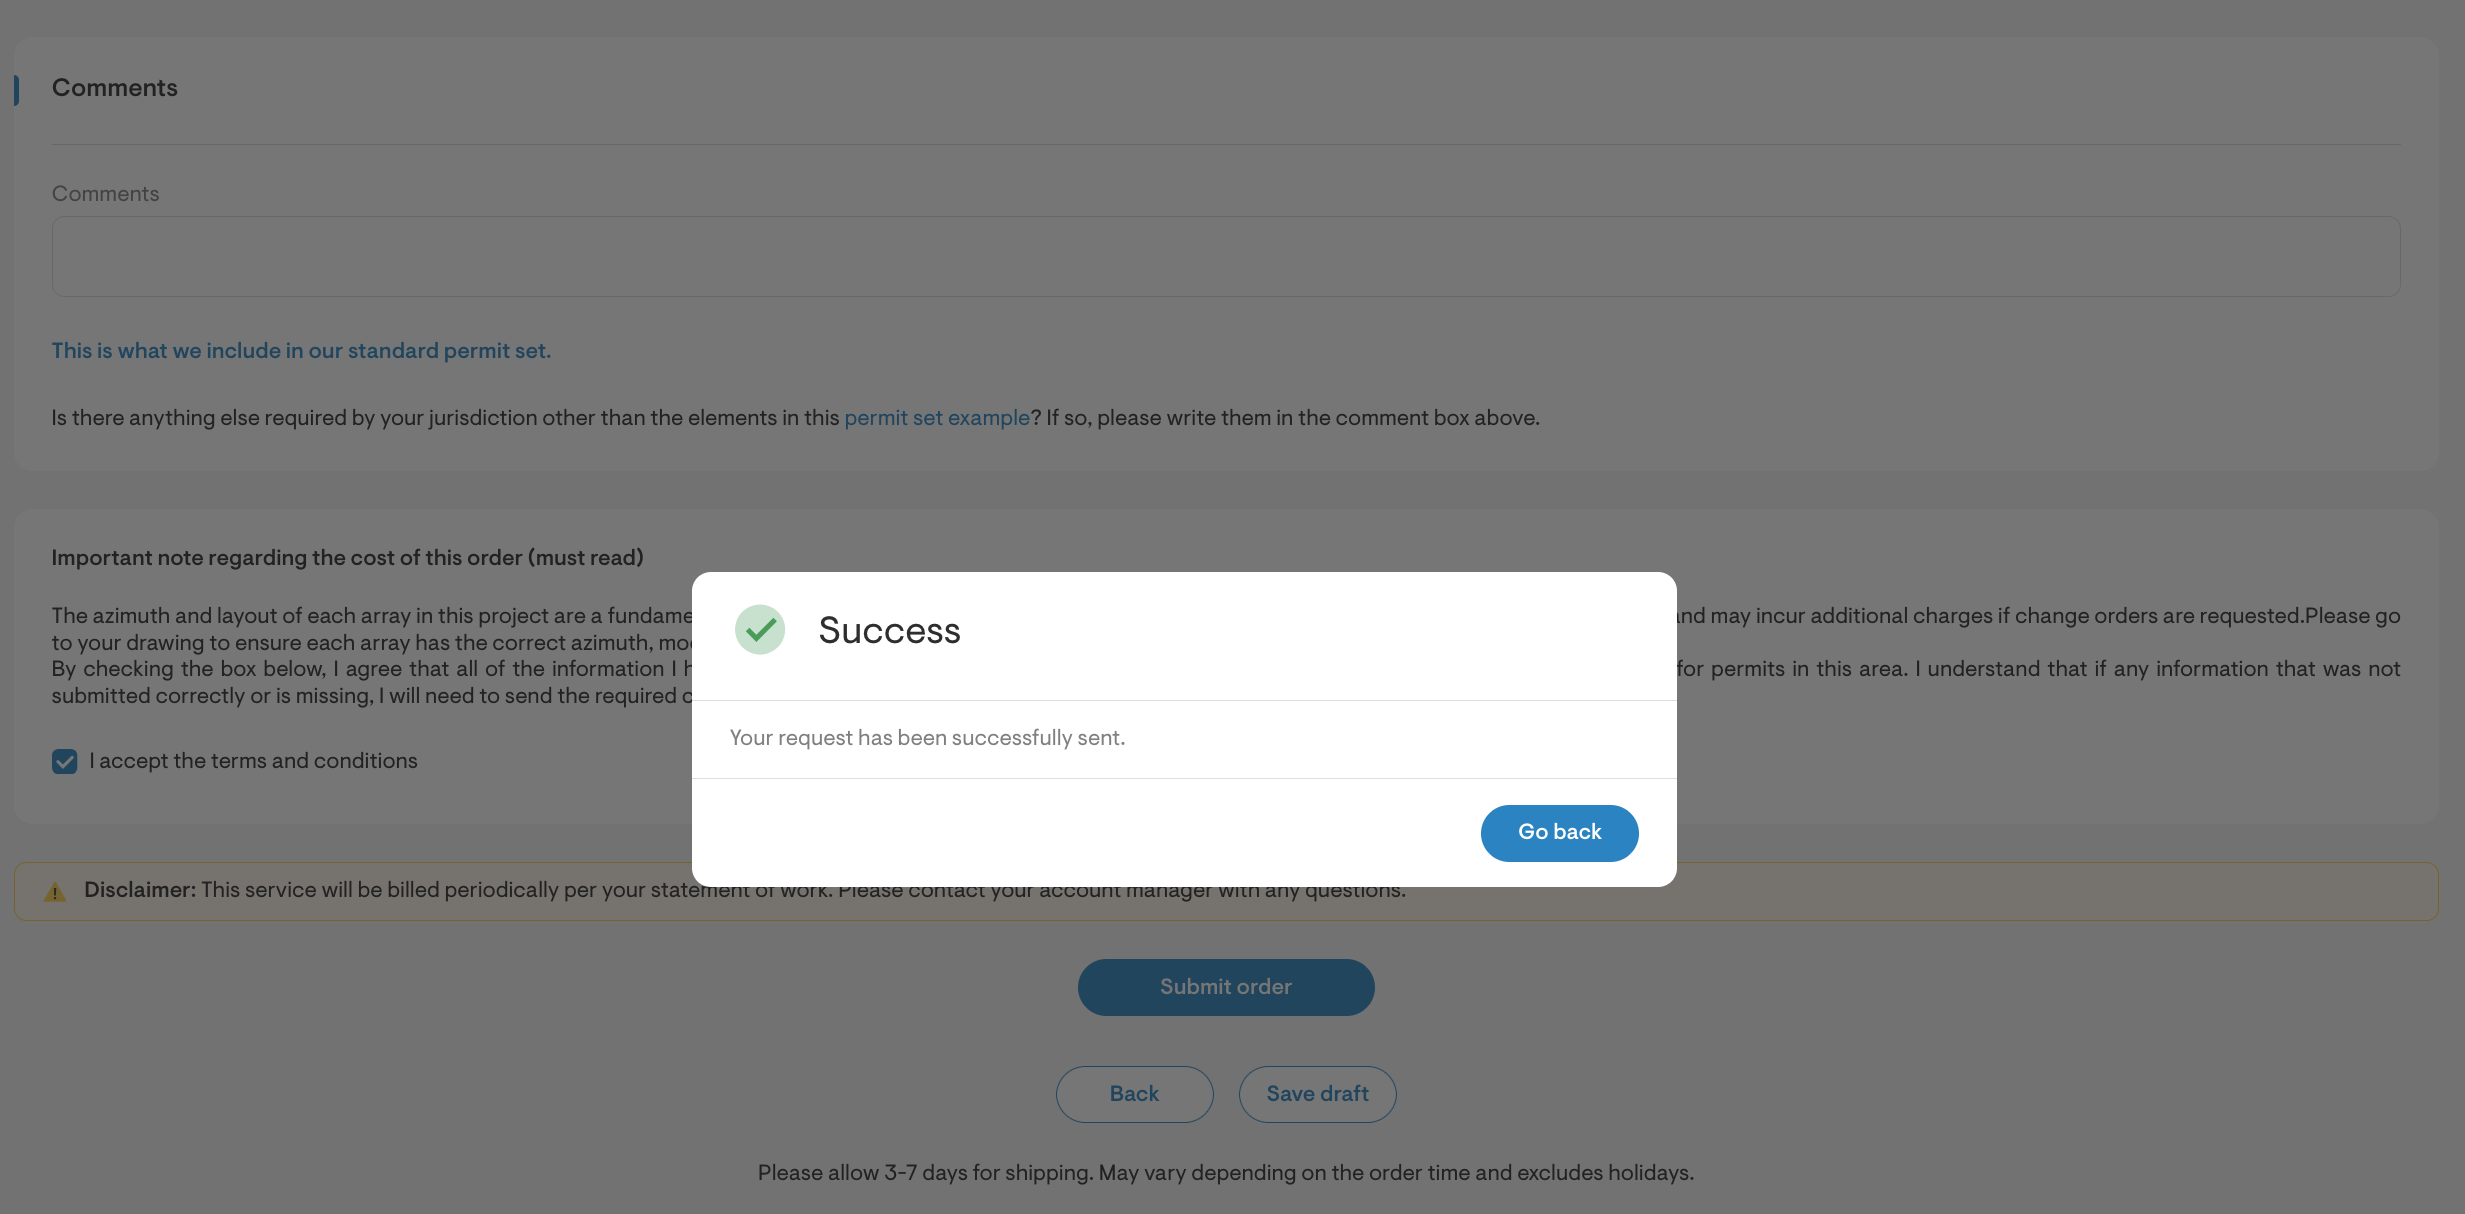
- You can also use the Save Draft option to return to this permit set application at a later time. The draft version can be accessed from the same place on the Overview page, by clicking Get Permit Set.