Help Center Permit
Automated Self-Service Permit Plan-Set FAQ's
Published on 9 Sept 2024
Read the guide below to learn about common questions related to the Permit Automation feature.
What systems are supported?
- Residential rooftop installations: PV only, PV + storage, and system expansions
- String inverters, including Tesla Powerwall 3
- Micro inverters with a 1:1 panel to micro inverter ratio
- Optimizers with a 1:1 ratio
- Enphase IQ Batteries and IQ System Controllers
- Tesla Powerwall 2 and Powerwall 3
- Single-phase systems
- Multiple interconnection types
What systems are not supported?
- Ground mount systems
- Commercial systems
- Carport installations
- Three-phase inverters
- Multi-module per micro inverter or optimizer configurations
Note: Some unsupported system types may be available through Solargraf Managed Services. Reach out to us to learn more.
Why is the 'Permit' tab missing from the design tool?
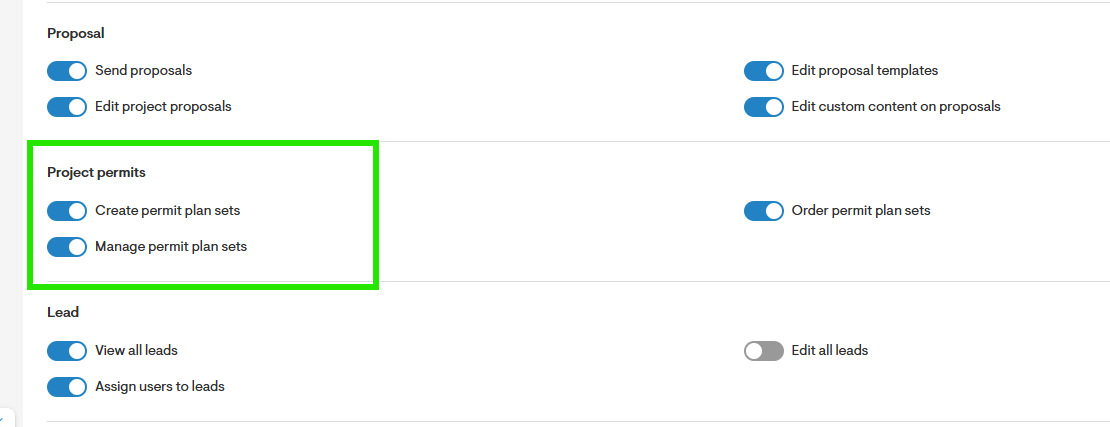
Please ensure you have the necessary access to generate permit plan sets. In the company settings, under roles and permissions, enable the "Create permit plan sets" permissions.
How can I ensure that the materials I use in my Solargraf design are suitable for permit plan set generation?
For the best results in design and permit plan generation, we recommend using materials from the Solargraf global list included in your company's catalog. These materials come with all the essential electrical and physical specifications.
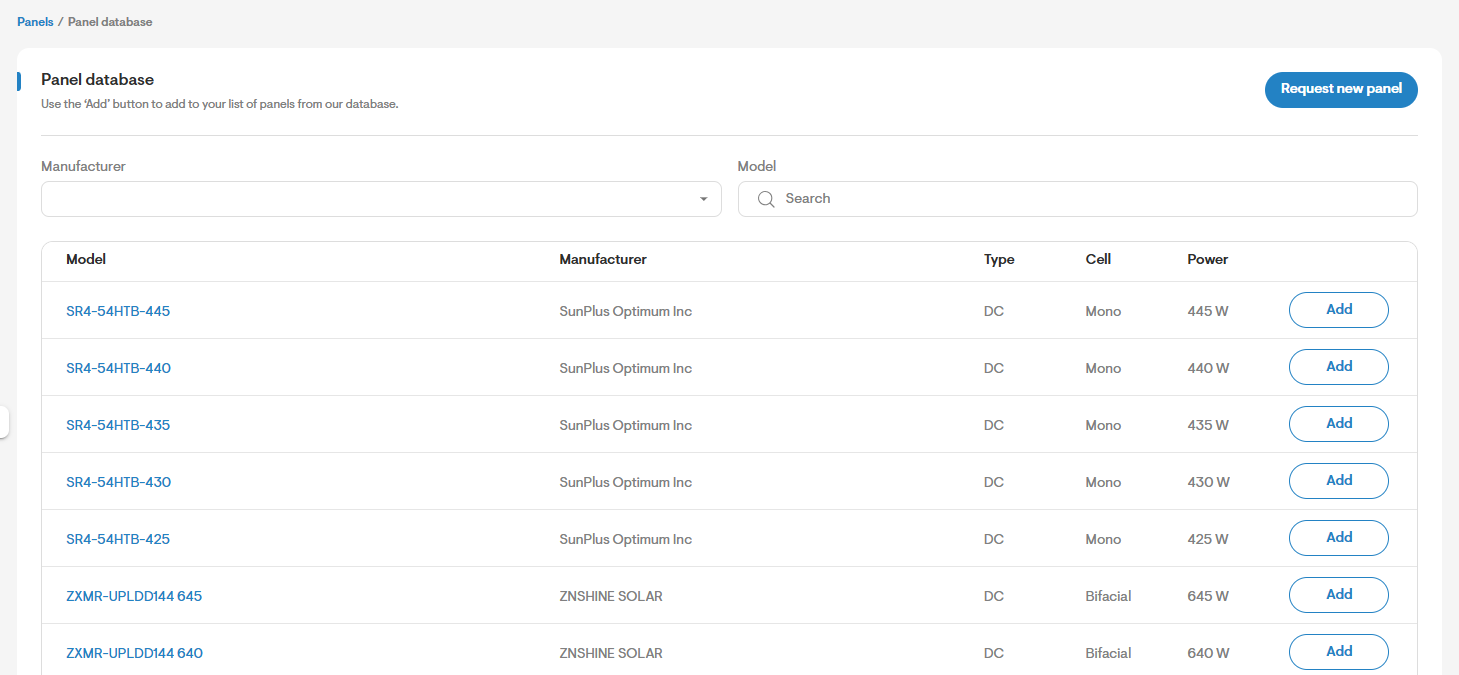
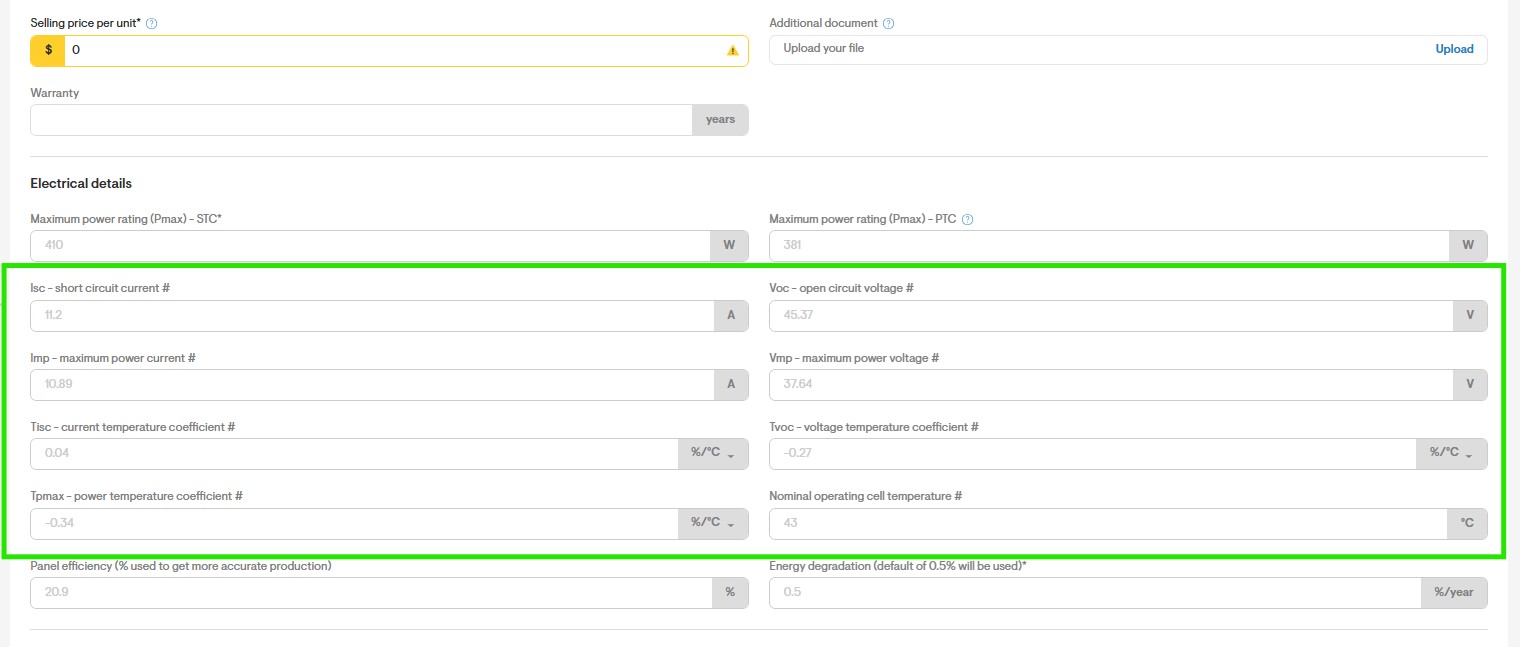
If you prefer to use custom materials (such as panels, inverters, batteries, or optimizers), please ensure that you enter the additional parameters marked with "#" before incorporating them into your design. This will help streamline the permit plan creation process.
How can I set Solargraf to automatically suggest jurisdictions based on my project address?
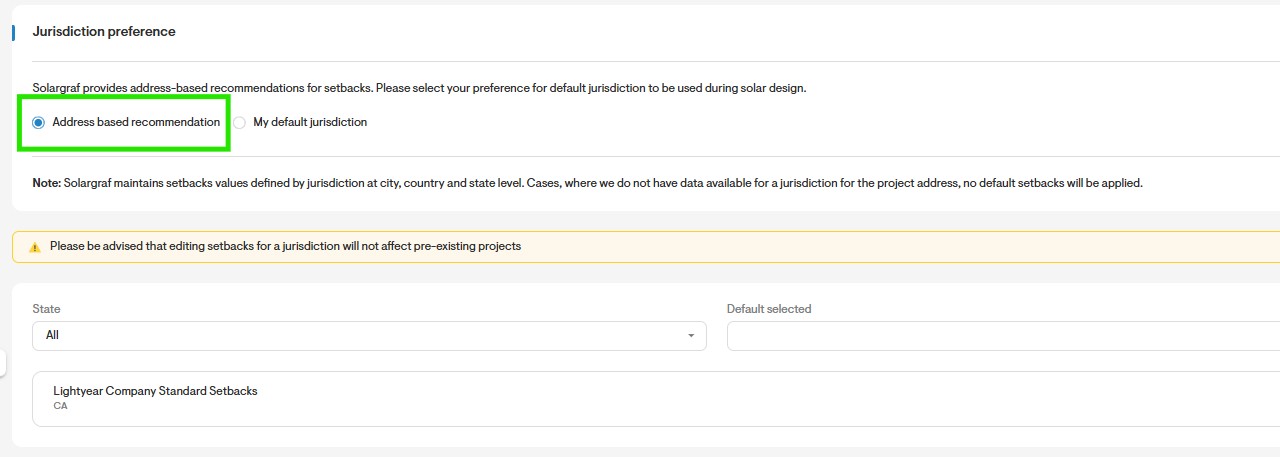
To receive automatic suggestions for relevant jurisdictions based on your project’s location, switch to "Address-based recommendation" under "Jurisdiction preference" in your company settings. Solargraf will then recommend fire setbacks and governing codes within the solar design tool. You can select an alternative jurisdiction if it better suits your project.
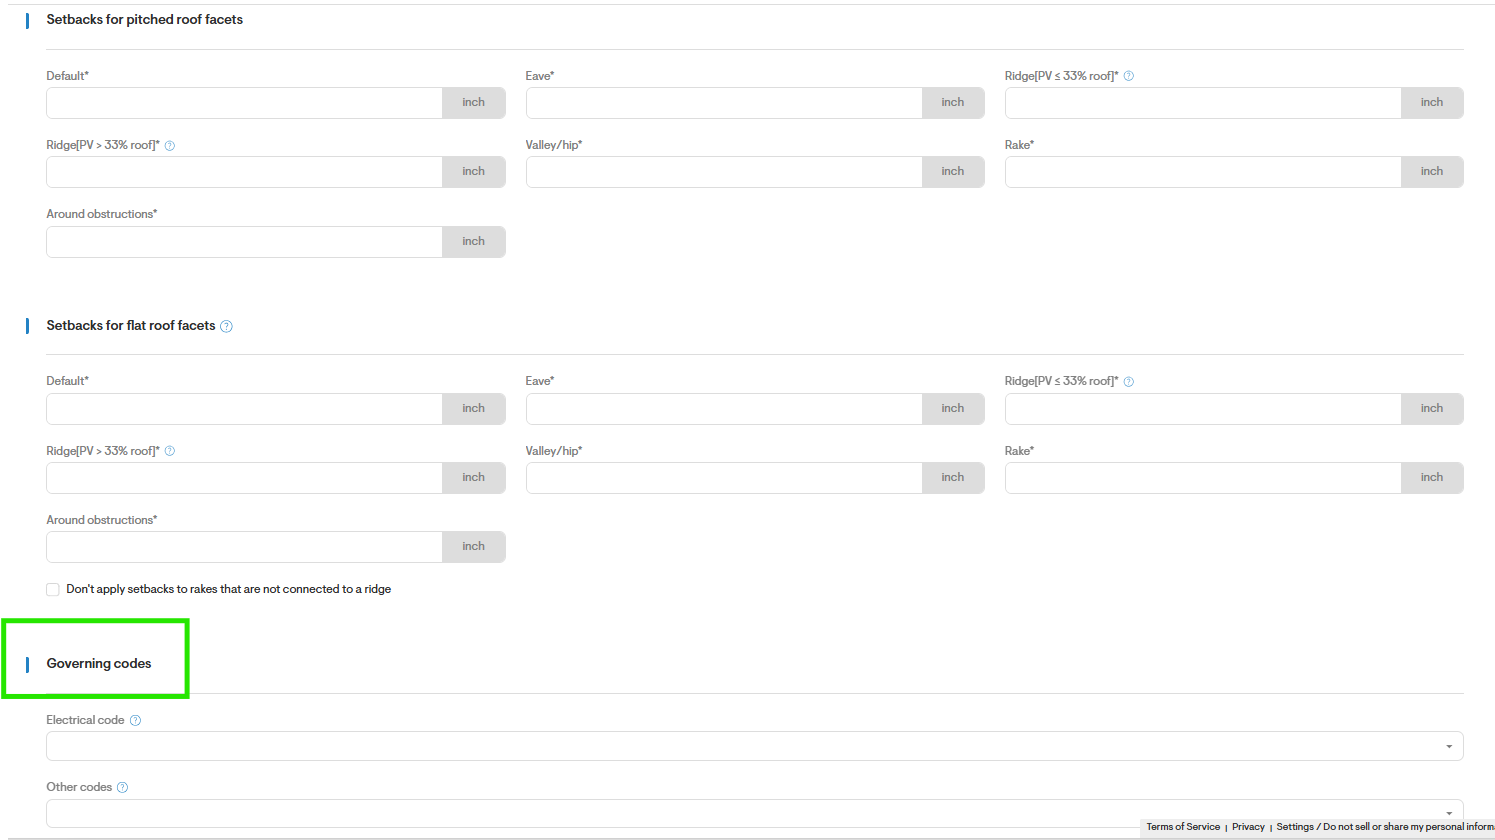
If you choose to use custom jurisdictions that you’ve created, please manually enter the governing codes to ensure a smooth permit plan set generation process.
How do I edit the plan set once downloaded? (include PDF and .DWG)
Once you've downloaded the plan set, you’ll receive both PDF and DWG file formats. You can edit the PDF with any supported PDF editor, while the DWG file requires AutoCAD for modifications. After your purchase, you can also make further design changes and generate updated permit plan sets through Solargraf, completely free of charge.
How can i see list of projects where I've purchased a plan set that I created ?
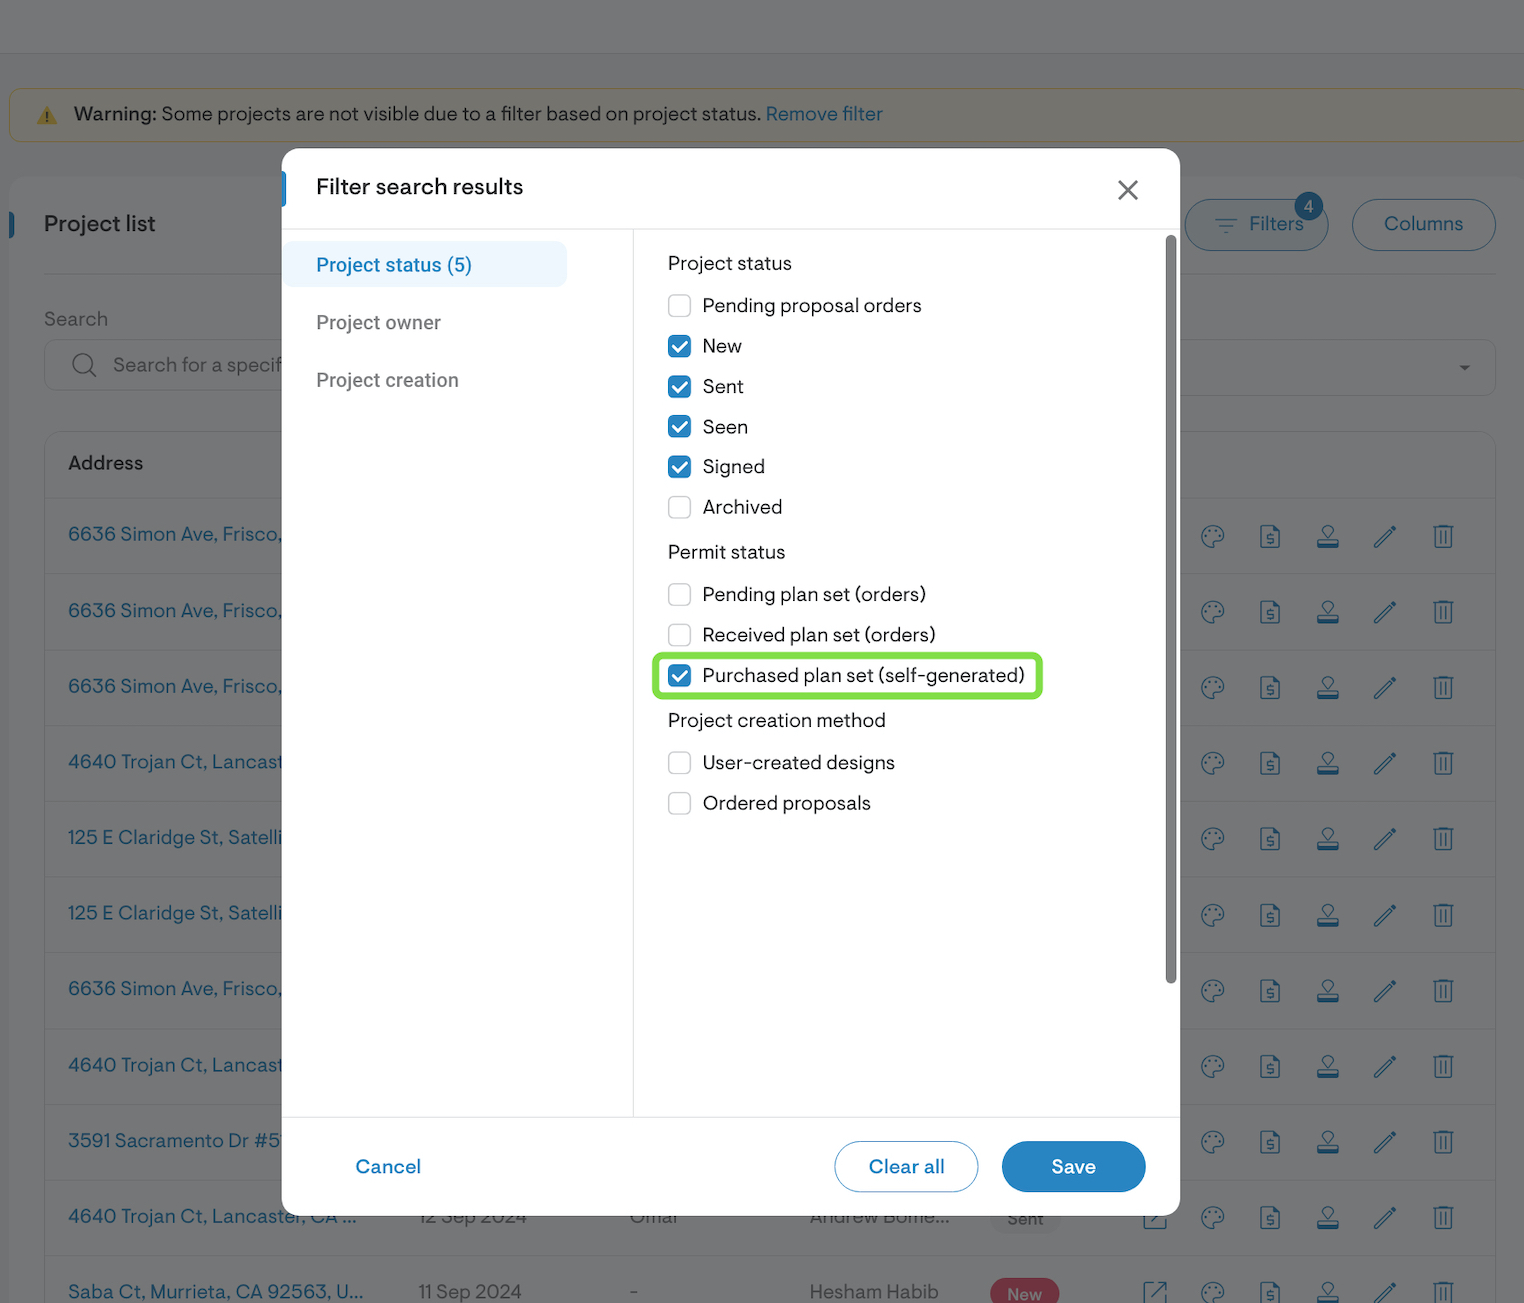
On the project listing page, you can apply a filter to display only projects with 'self-generated' purchased plan sets.
How can I adjust conductor properties such as length, type, and other specifications?
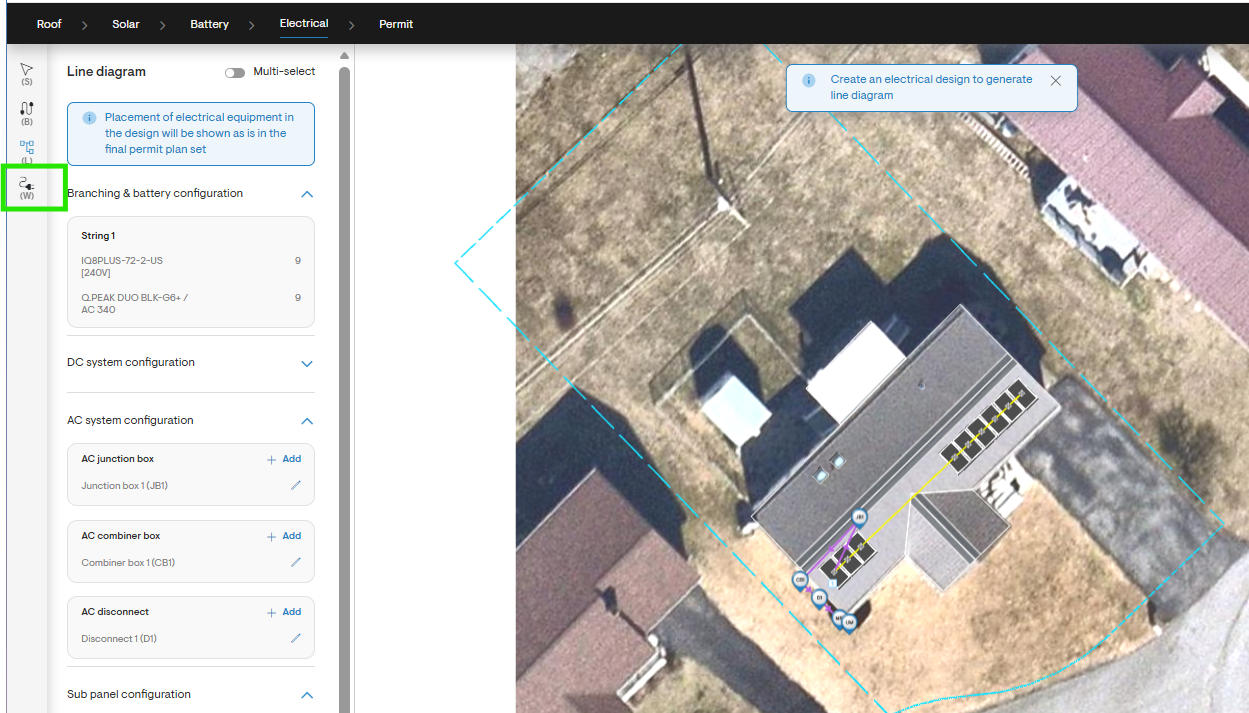
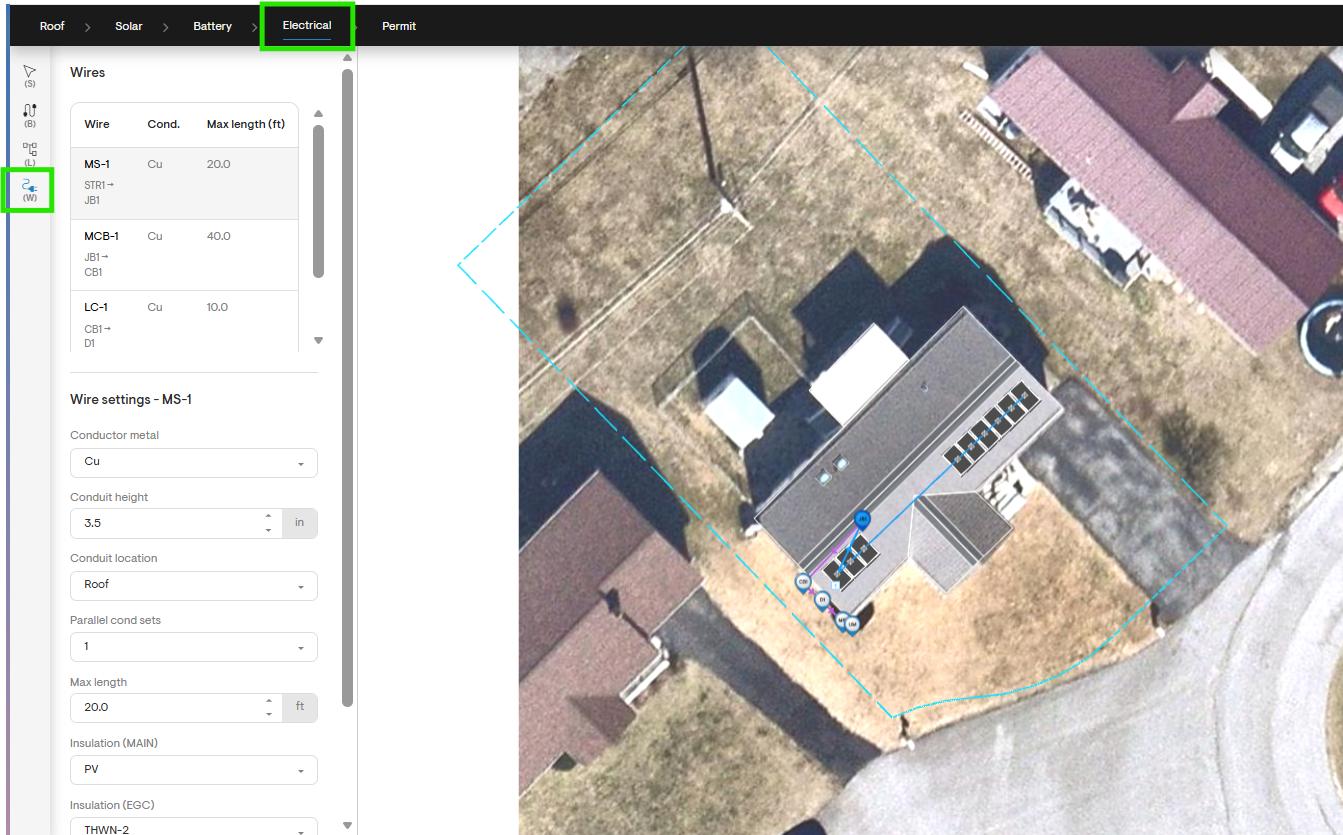
In Step 4 - Electrical, click the Wire Configuration icon (W), select the desired wire, and adjust its properties as needed.
How can I set up Grid-tied battery mode?
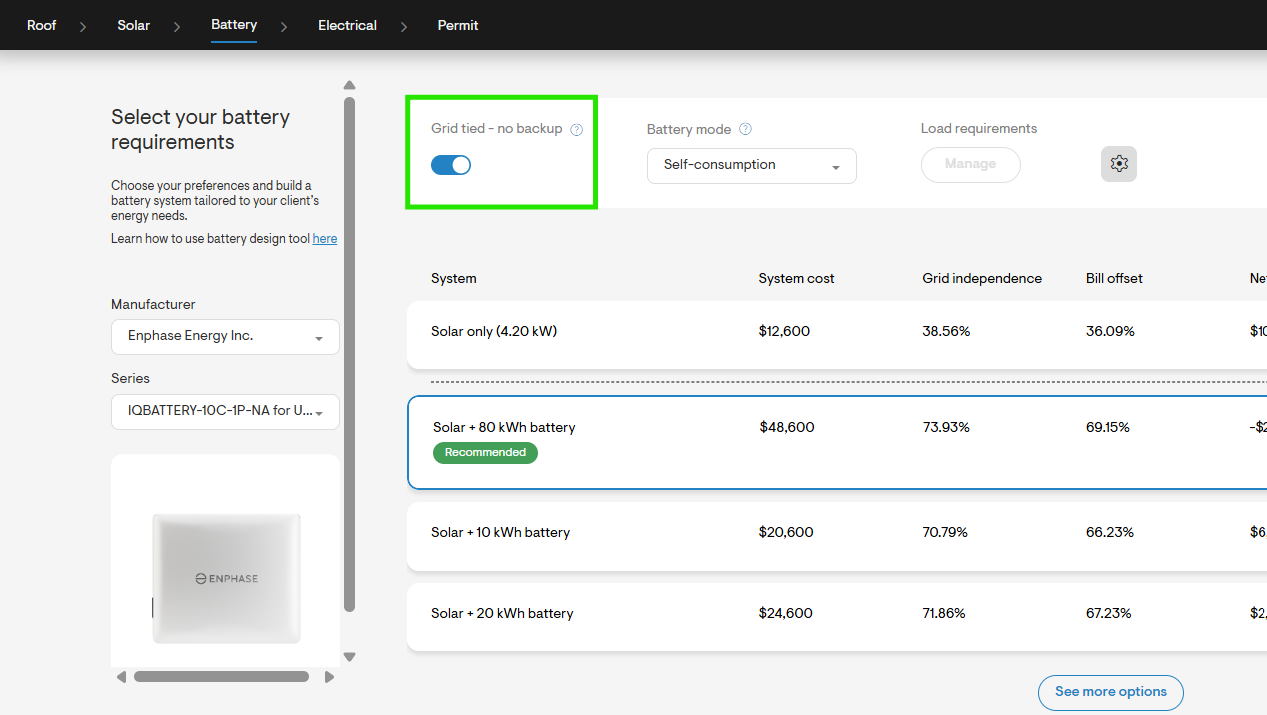
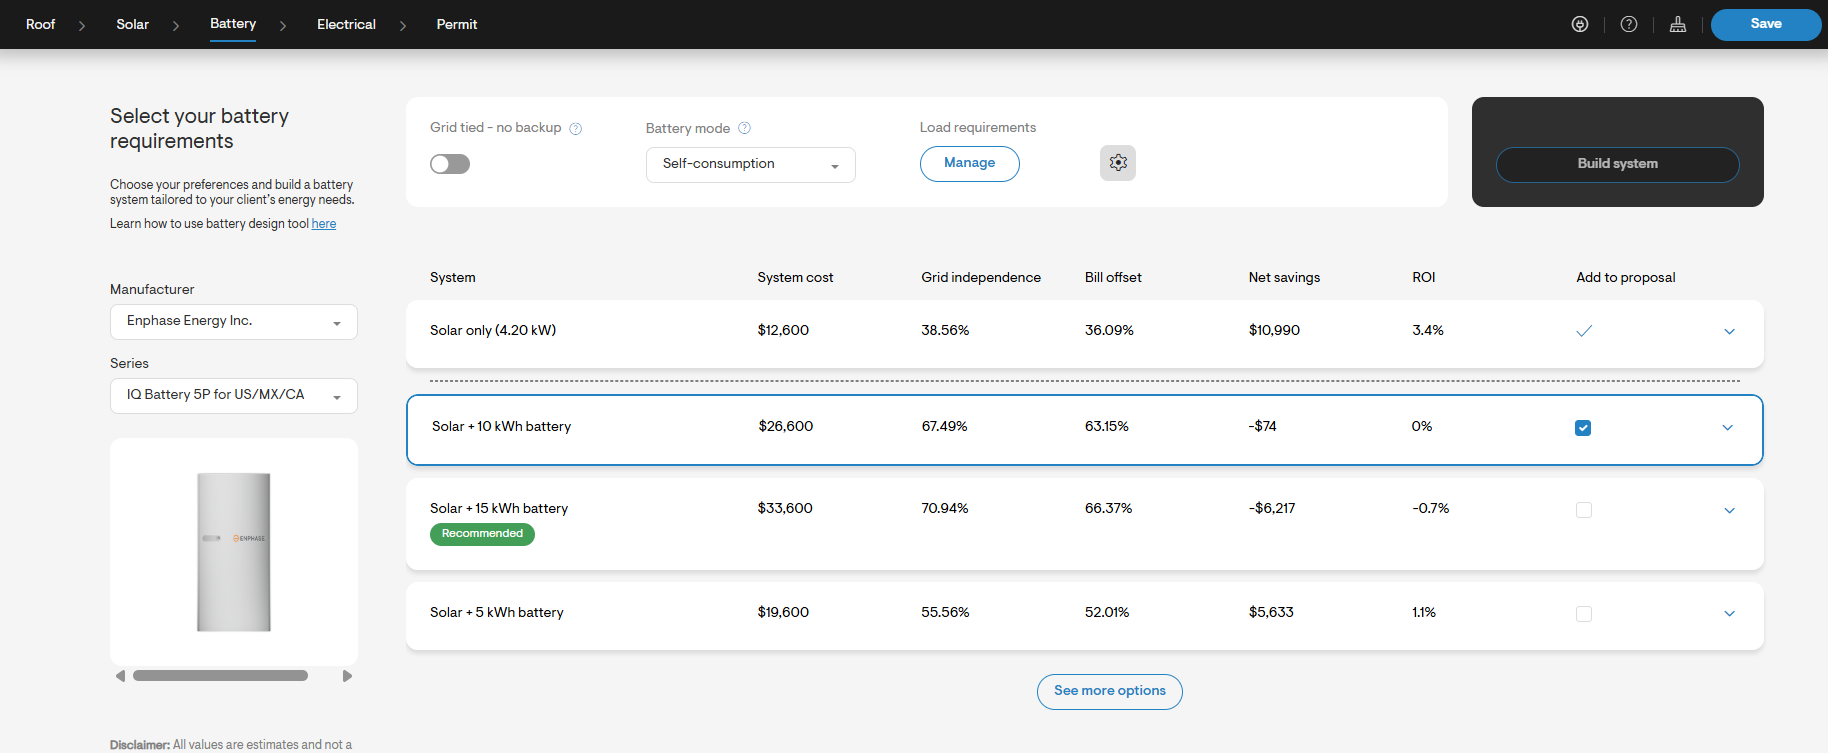
- In Step 3 - Battery Design, ensure that batteries are added and the Grid Tied - no backup toggle is ON.
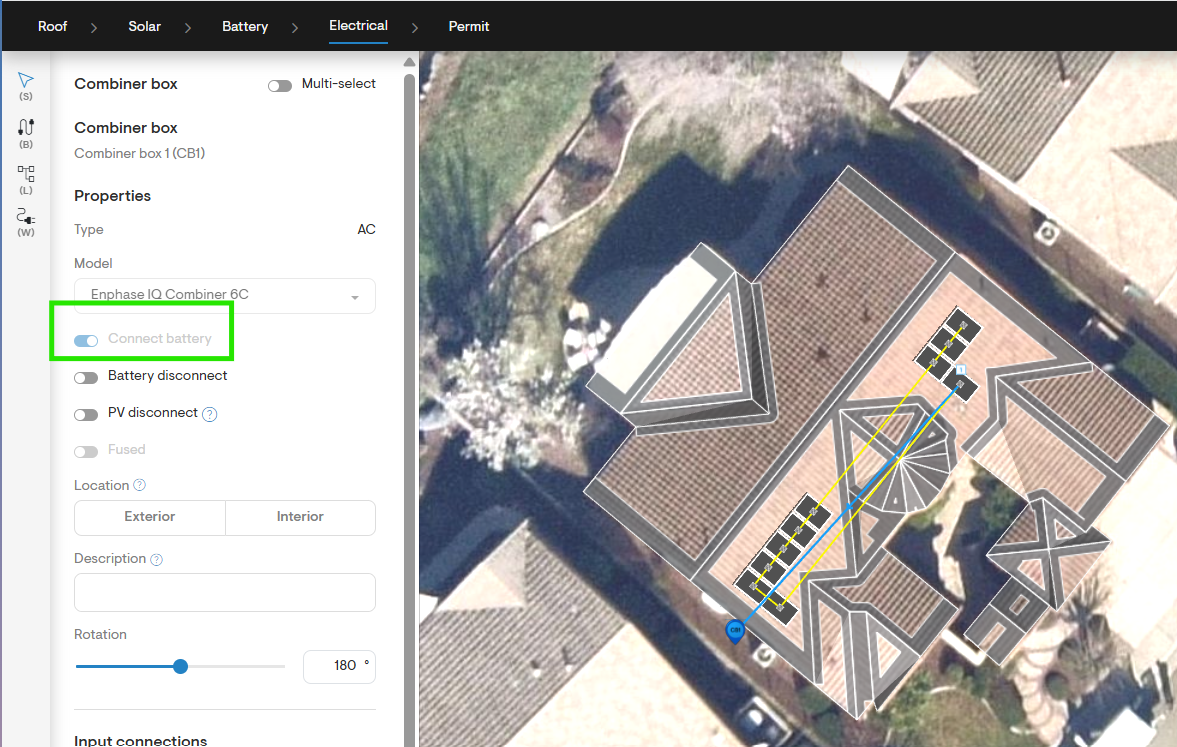
- Next, in Step 4 - Electrical Design, add a "Combiner" box to the line diagram.
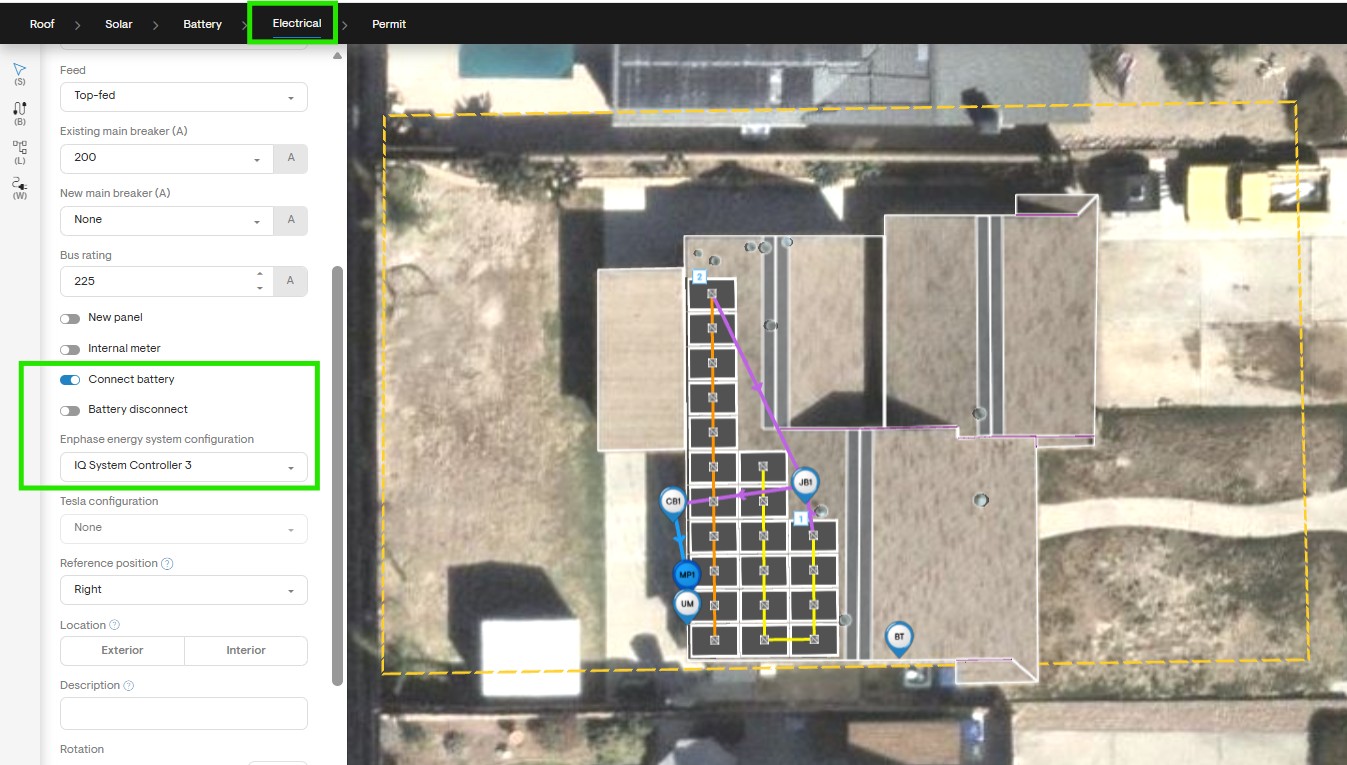
- Verify that the Connect Battery toggle is activated as seen below.
How can I set up Partial Home Backup?
- In Step 3 - Battery Design, ensure that batteries are added.
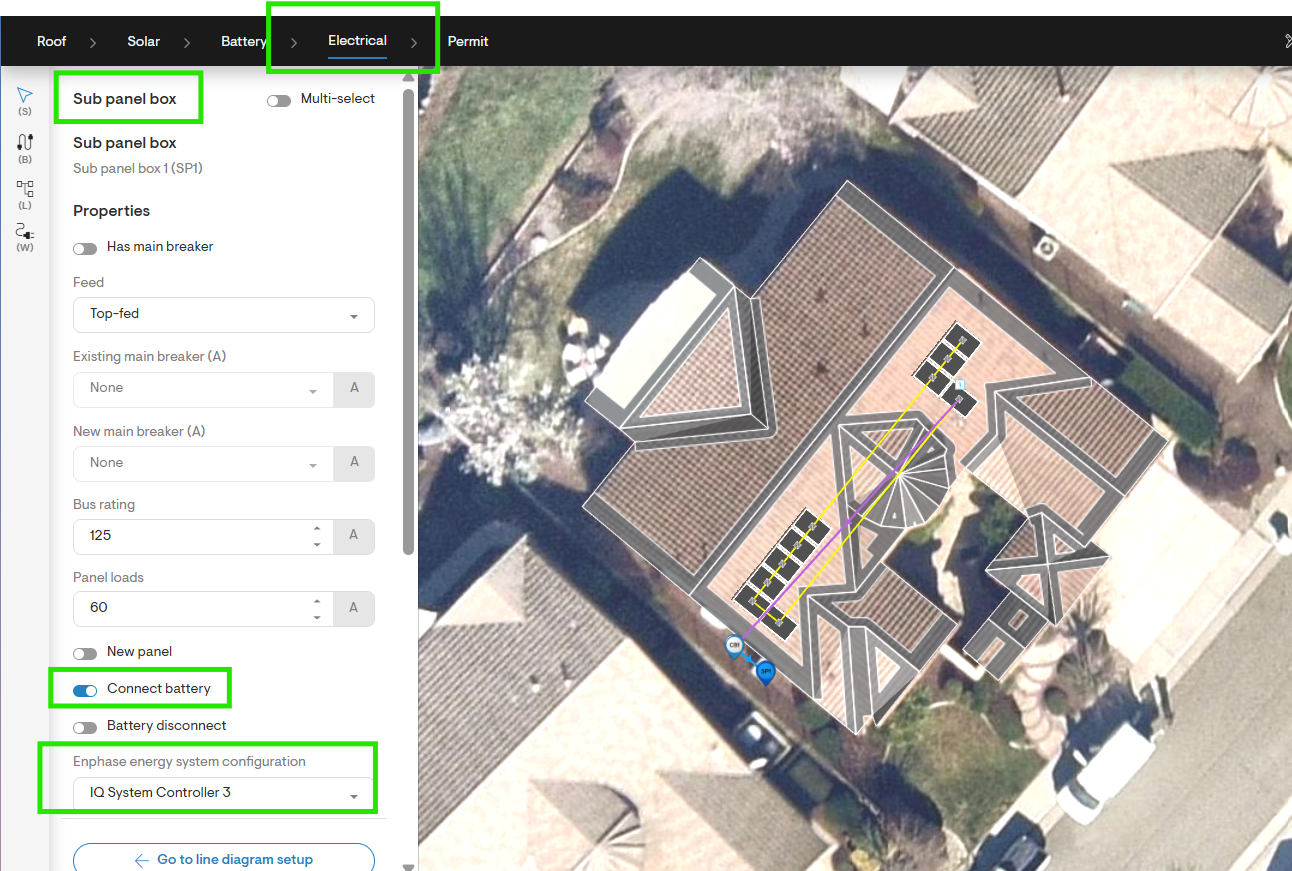
Then, in Step 4 - Electrical Design, add a Sub Panel box to the line diagram. Make sure the Connect Battery toggle is activated and select the appropriate IQ system controller.
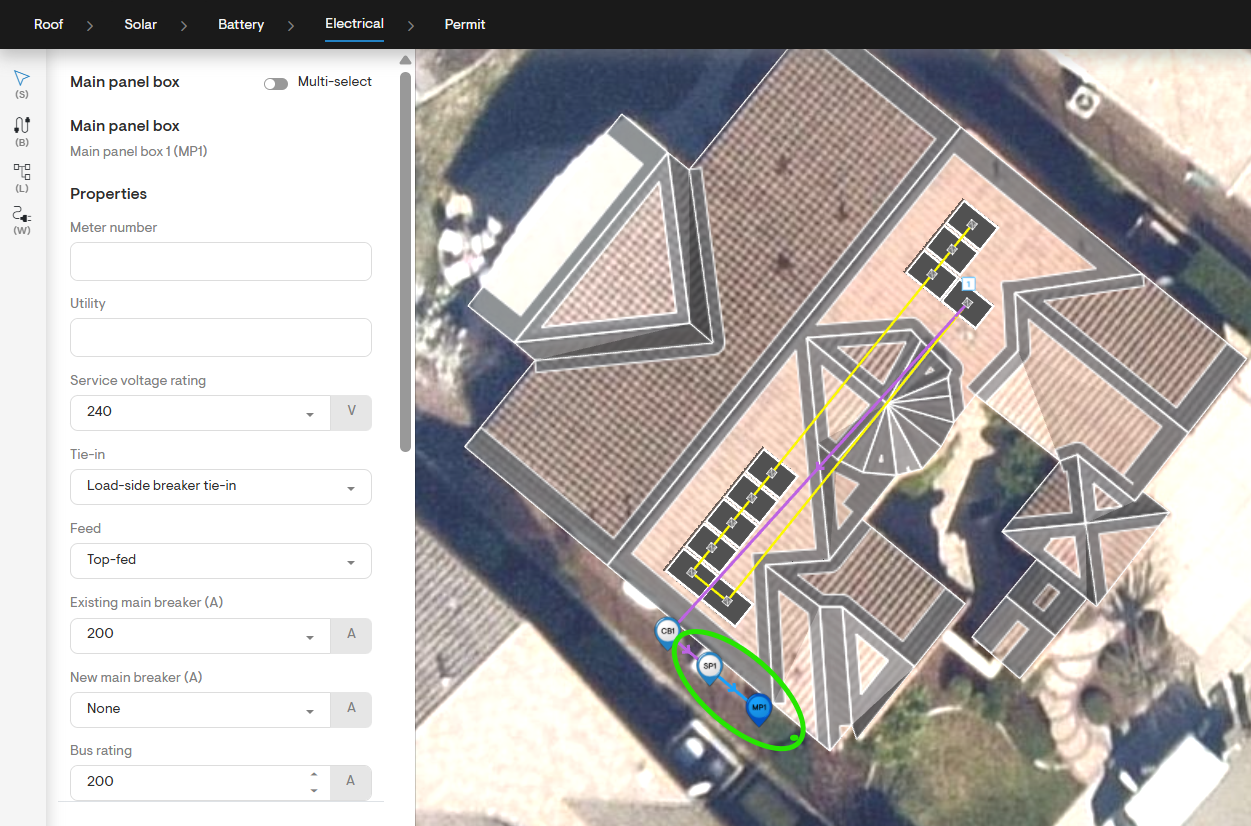
- Further, connect the Sub Panel box to the Main Panel box.
How can I set up Full Home Back-Up?
- In Step 3 - Battery Design, ensure that batteries are added.
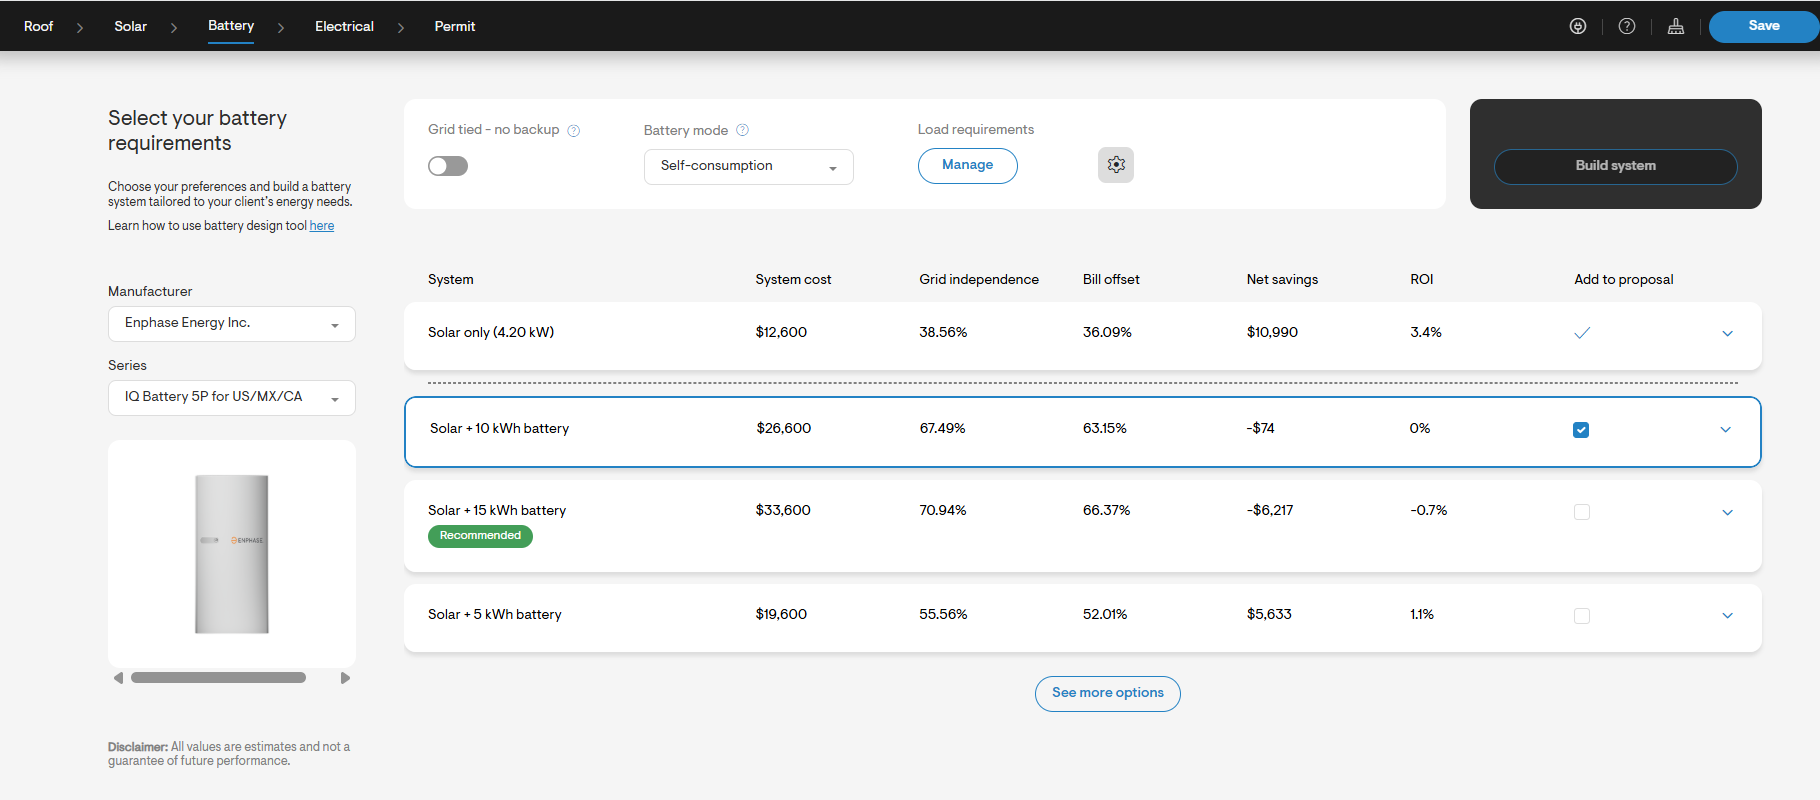
- In Step 4 - Electrical Design, add a Main Panel box to the line diagram. Make sure the Connect Battery toggle is activated and select the correct IQ system controller.
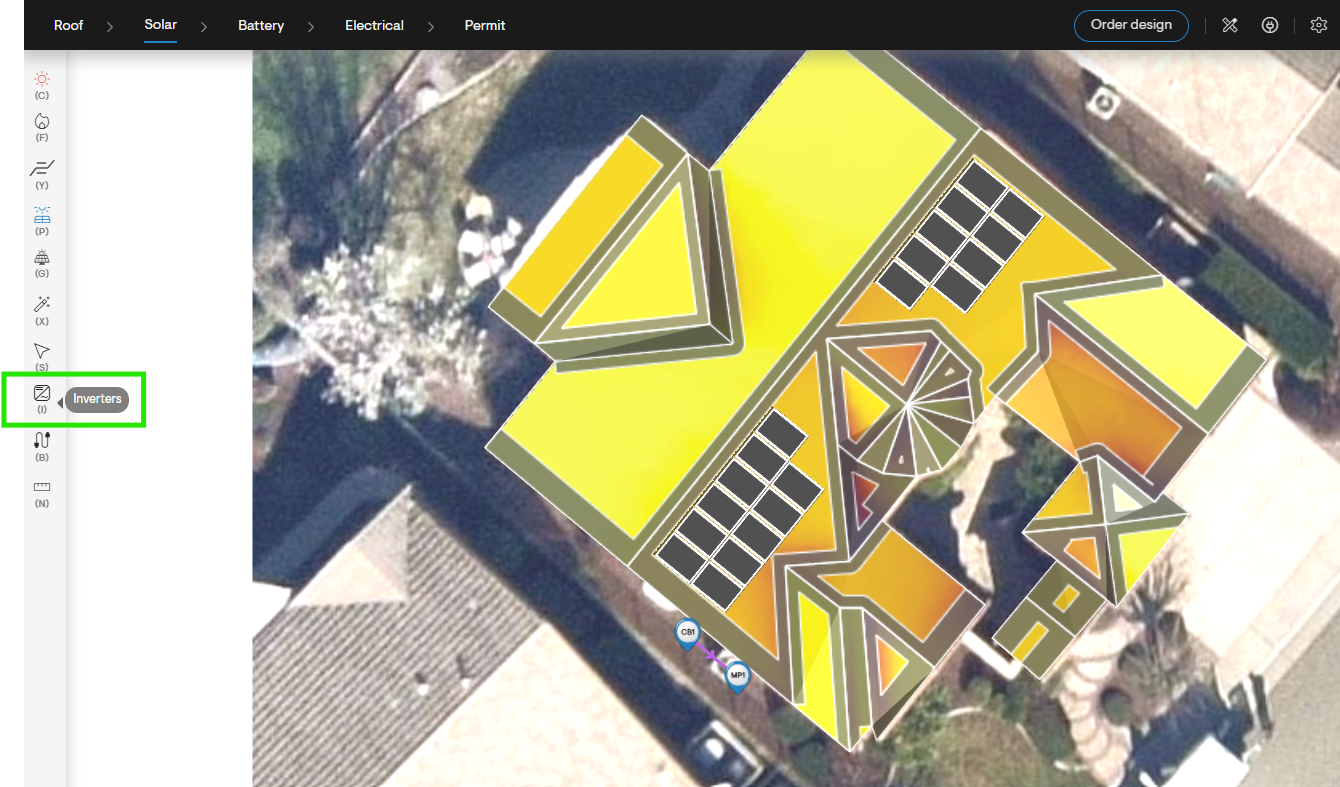
How can I set up a String Inverter System?
In Step 2 - Solar Design, after placing the solar modules, add the inverter and optimizer (if required).
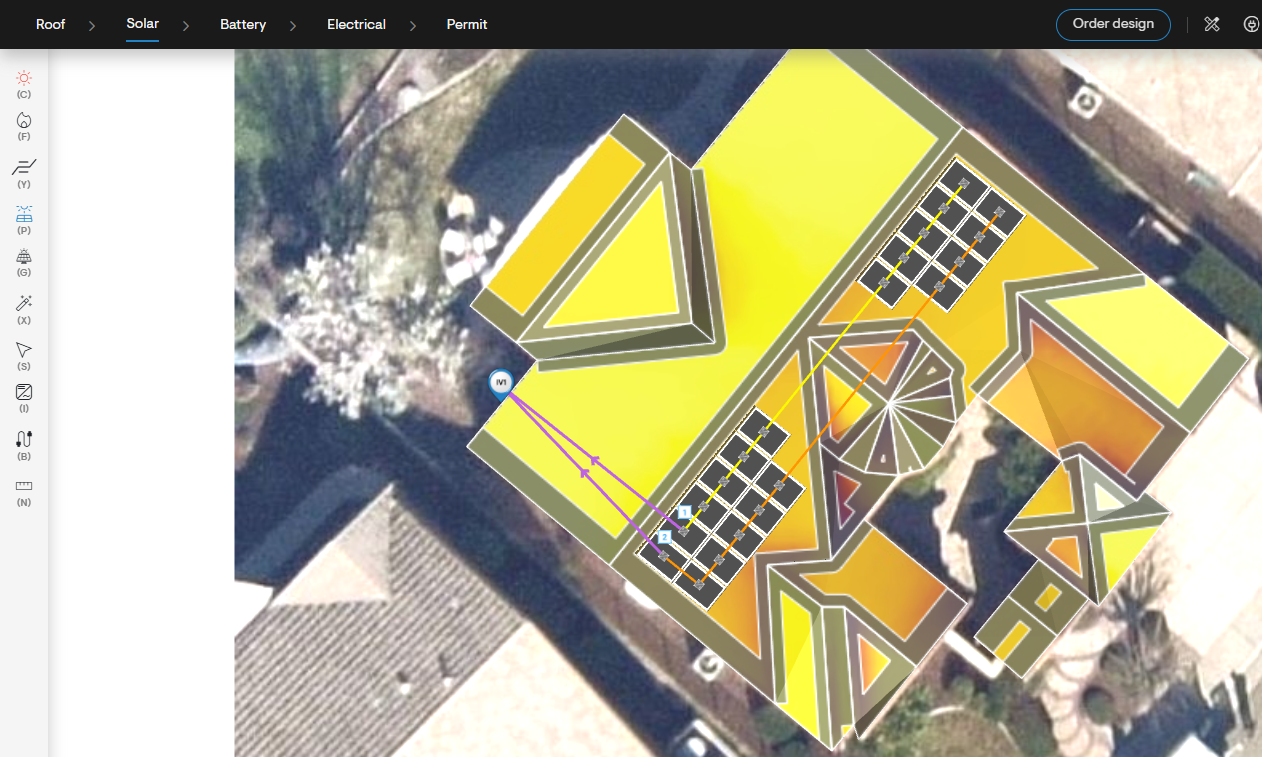
Create a string and connect it to the inverter before starting the next string. Repeat this process for all strings.
Once all strings are connected to the inverter, proceed to Step 4 - Electrical Design to complete your circuit by following the checklist.
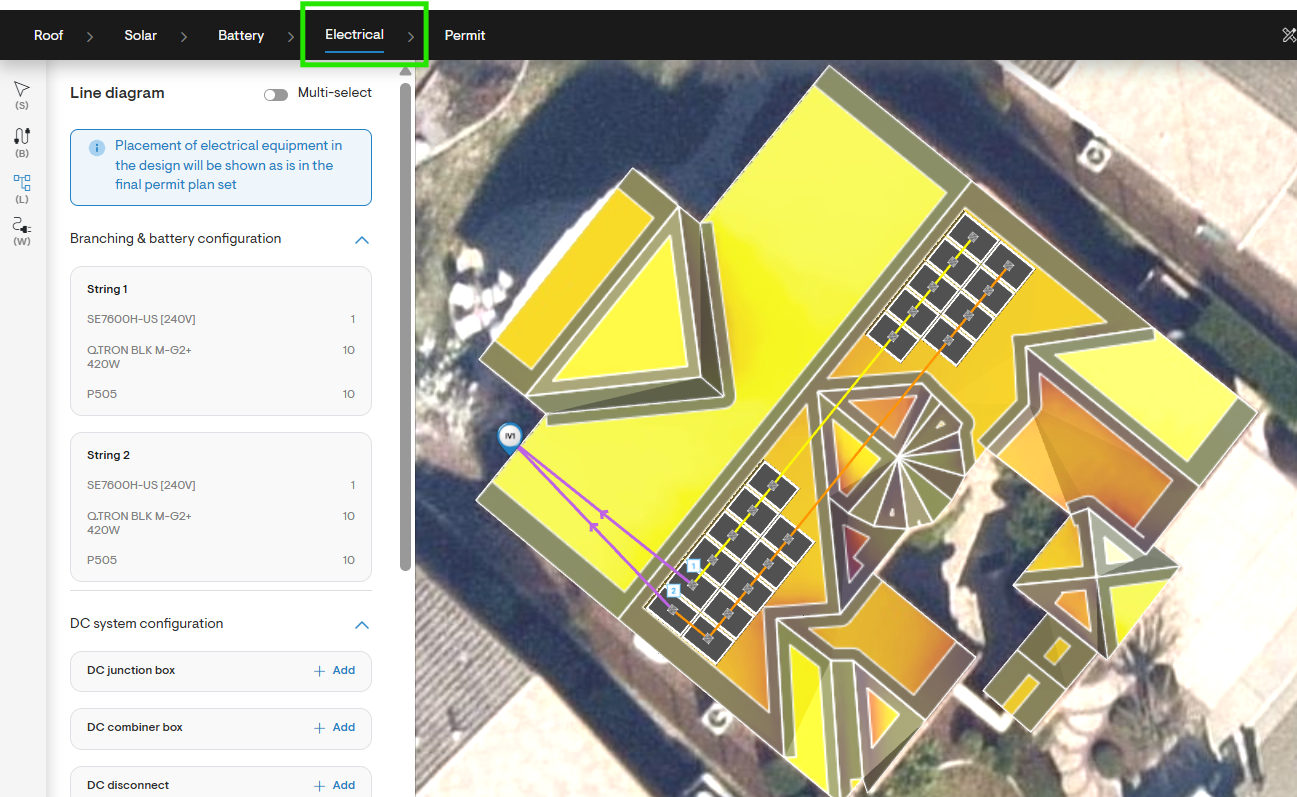
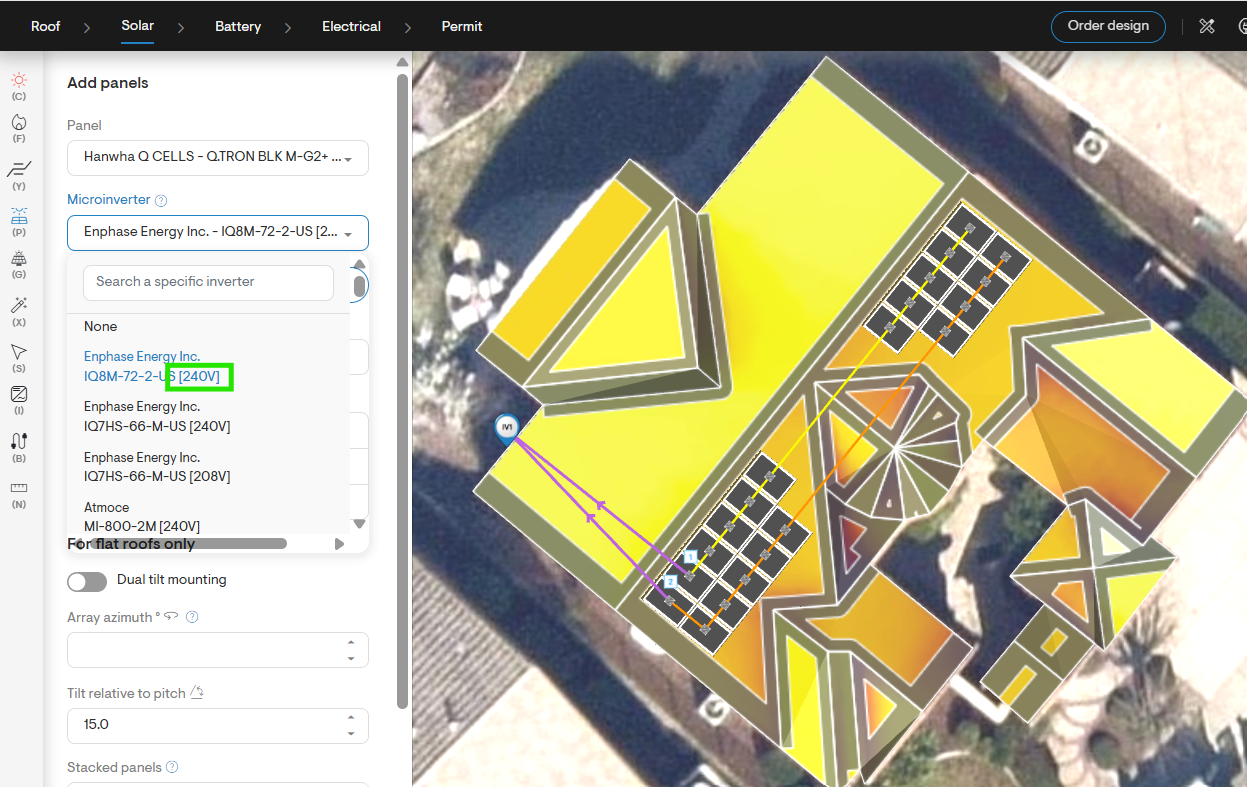
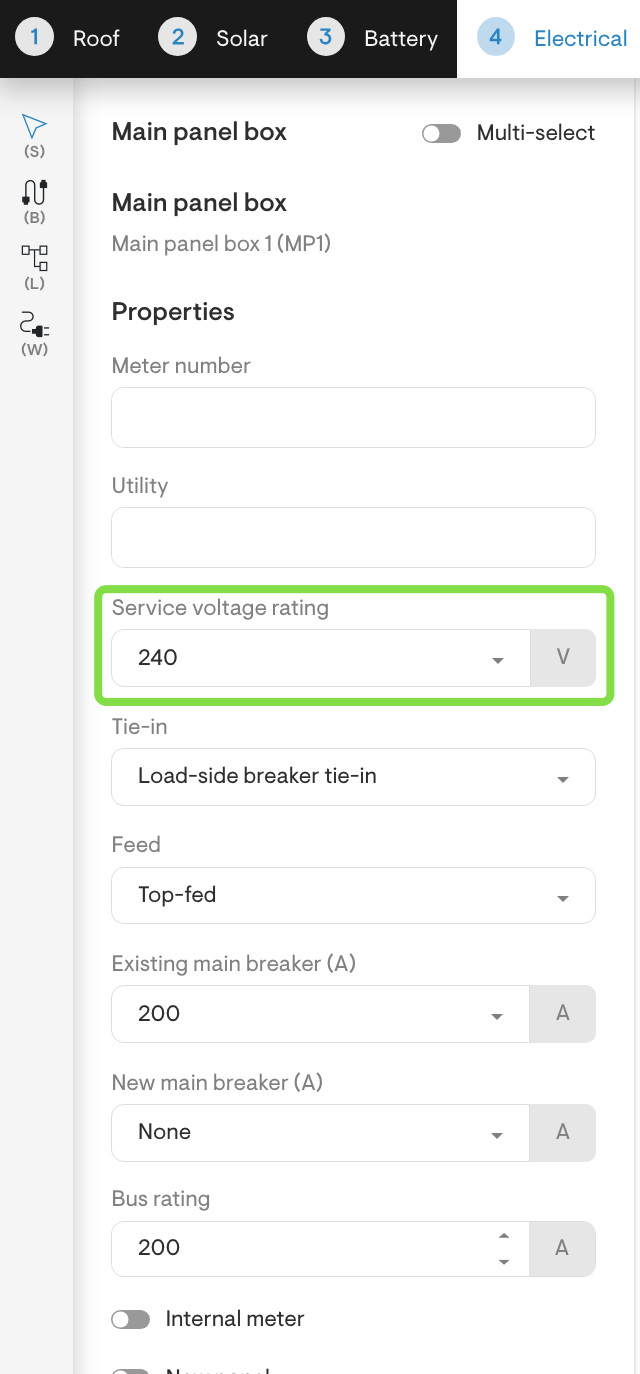
- Service Voltage: Ensure the micro-inverter or string inverter you select matches the voltage of the Main Service Panel.For U.S. residential systems, the standard voltage is 240V.
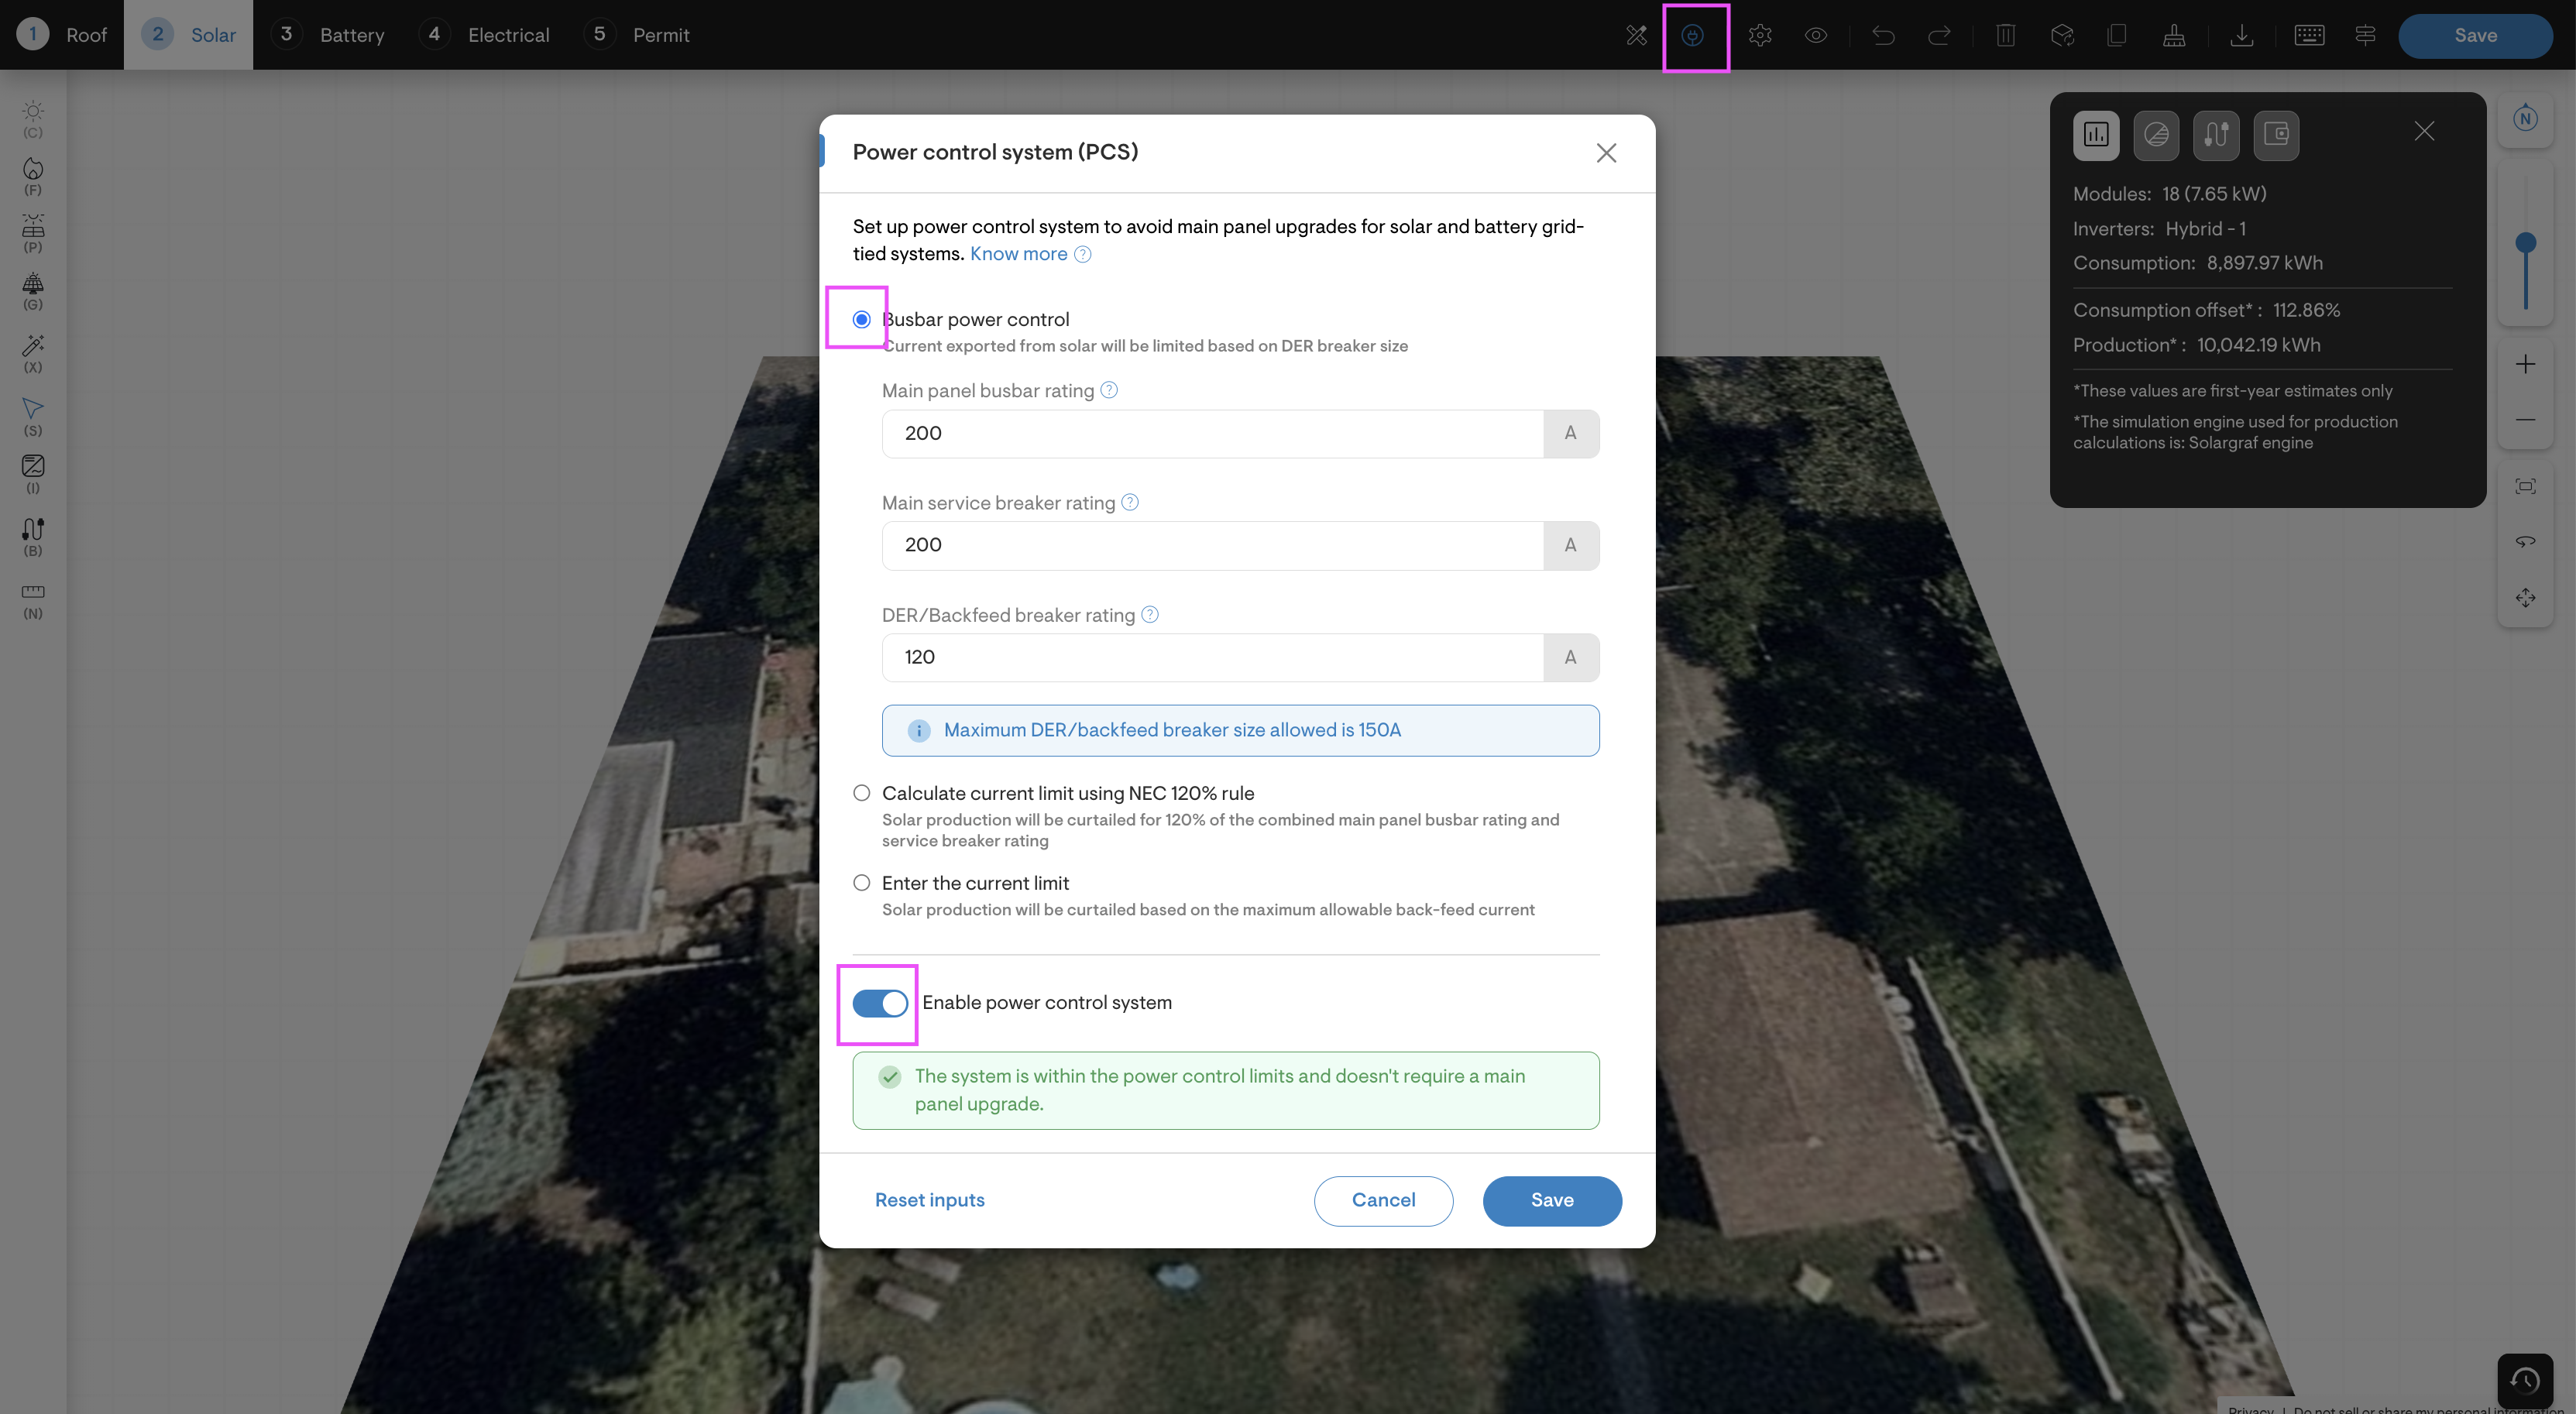
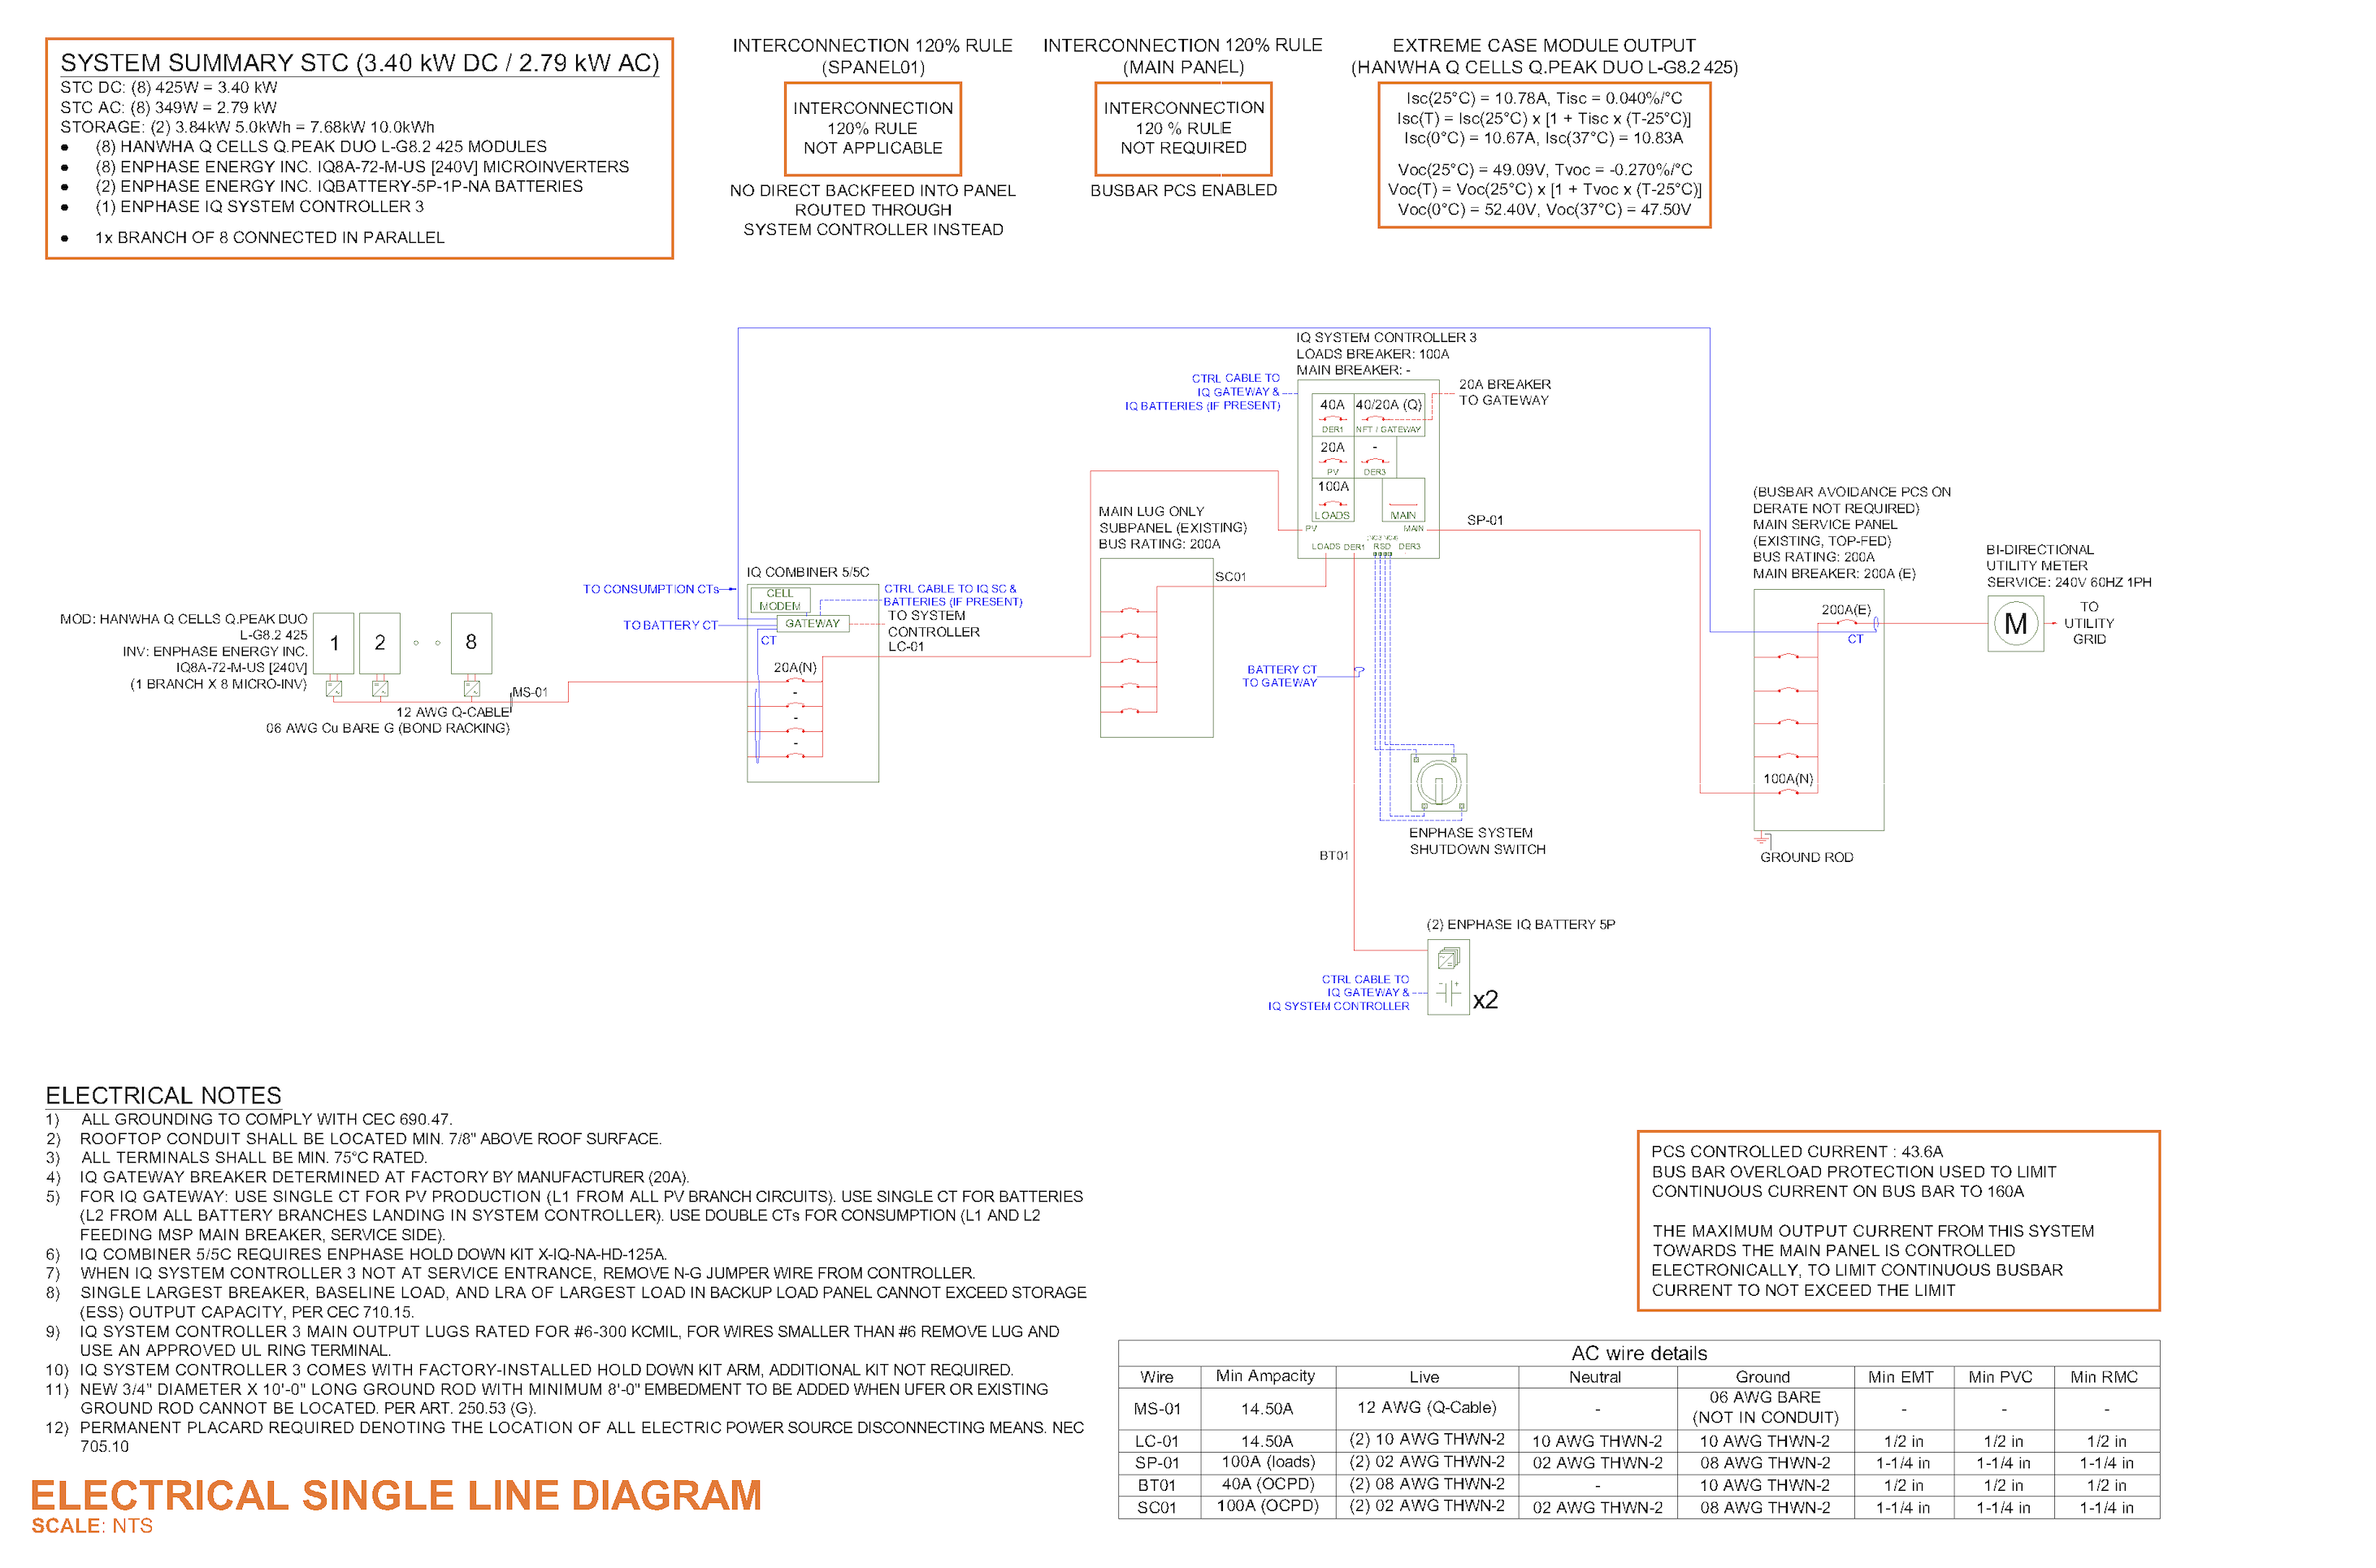
Busbar PCS SLD support extended to backup mode
Busbar PCS support for Enphase systems supports grid-forming mode and can be included in SLD and automated permit plan sets
Steps:
On Solar design tab, click on Power controlled System (PCS) icon,
Select Busbar power control option, Toggle ON “Enable power control system” and click on Save
Move to Electrical tab, create electrical circuit (as usual) and generate line diagram
Move to permit planset checkout page and generate permit package.
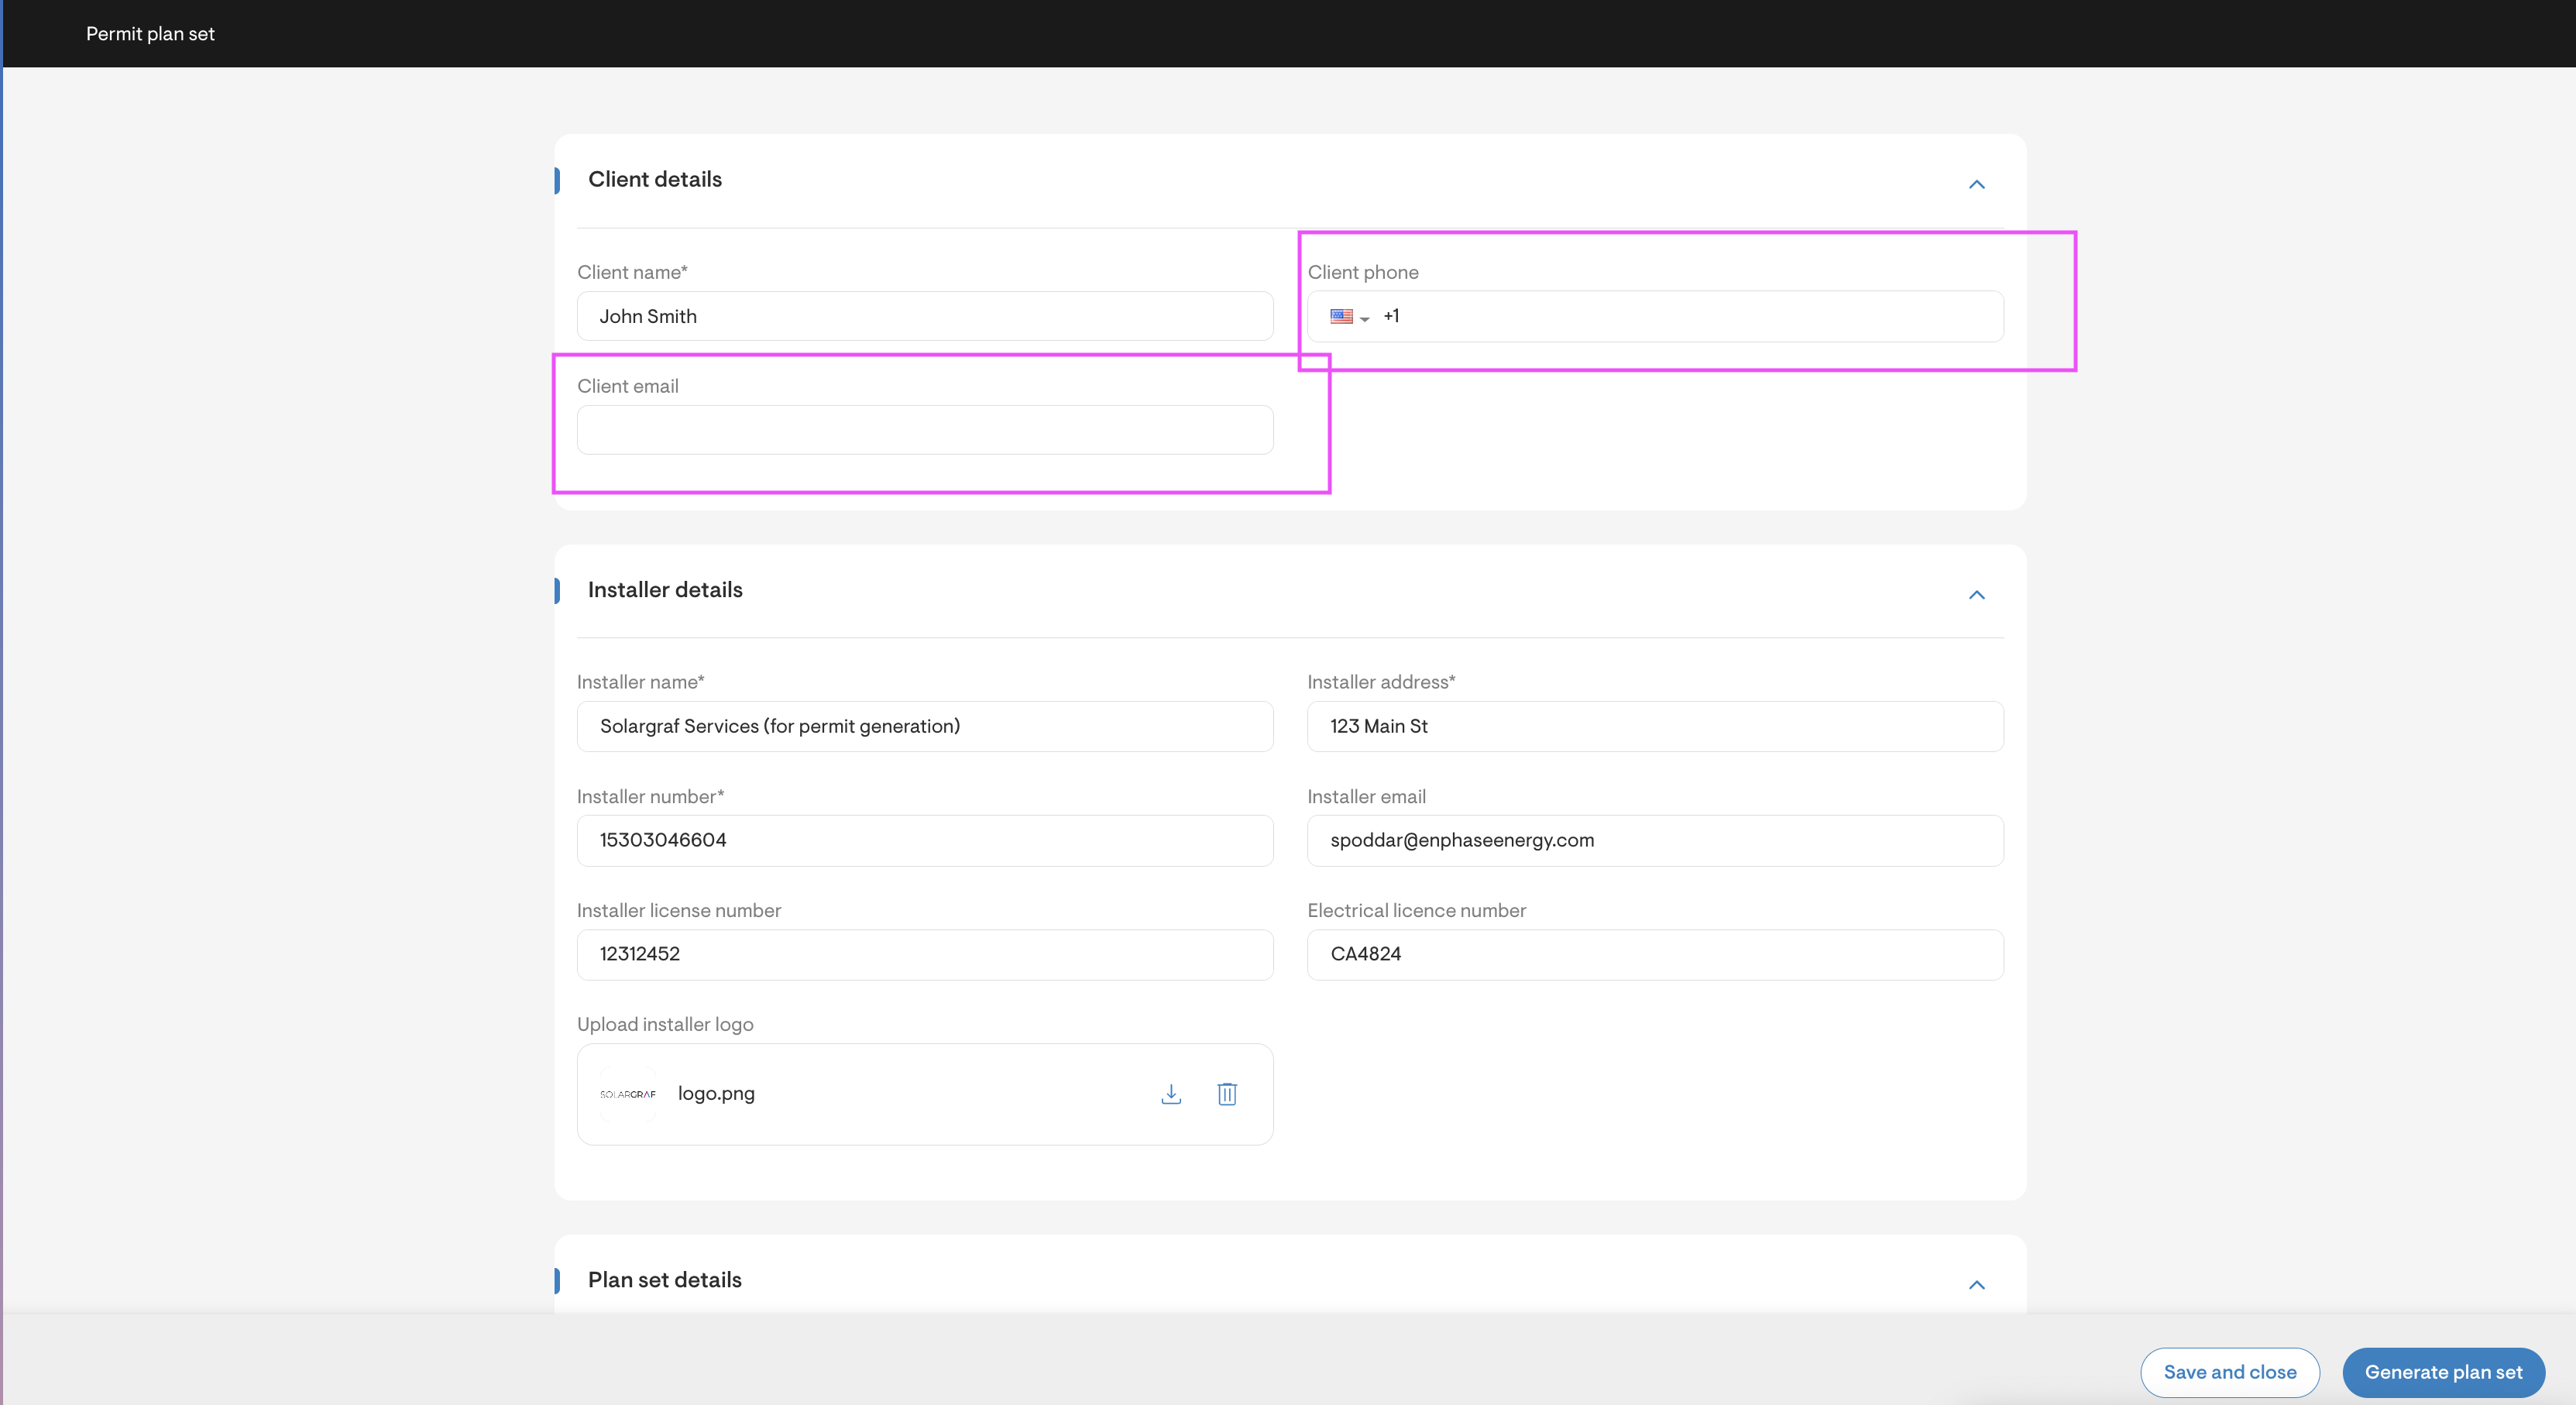
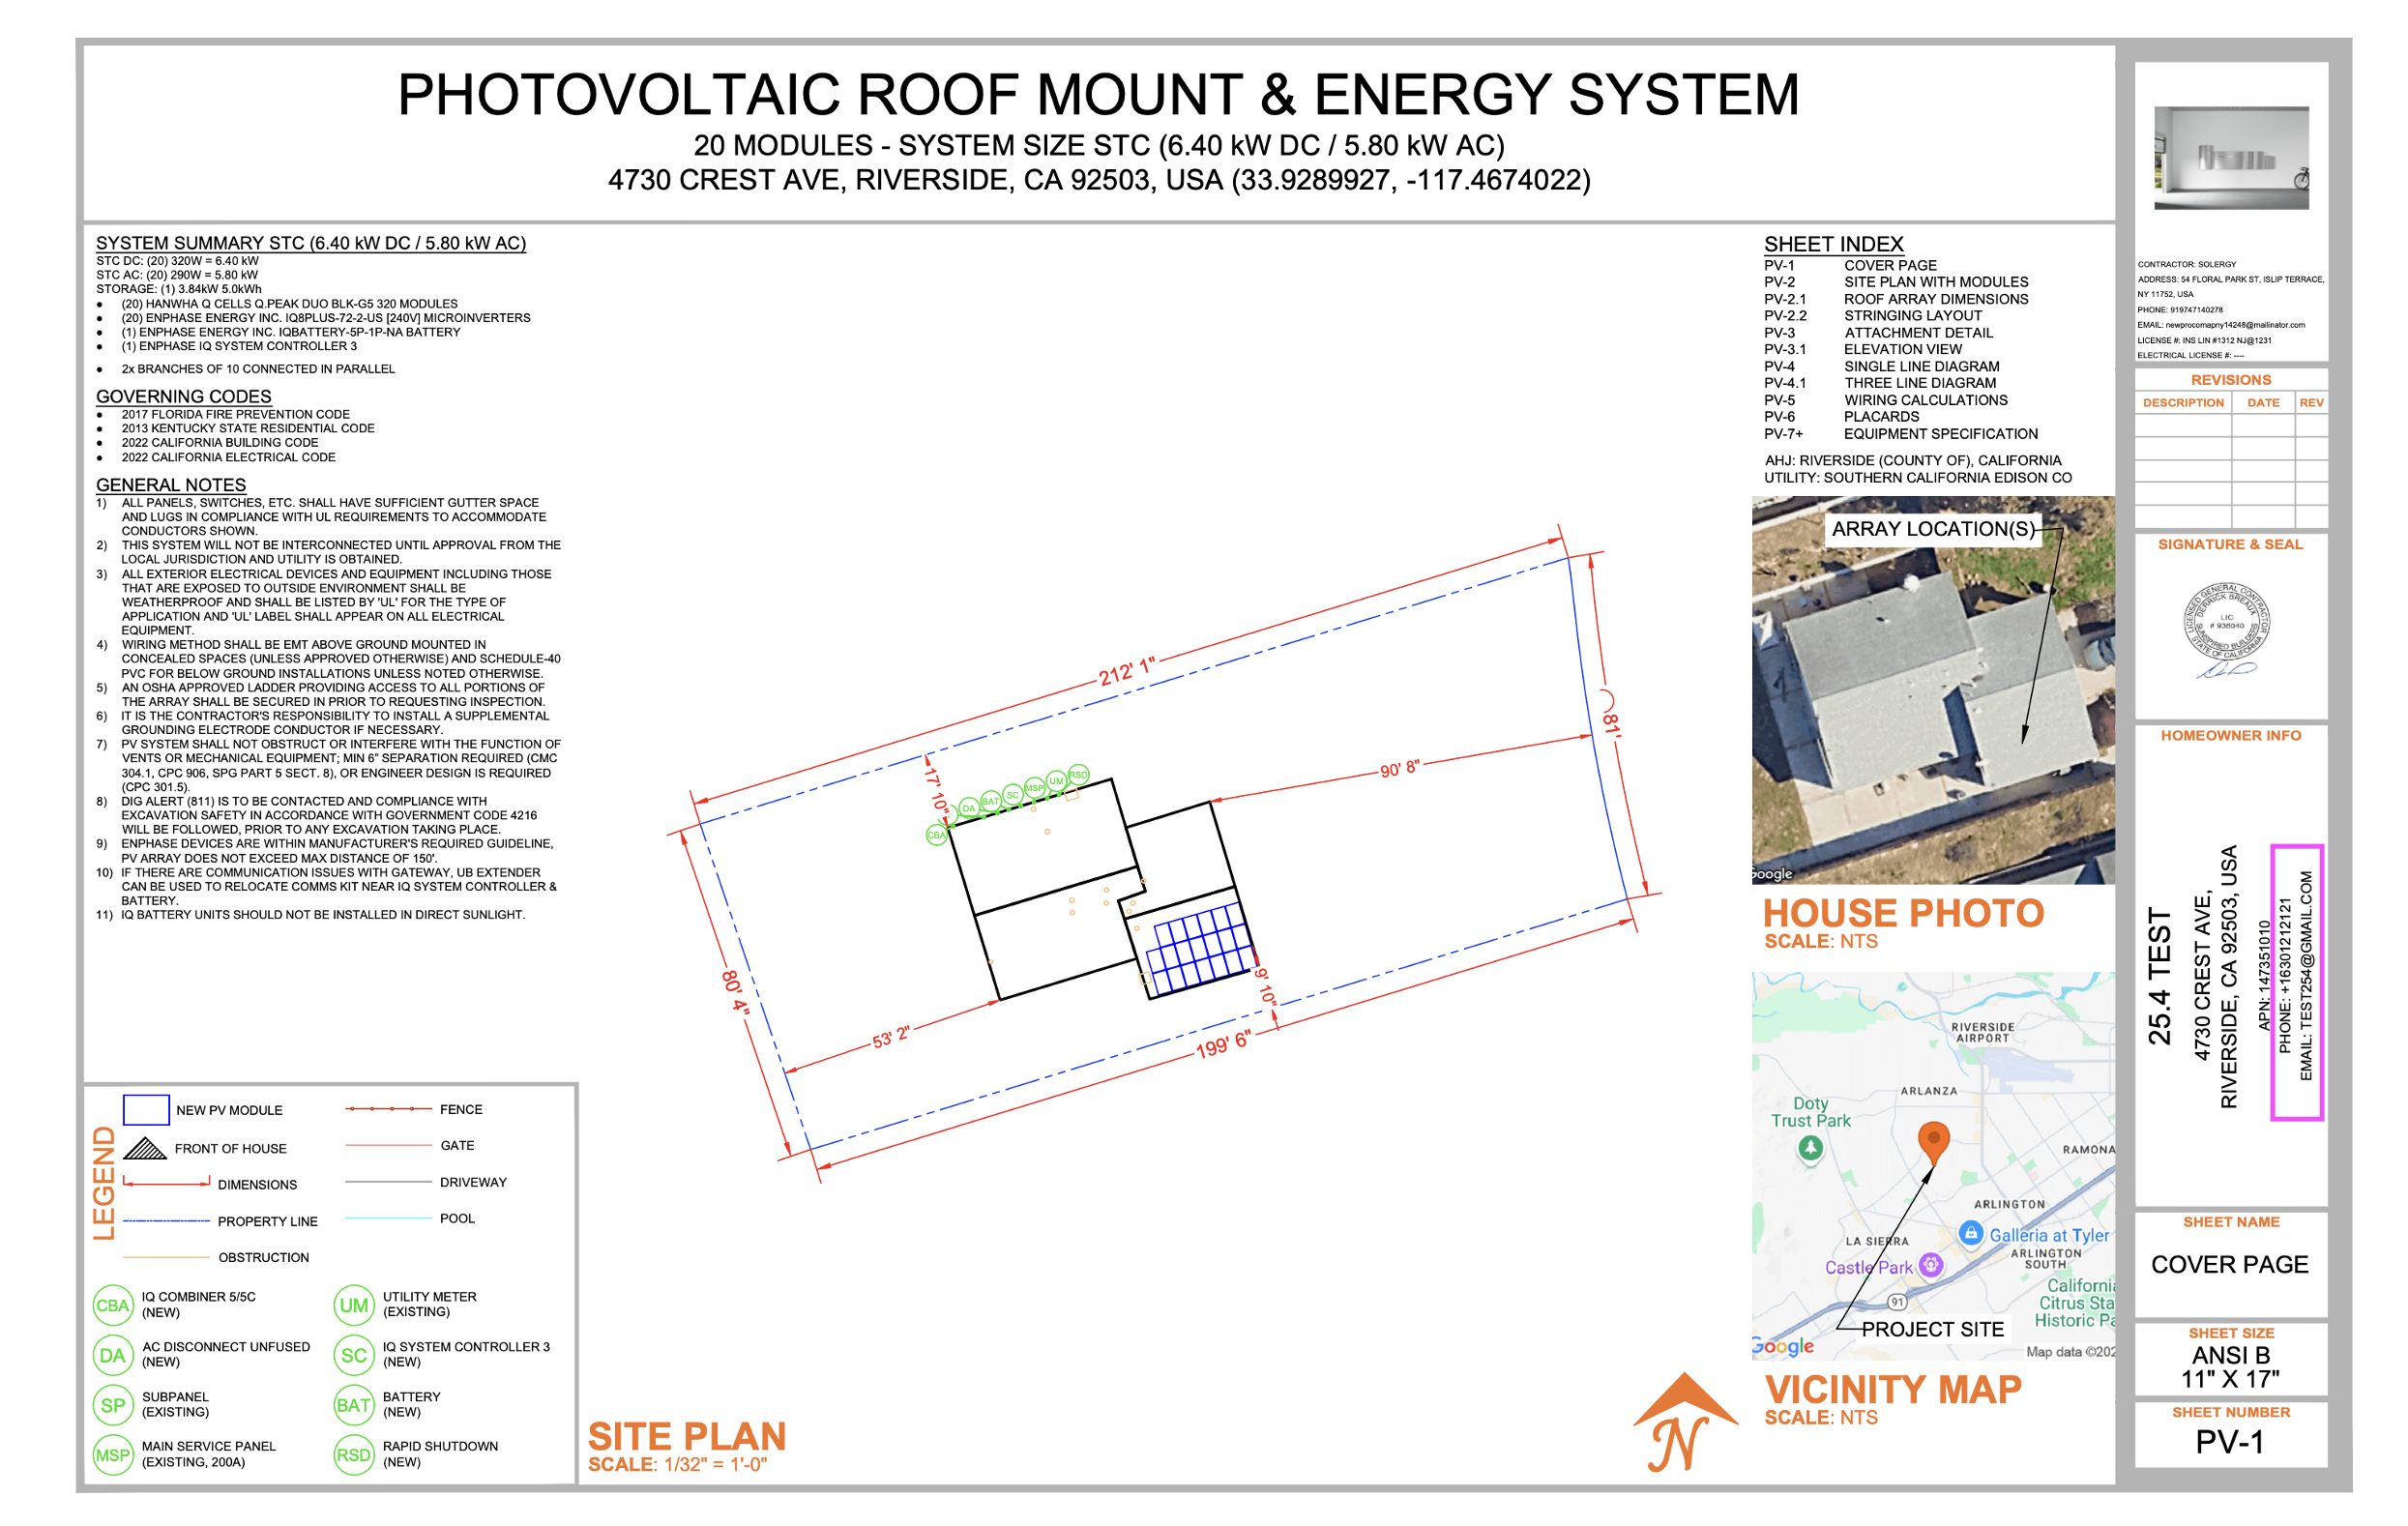
Automate Homeowner email address and phone number
Users can include the client's email and contact details alongside their name in the automated permit plan set.
Steps:
On permit checkout page, enter homeowner email address and phone number (optional)
Automate Contracter Signature
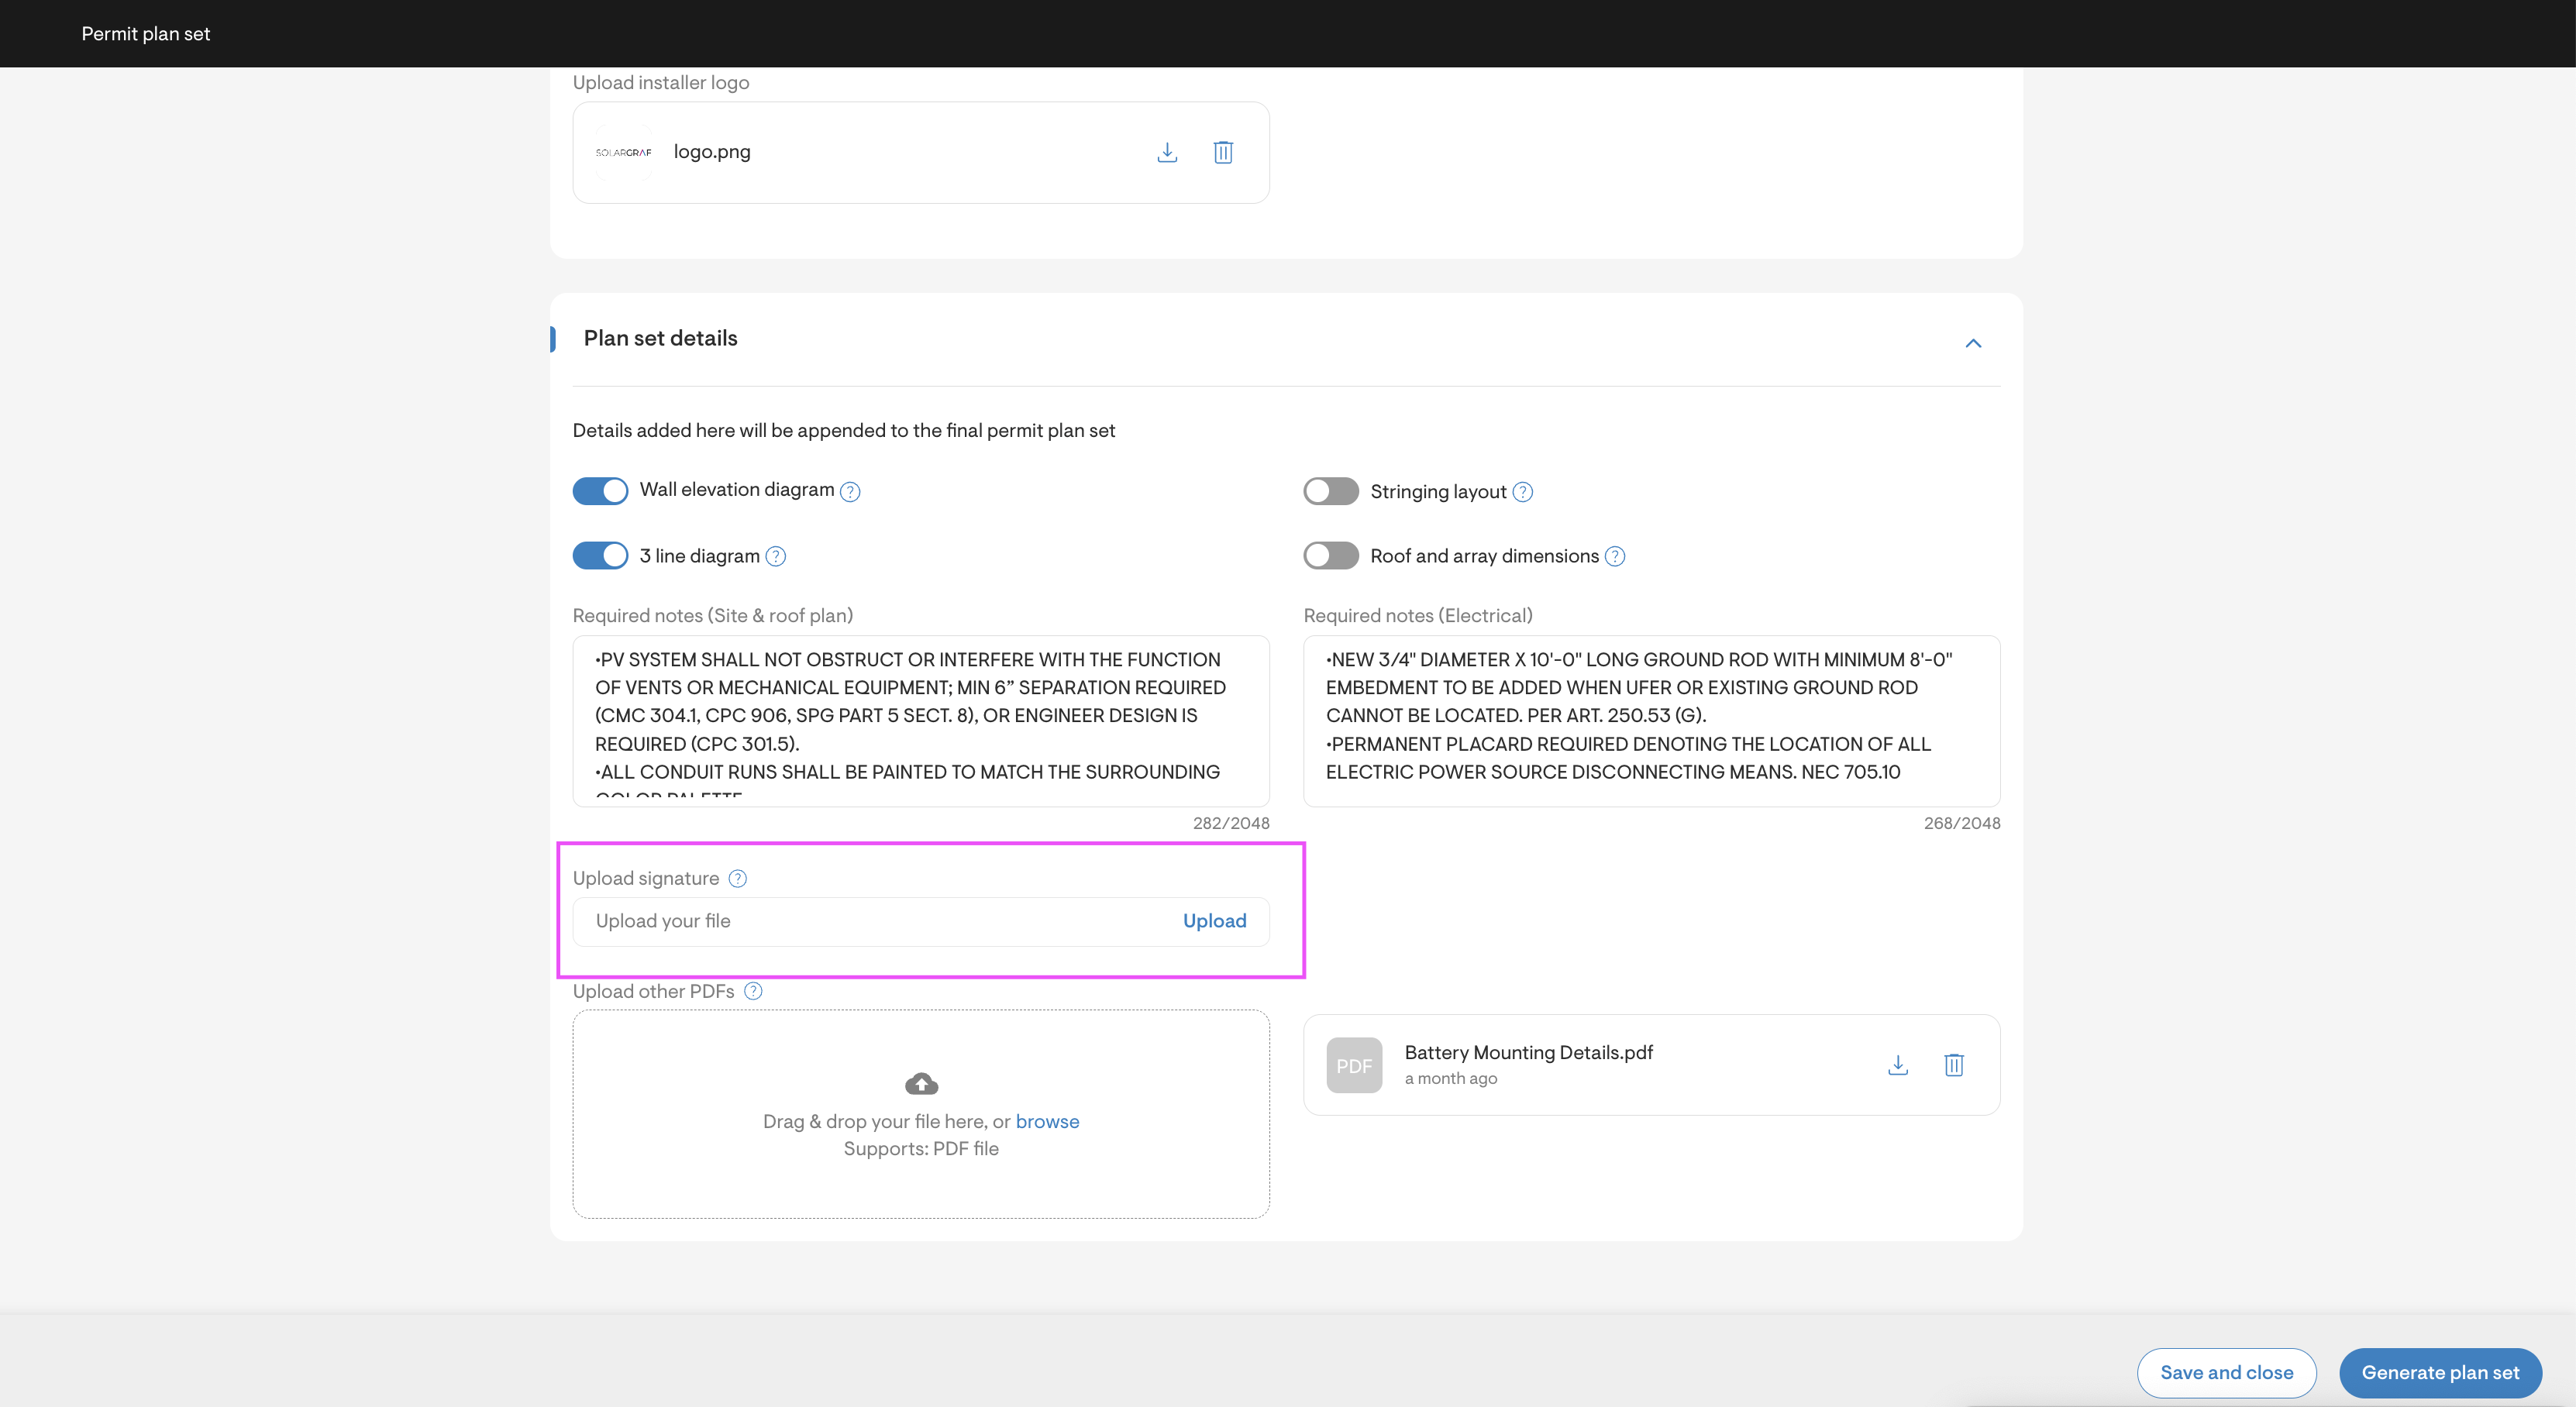
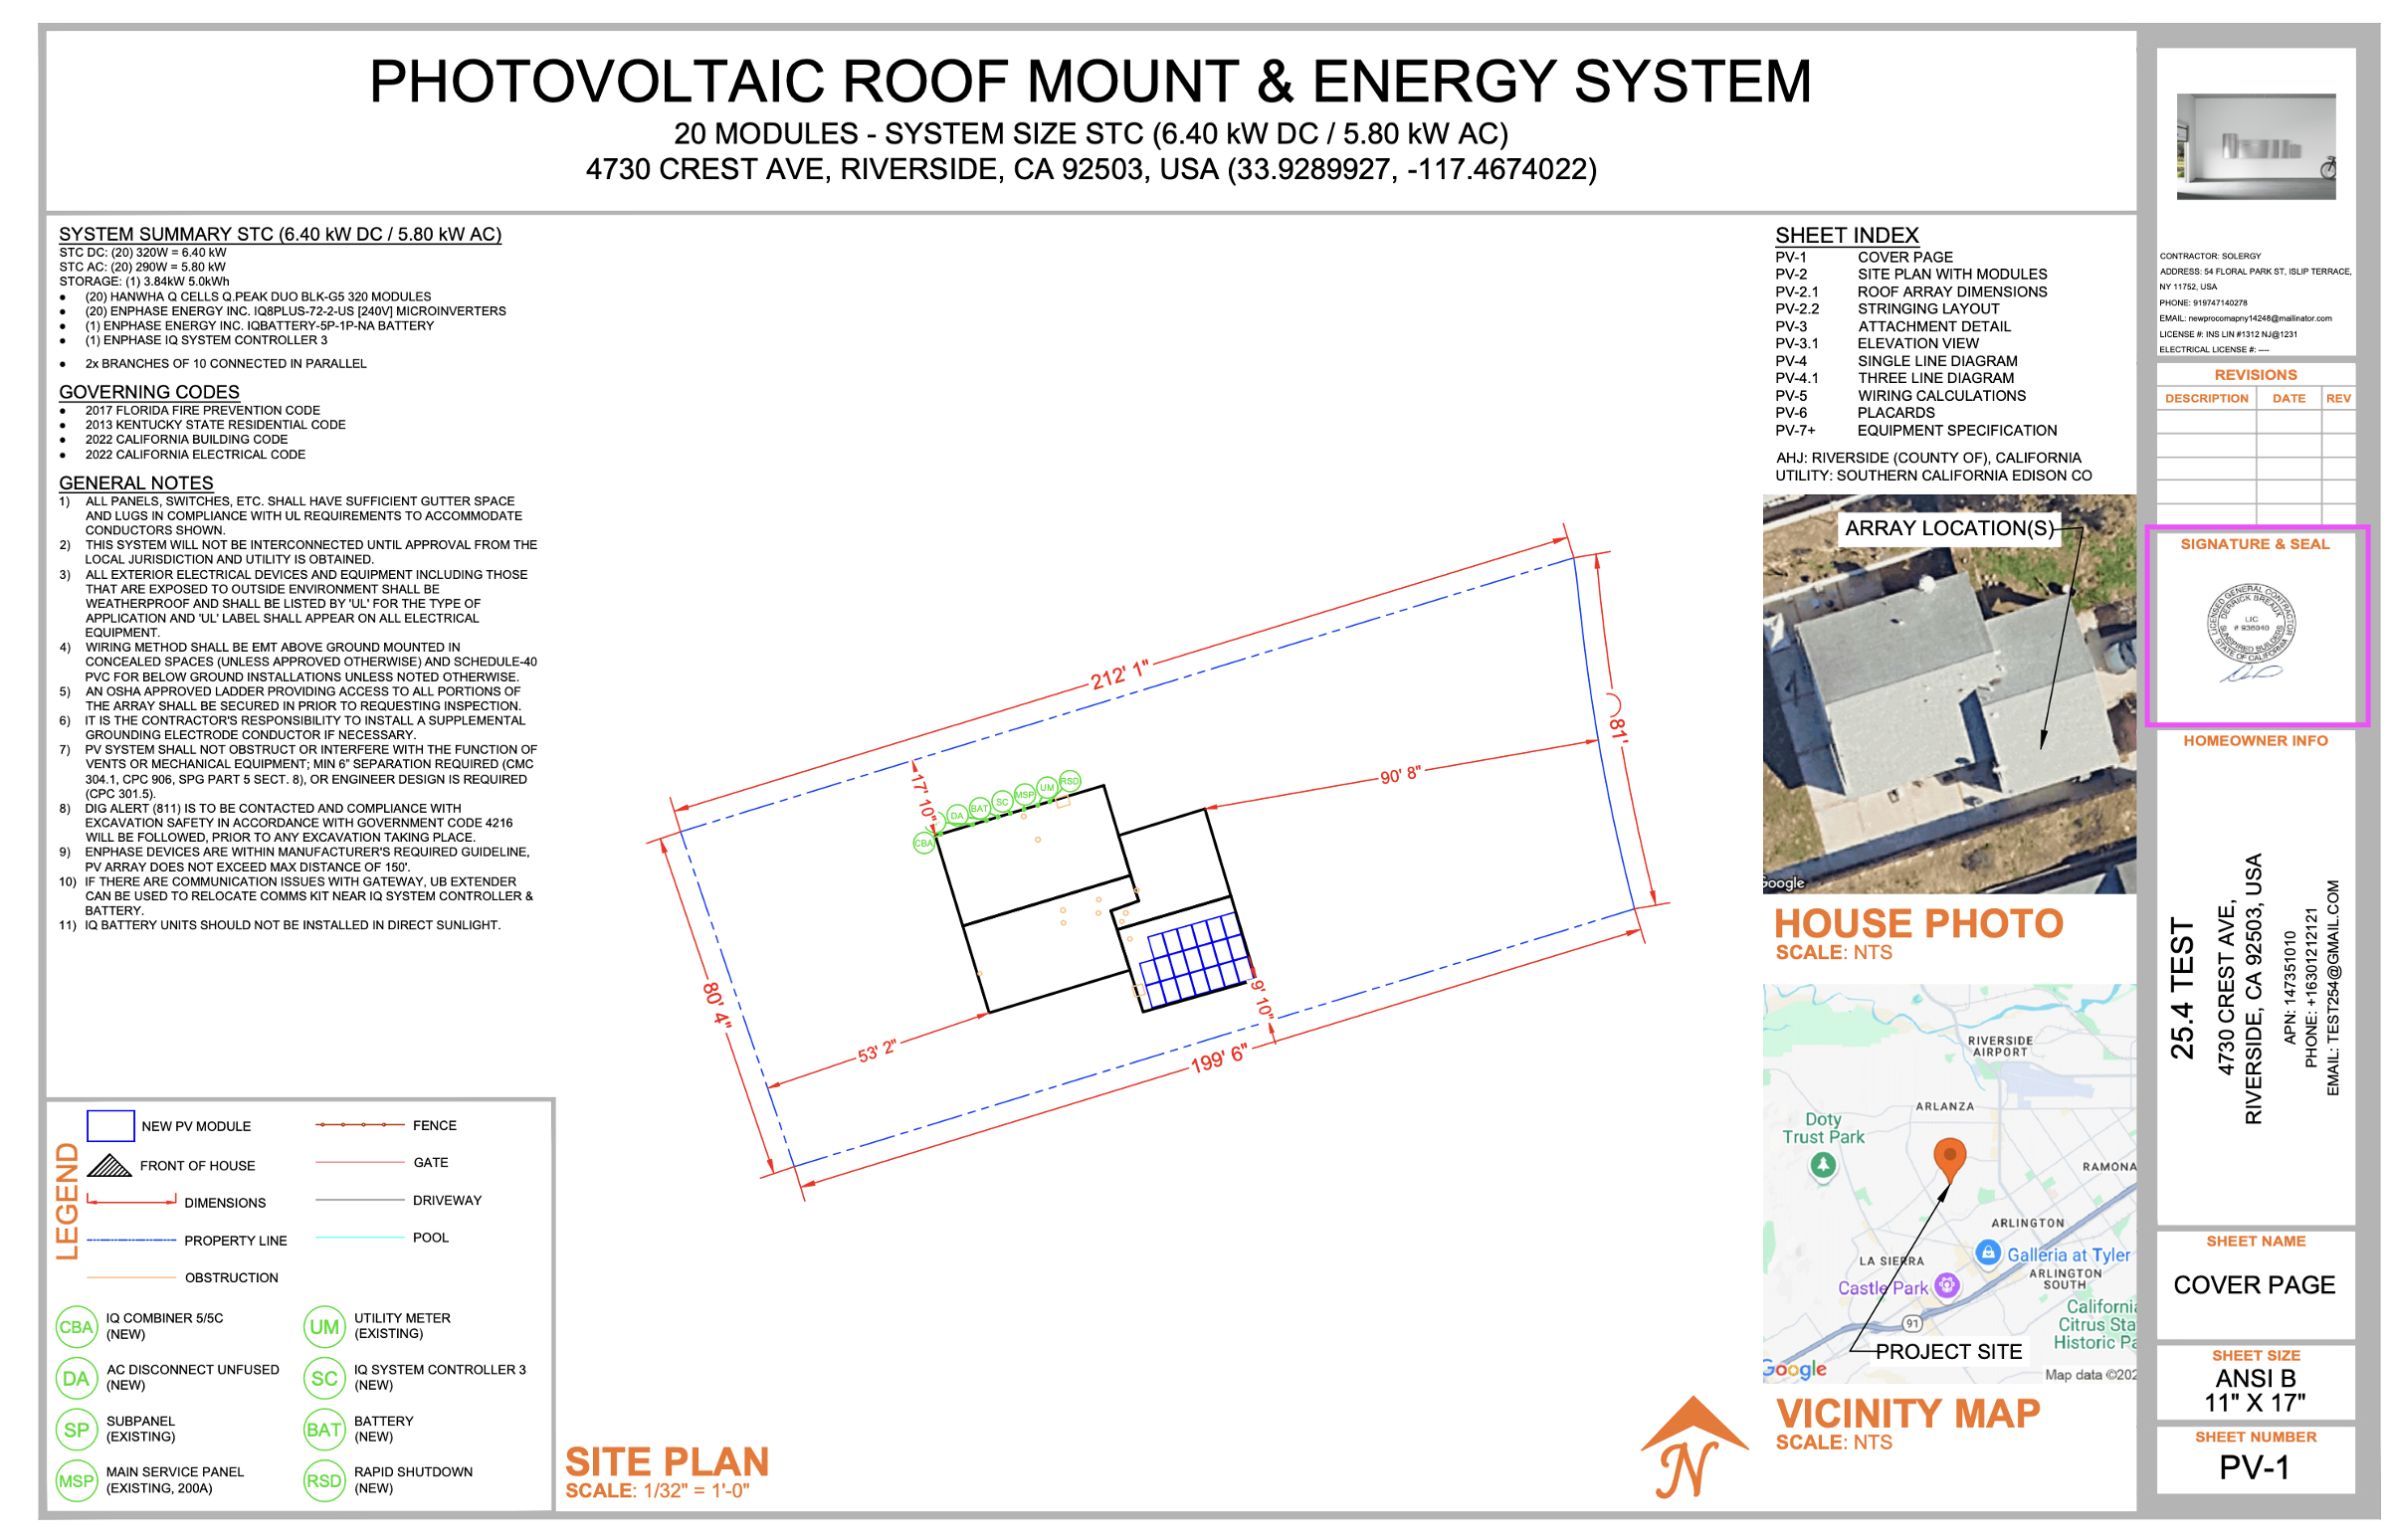
Users can include contractor signature in the automated permit plan set.
Steps:
On permit checkout page, upload contractor signature under planset details page
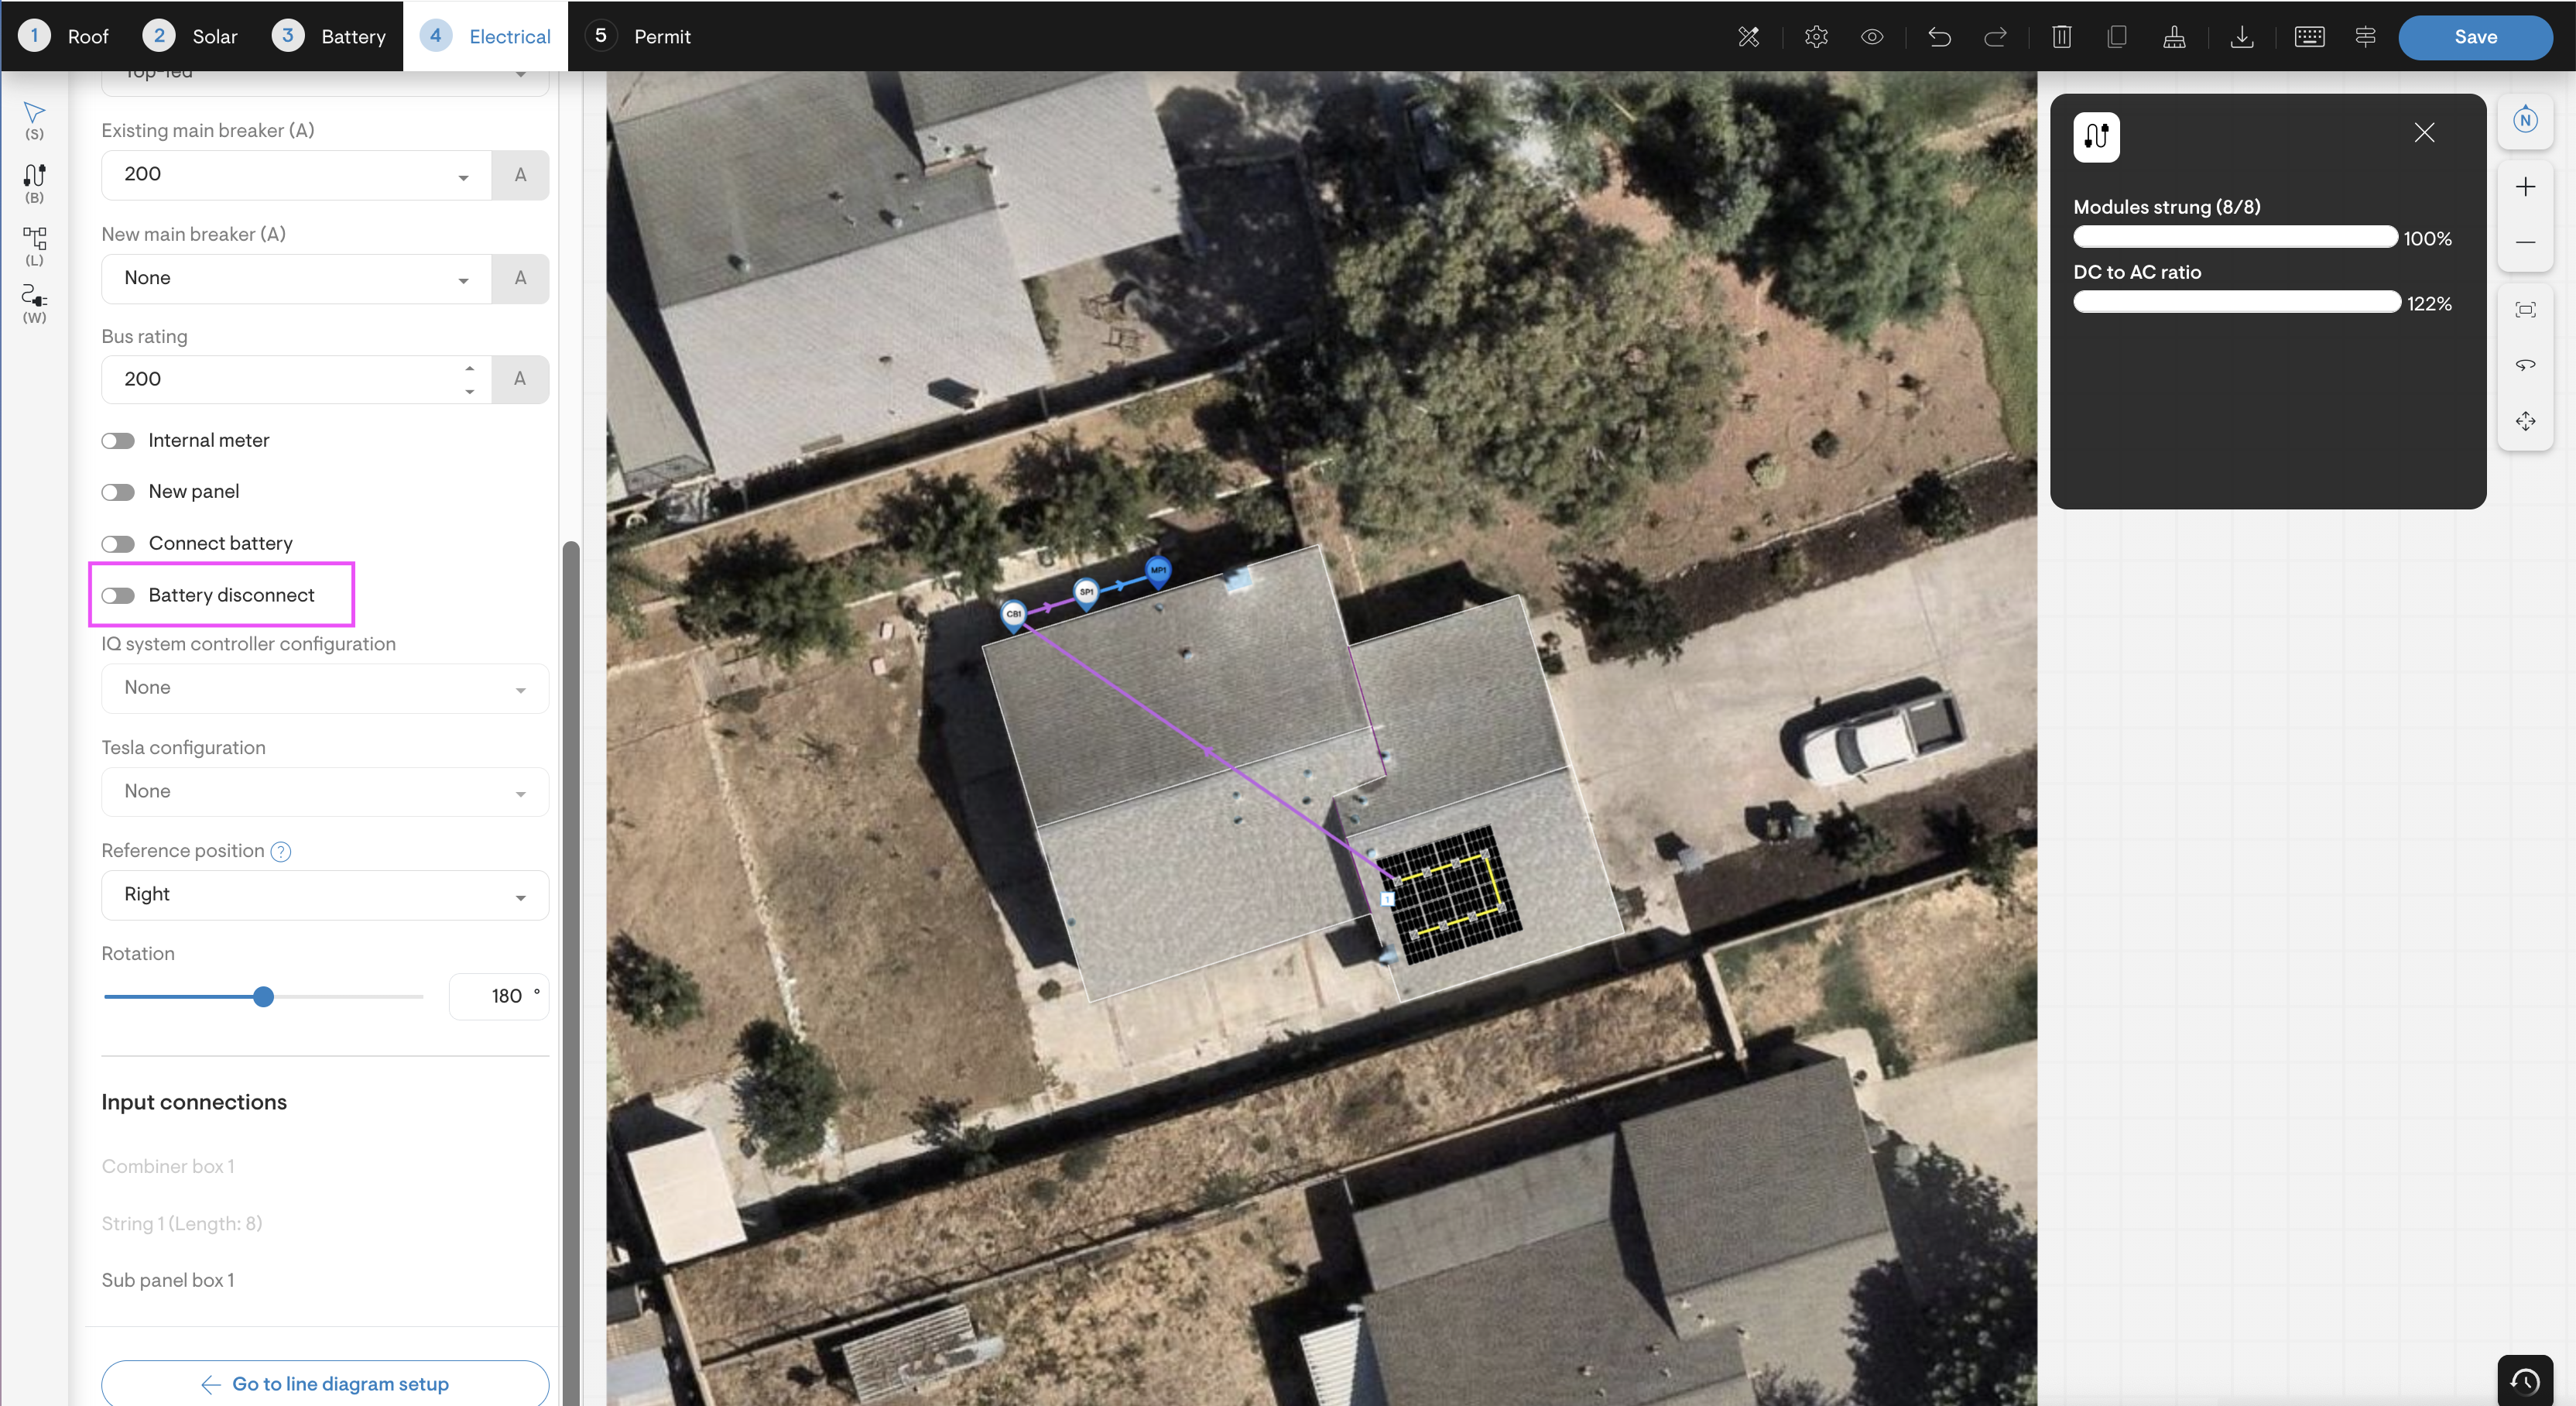
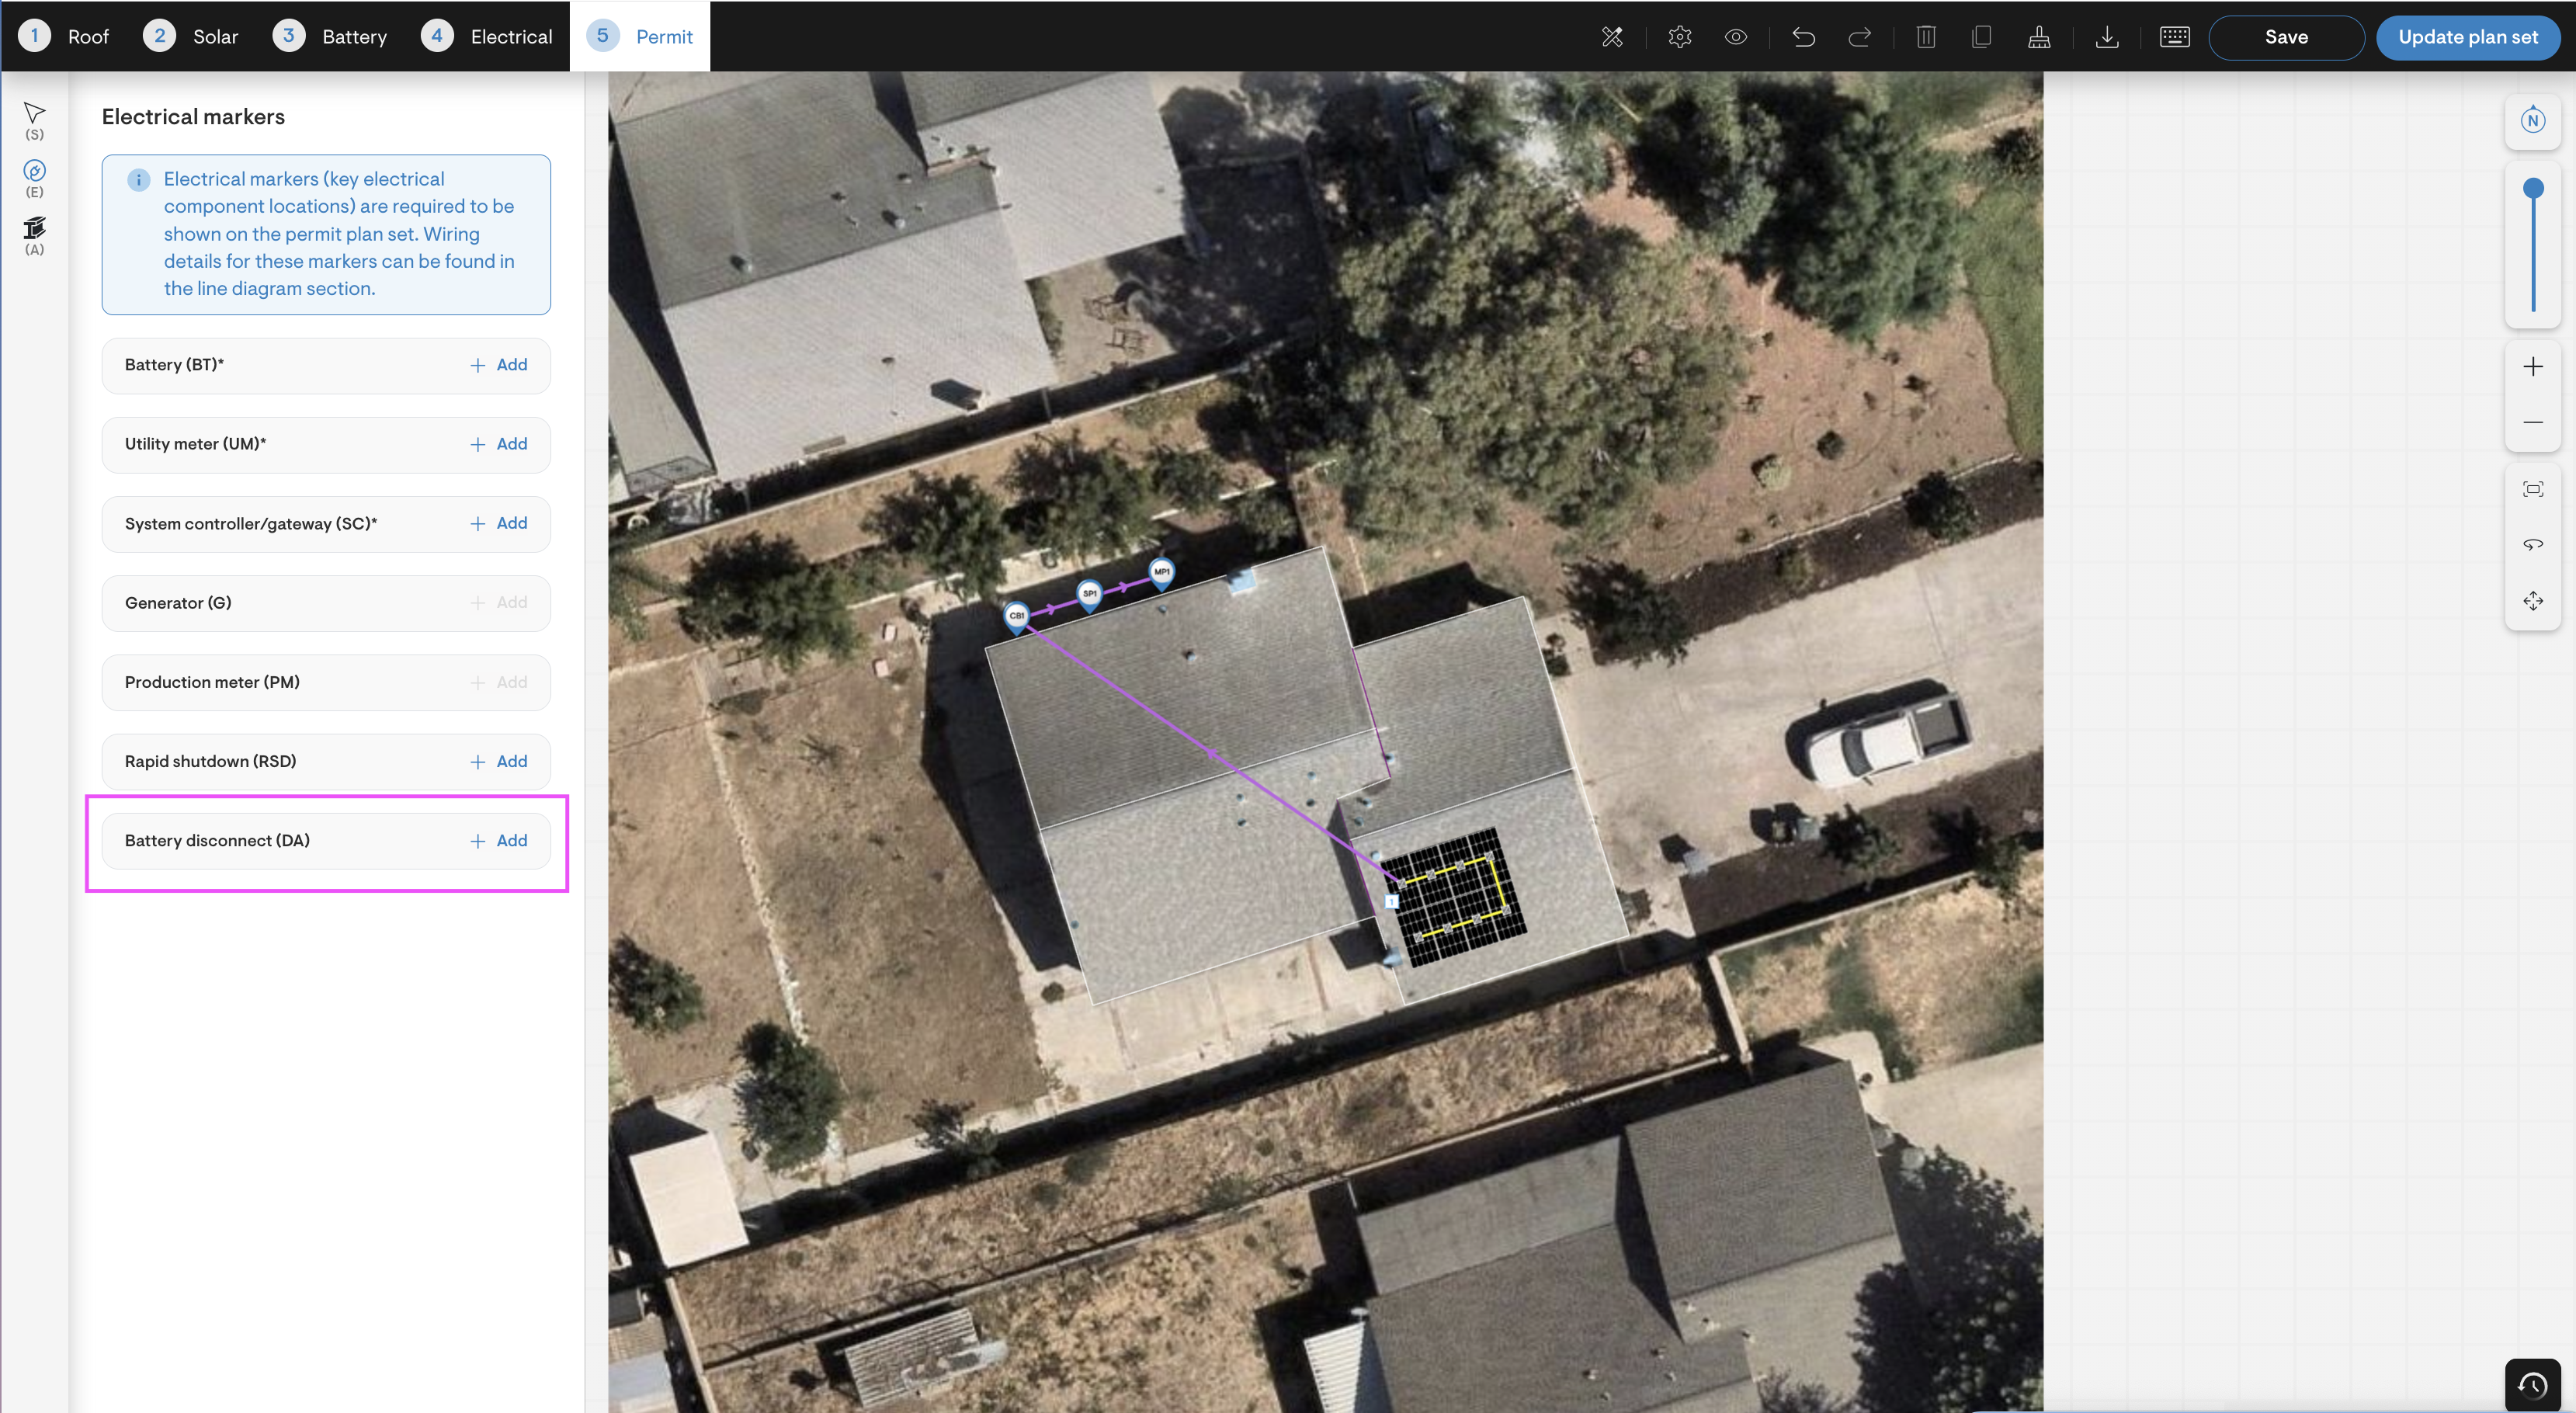
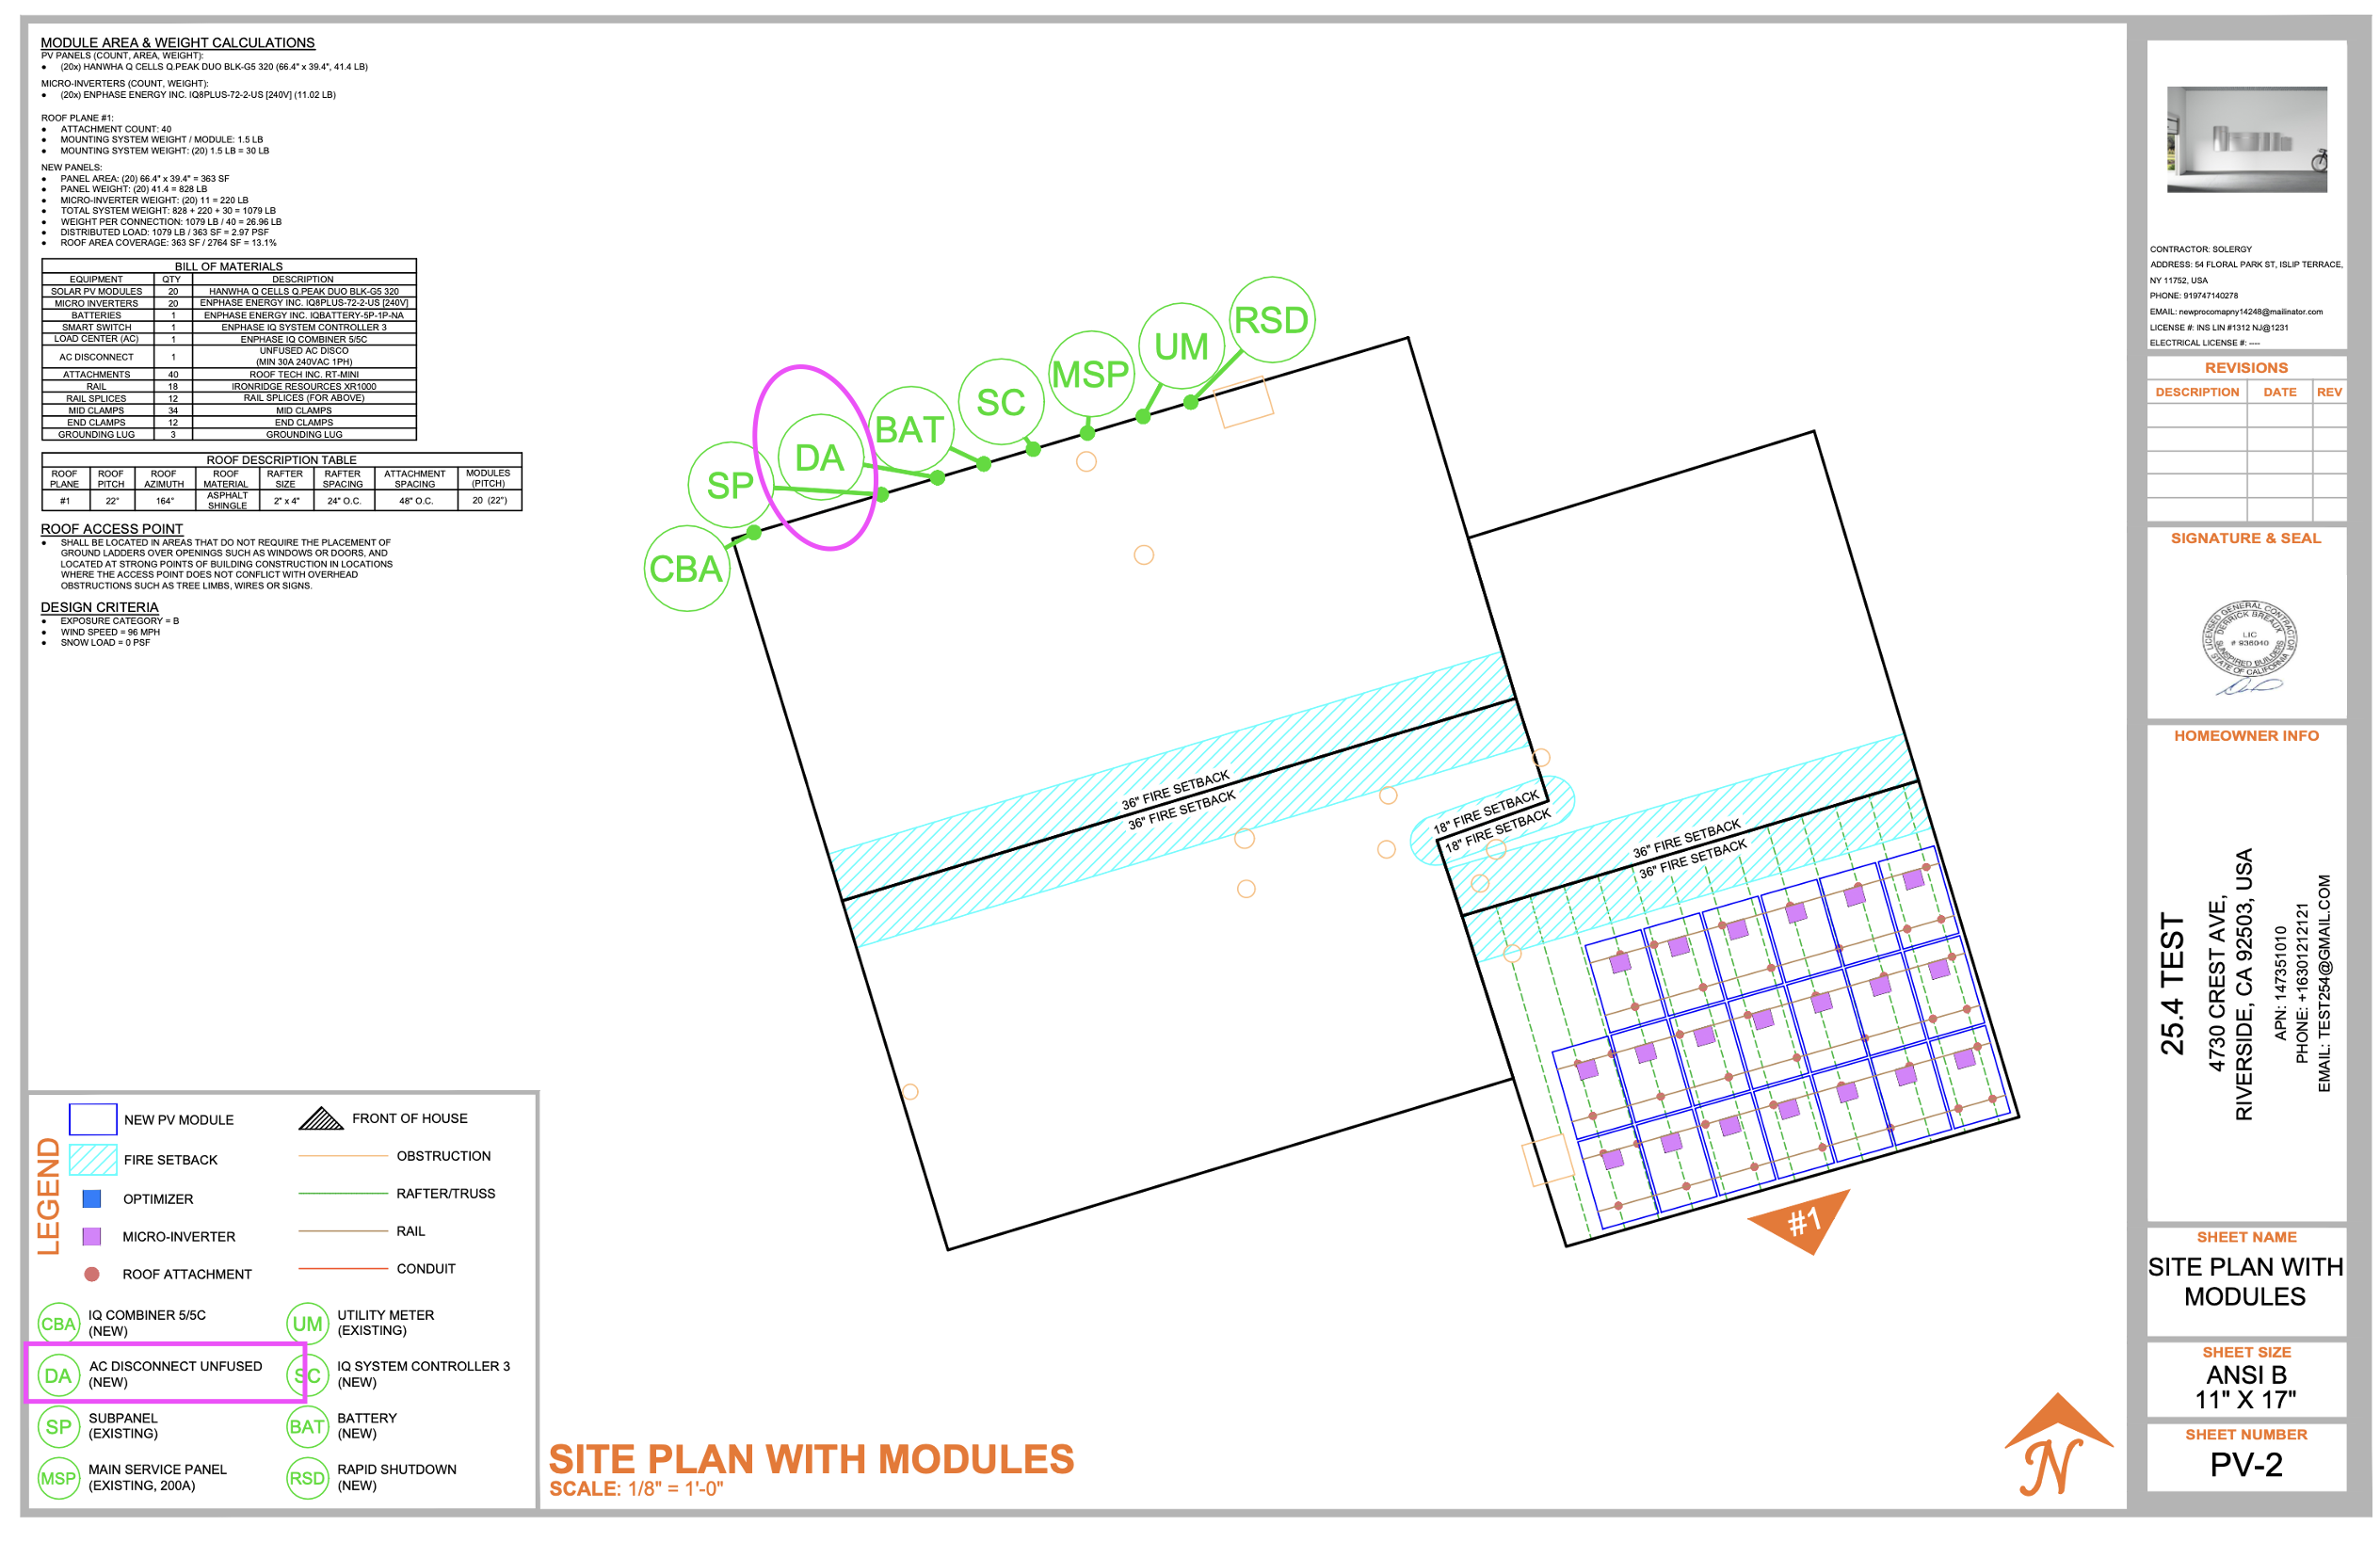
Battery disconnect marker option in permits
Users can include battery disconnect marker details on the site plan (PV-1)and roof plan (PV-2) pages of the automated permit plan set.
Steps:
Under MSP/SP properties in line diagram section in electrical tab, toggle ON “Battery disconnect”.
Move to permit design tab
Under Electrical marker section, select battery disconnect marker and place it at required location.
Breaker size exclusion in SLD generation
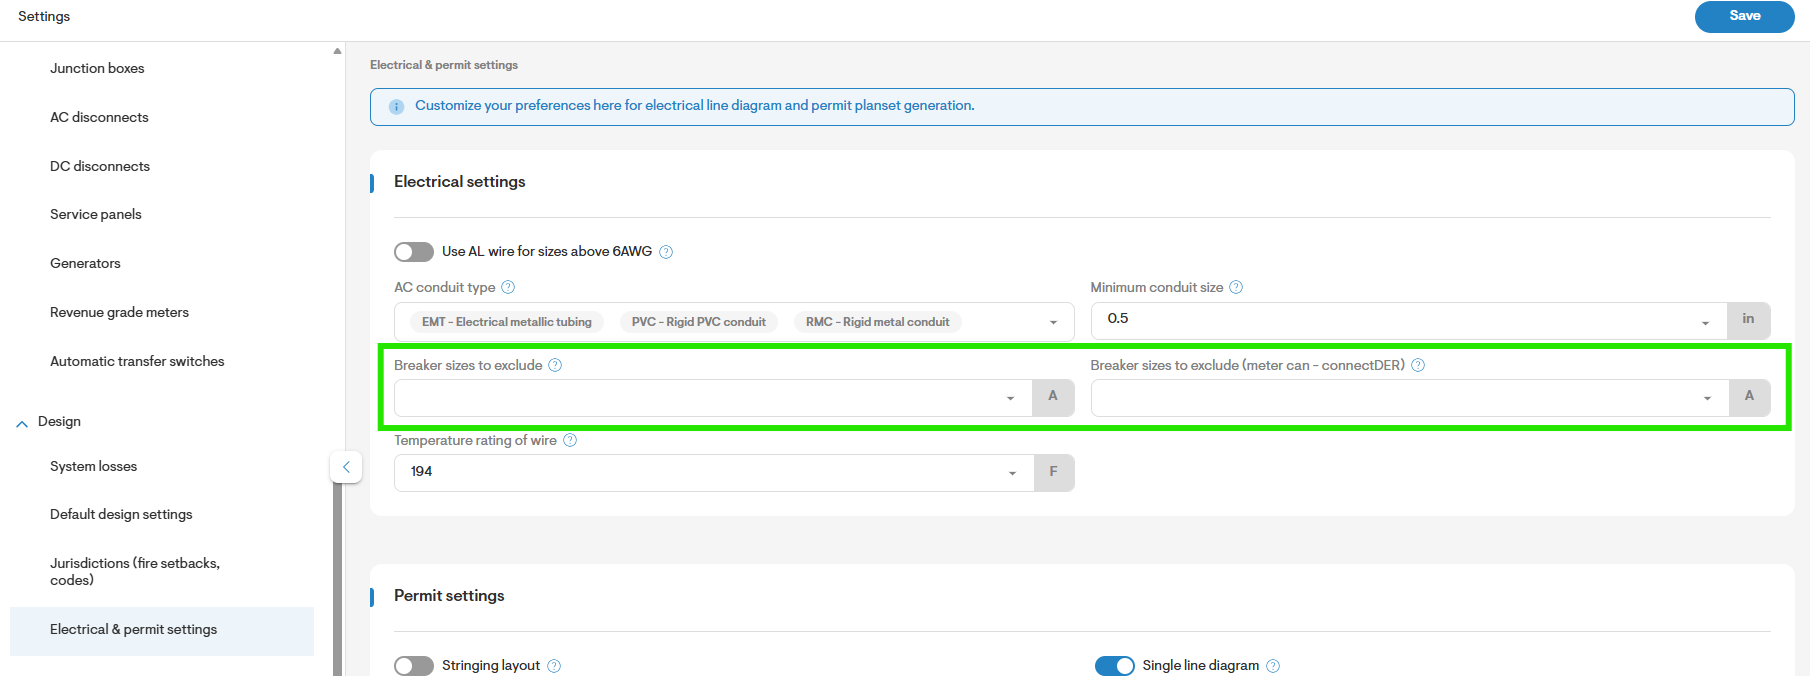
Users can specify breaker sizes that are to be excluded during SLD generation.
Say for example, 35A breaker is not easily available in the marker and user wants to skip it and move to next available breaker size (40A), simply select 35A in the field and generate line diagram. Solargraf will automatically display 40A breaker size and updates all the wire sizes accordingly.
Steps:
Go to Settings page under "Electrical & permit settings"
Select the breaker sizes you want to ignore for SLD generation. Multi select option.
Solargraf will generate the electrical circuit with next available breaker rating as per NEC.
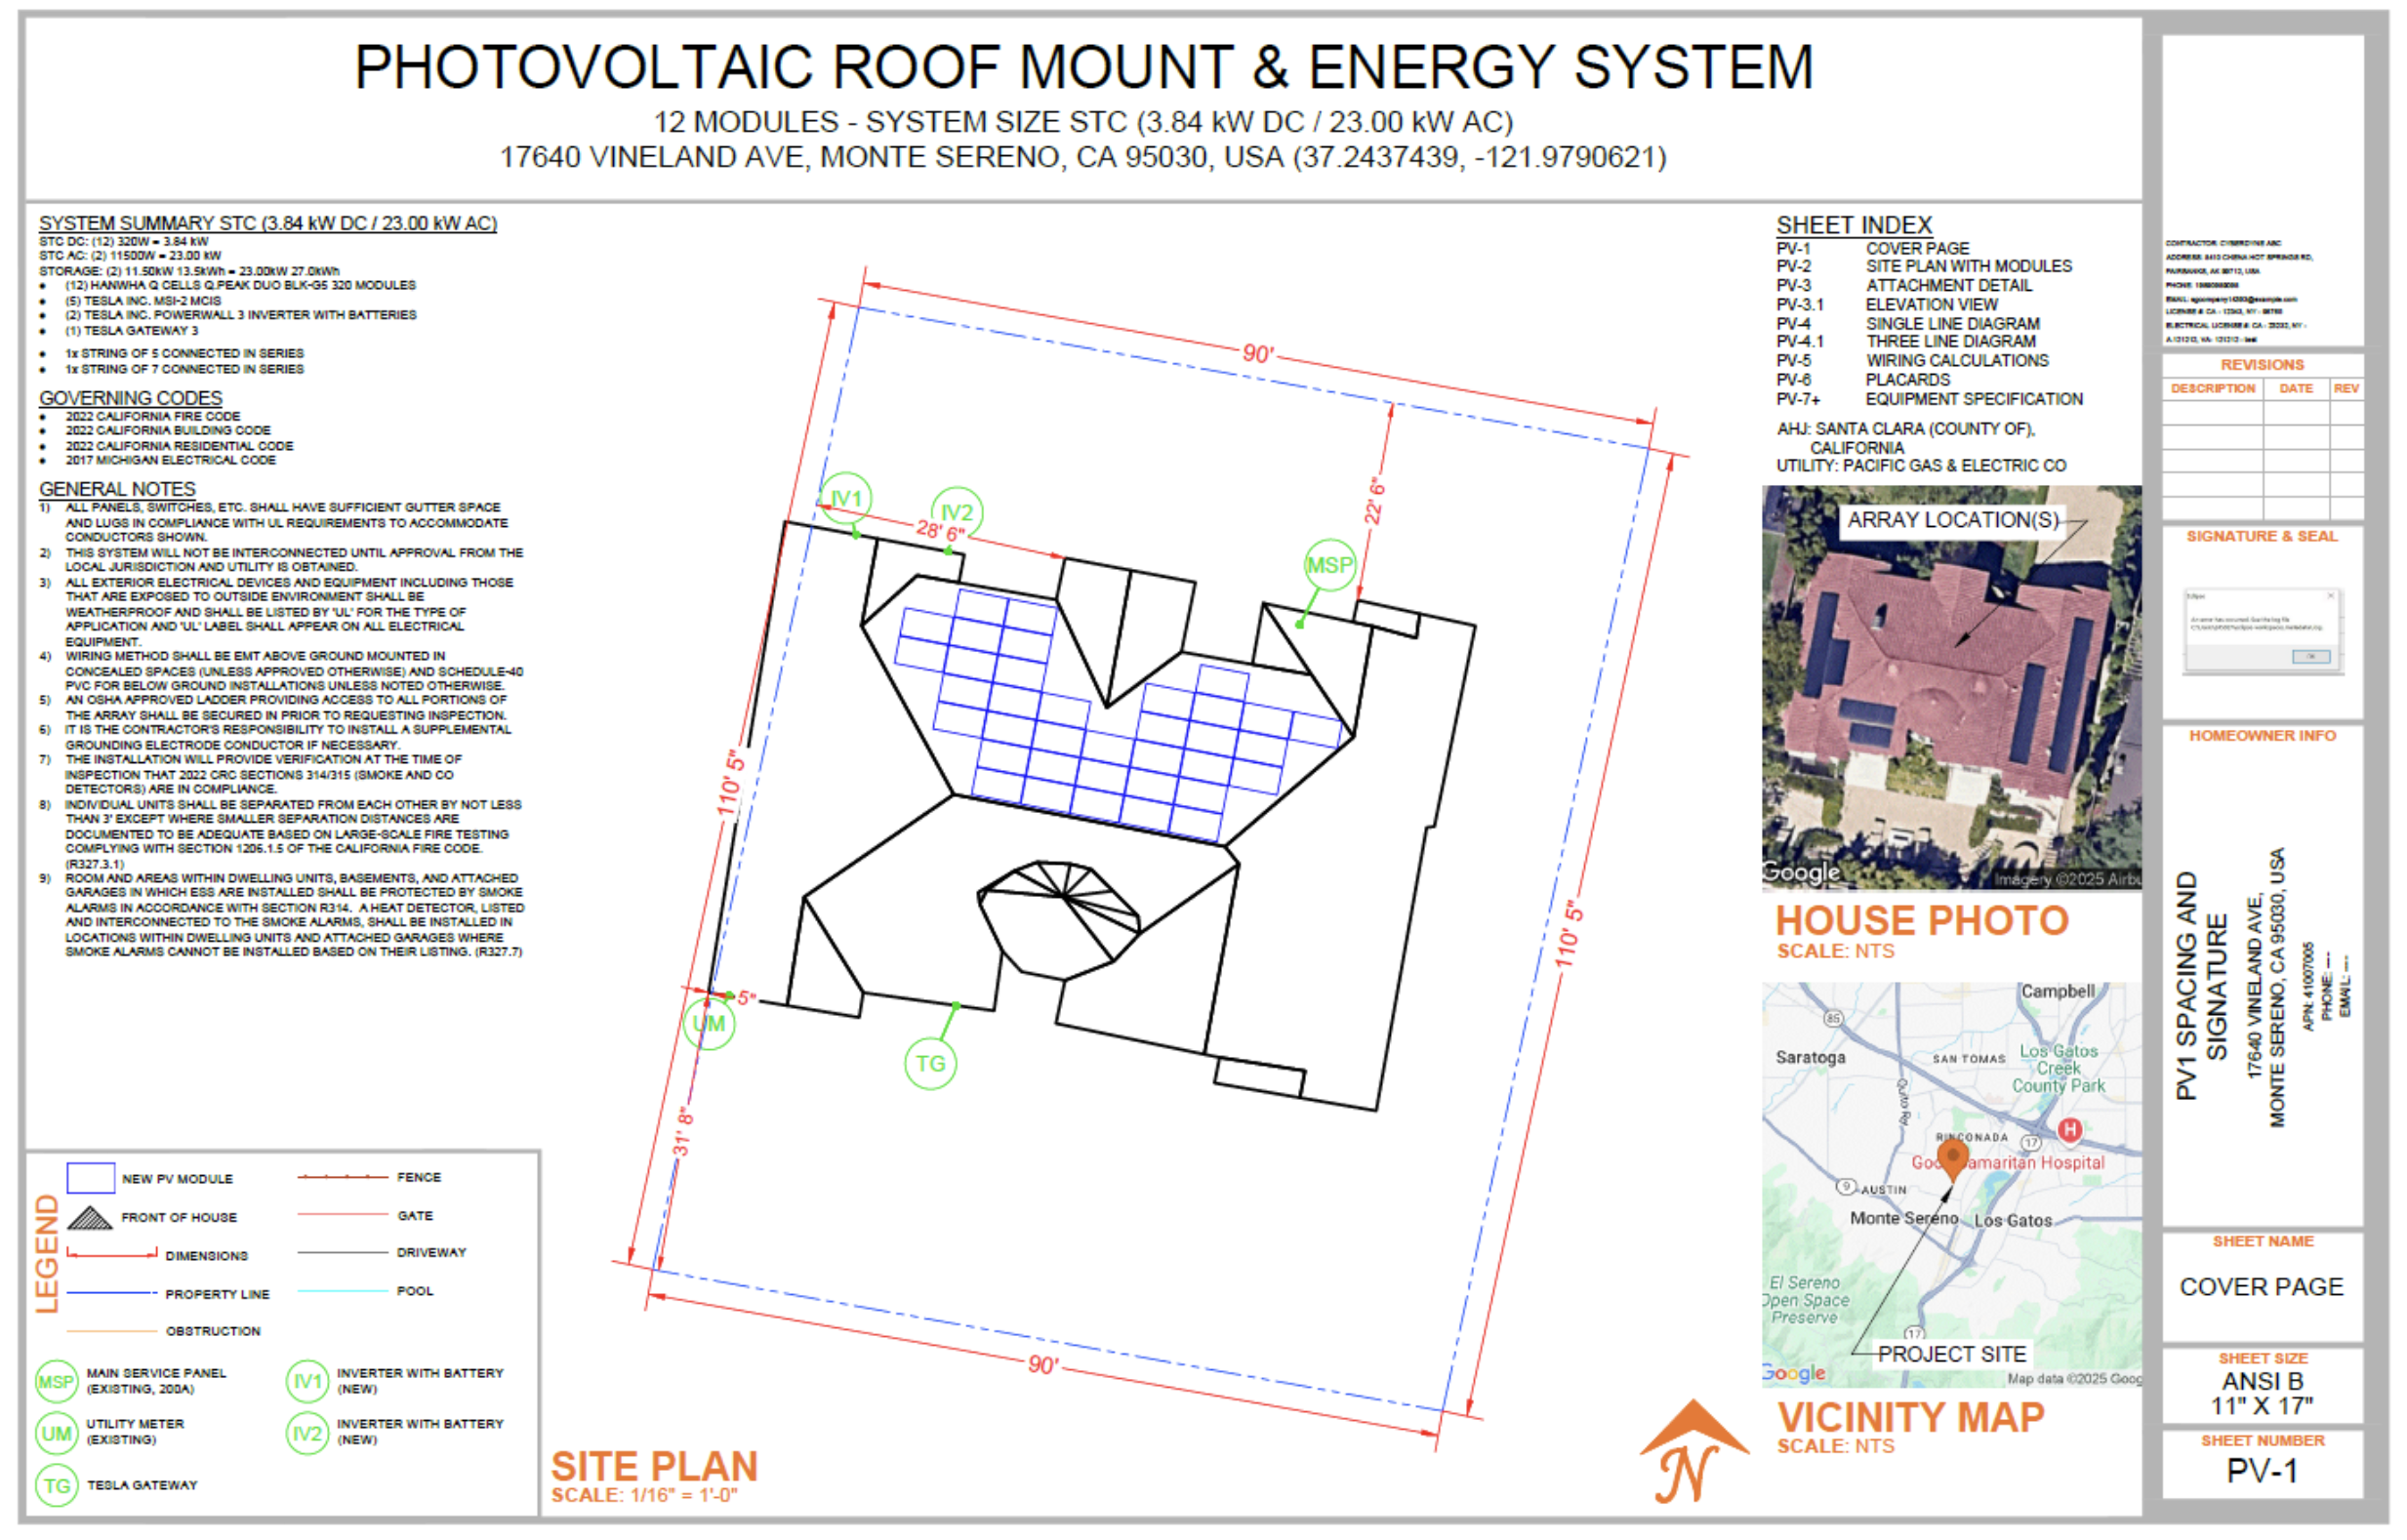
Improve the scaling factor on site plan (PV-1) to avoid white spaces
Solargraf will automatically adjusts the scaling factor to avoid as much of white space as possible while showing site plan on PV-1 page while sticking to the standard engineering/architectural scales.
Permit stamping services on self service planset generation
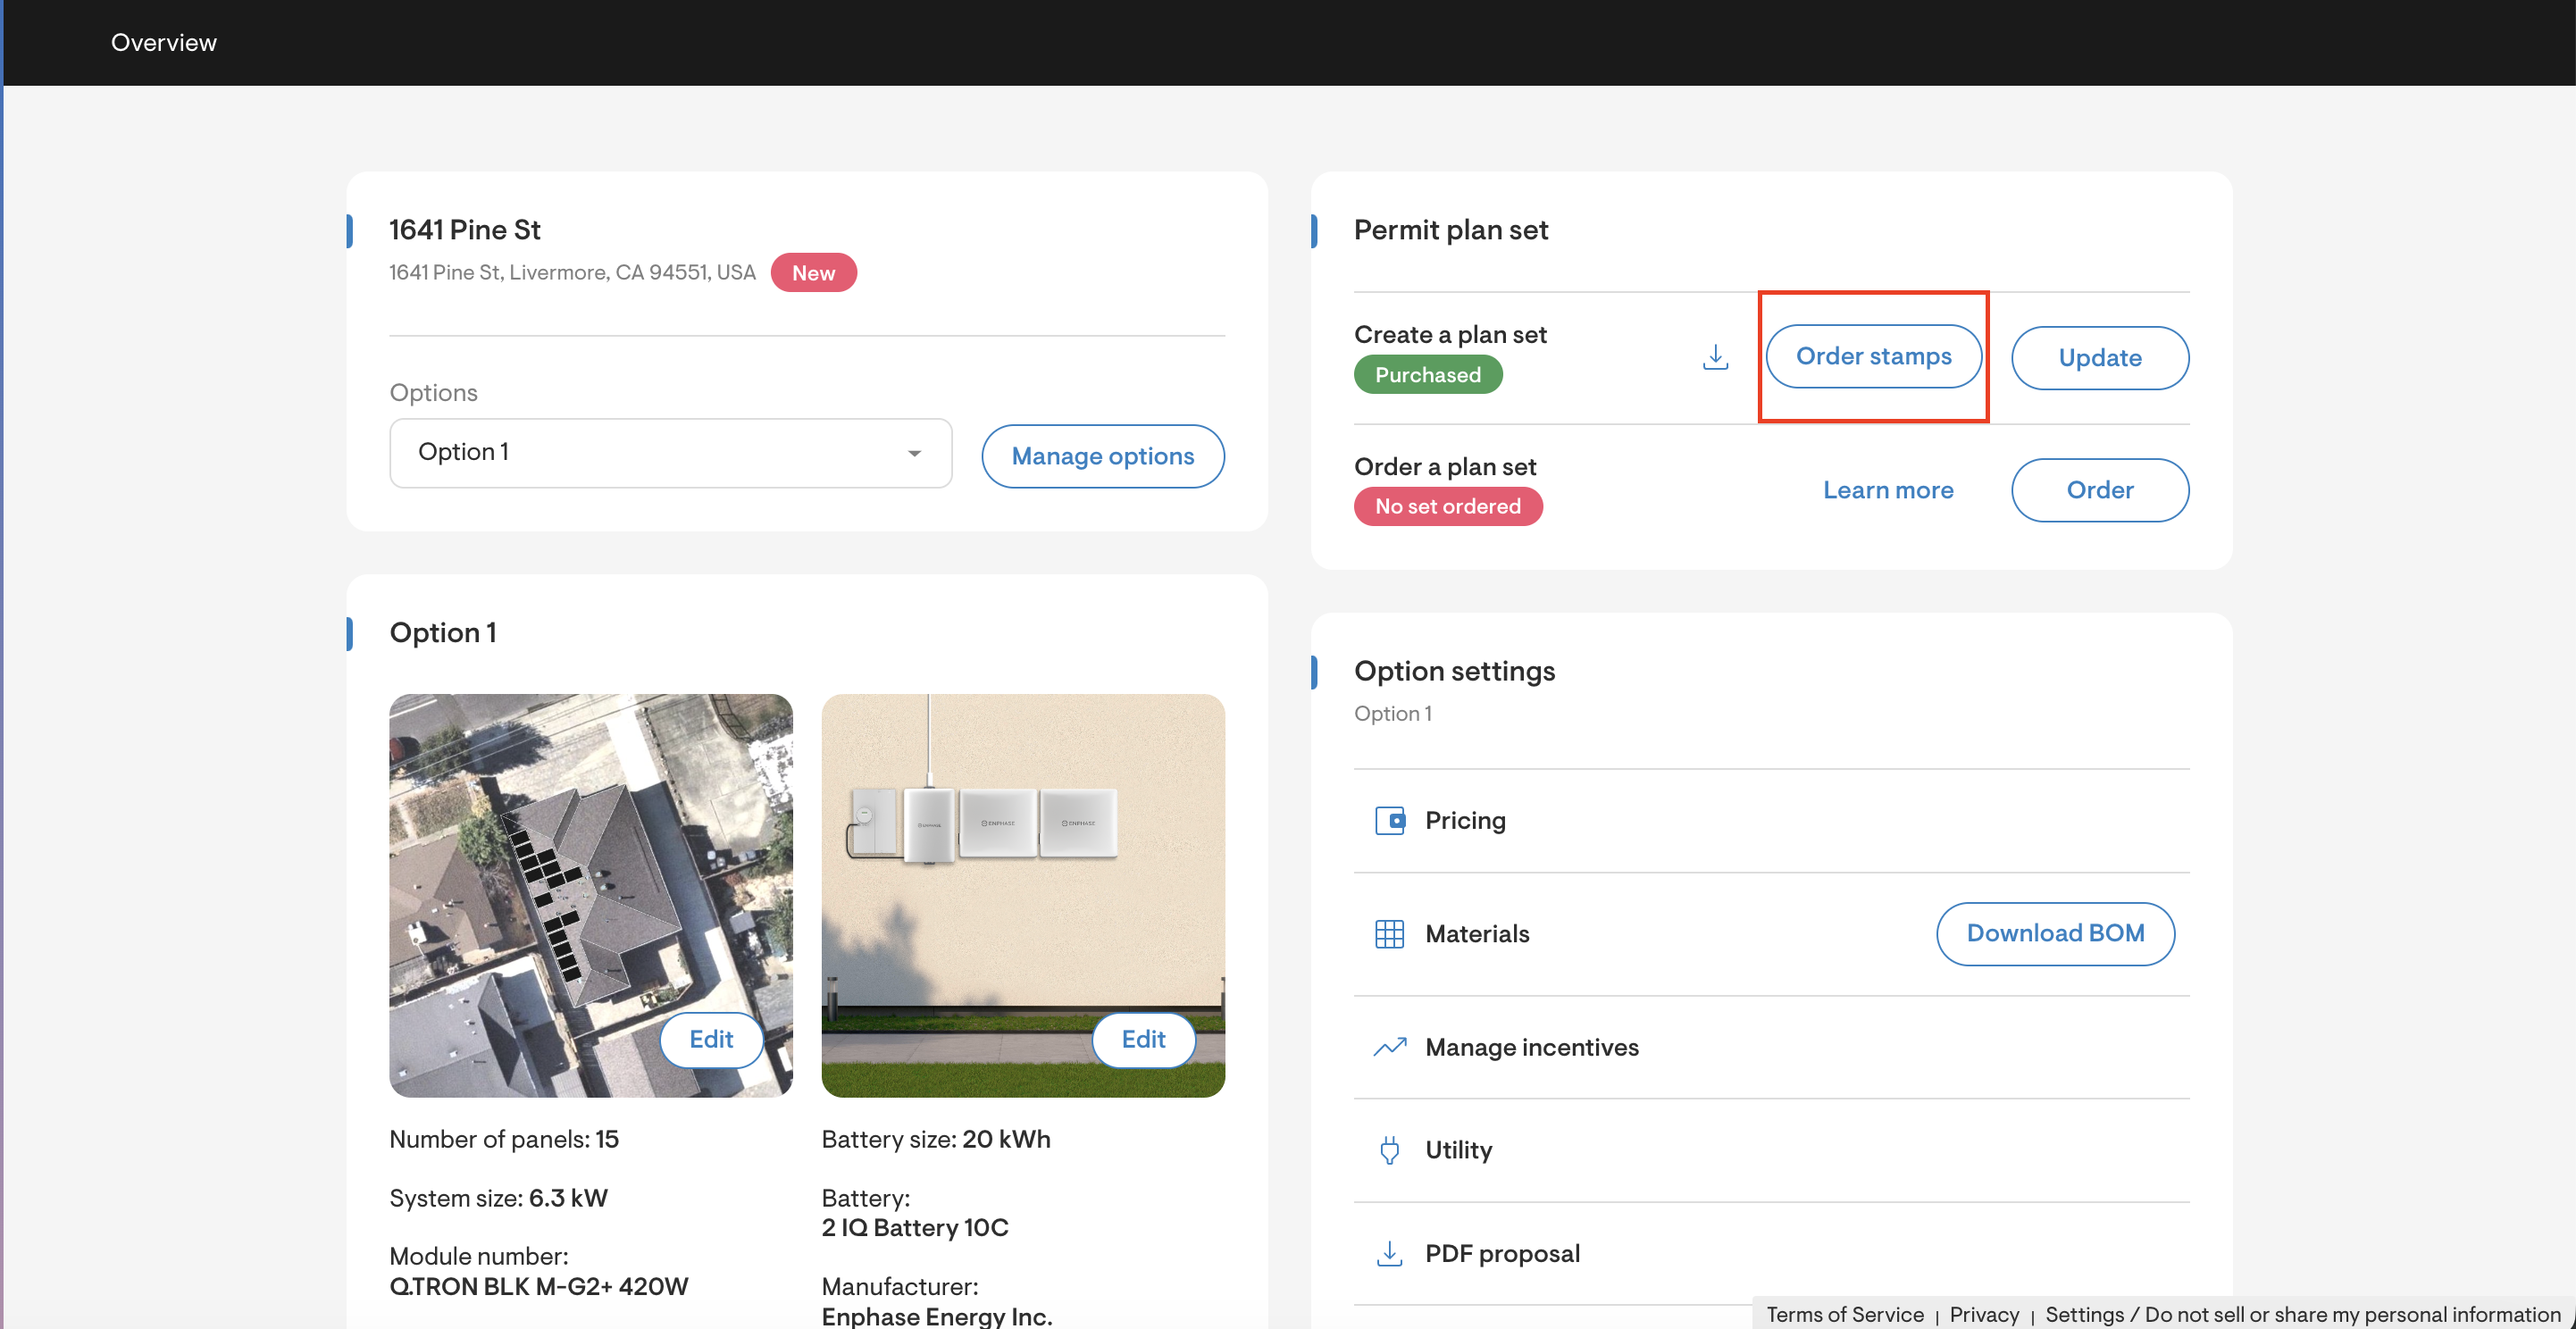
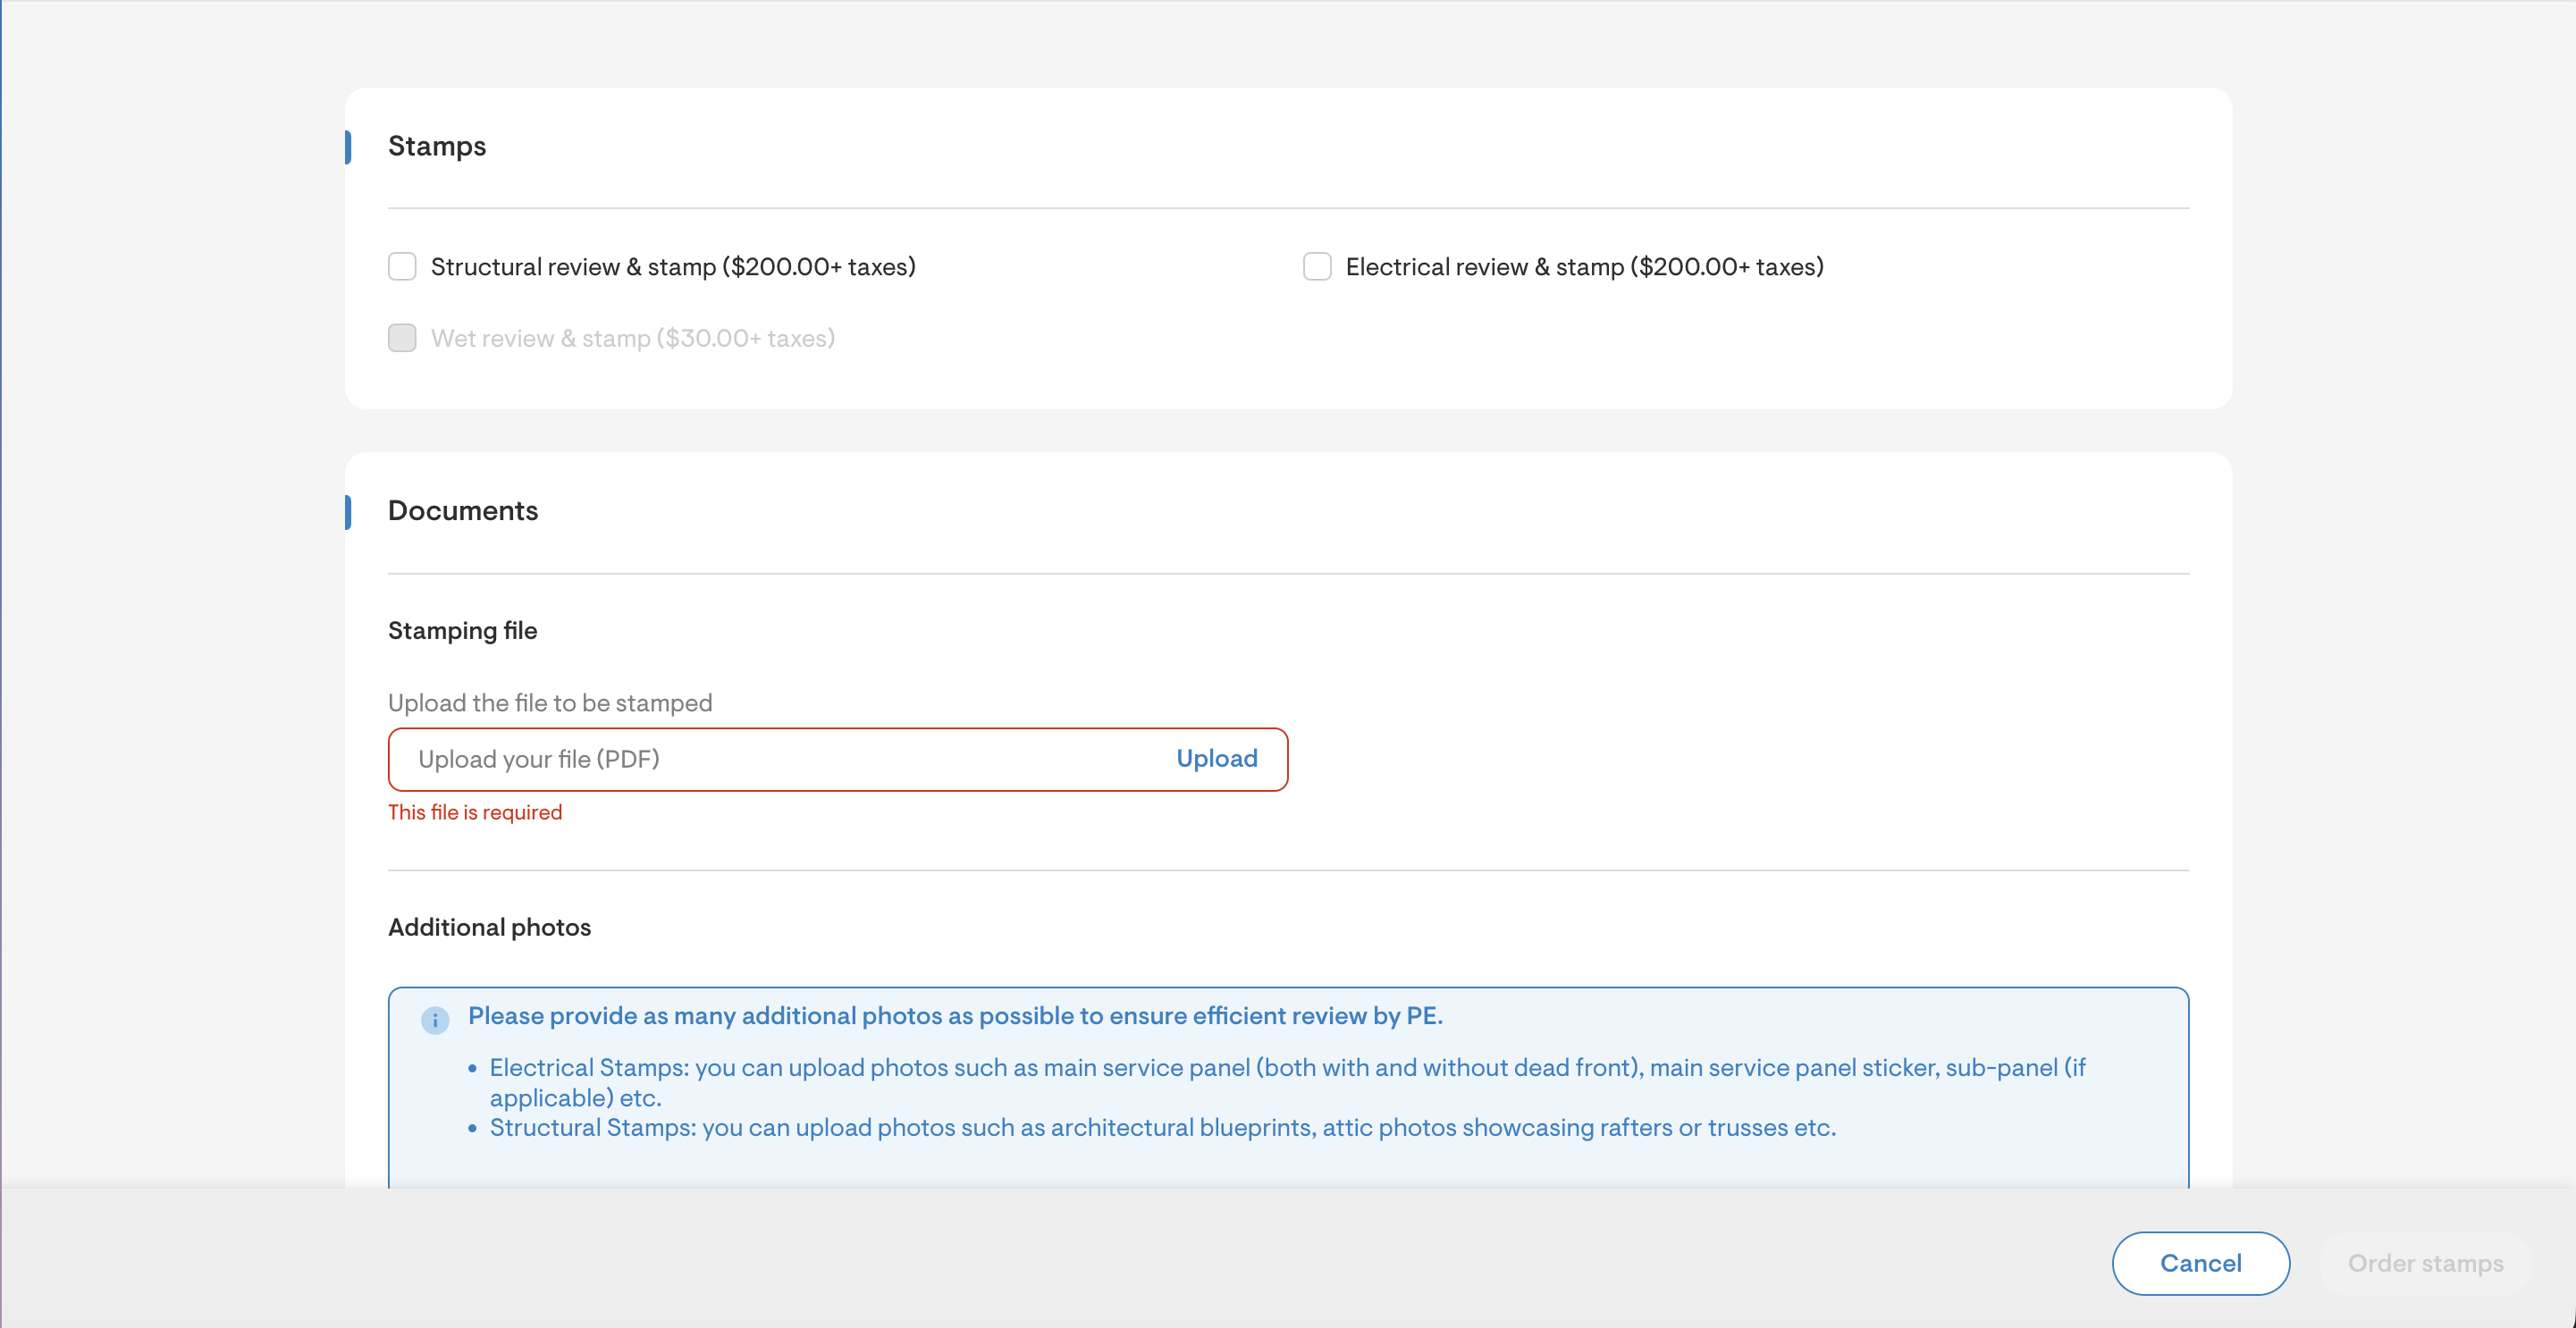
Users can order stamps for their automated permit plan sets at an additional cost. Once a permit plan set is generated, the Order stamps button becomes available. From there, users can select the required stamping service(s), upload the final plan set, and place the order. All further communication regarding the stamping process is handled via email.