Help Center Permit
How to create an Automated Self-Service Permit Plan-Set
Published on 18 Sept 2024
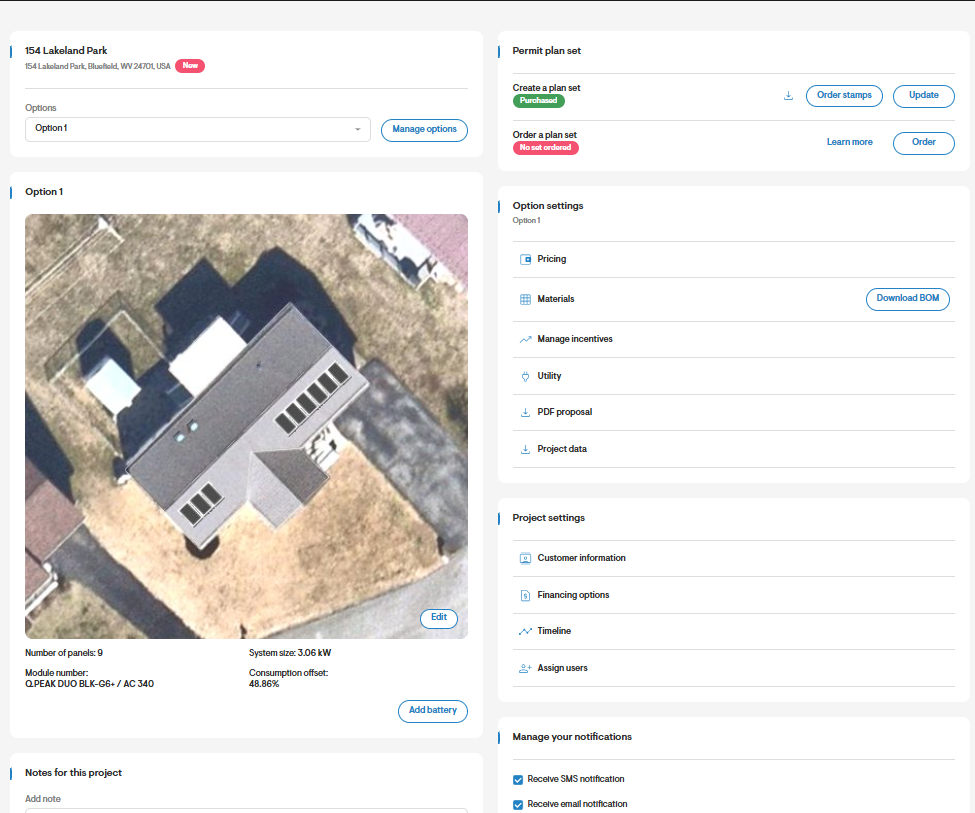
There are two ways to access the permit design page:
- From the Overview page, click the Create button under the Permit plan set section.
- From any step within the design tool, click the Permit step along the black navigation bar.
Requirements
Roof design
Full roof coverage: Ensure all roof facets are drawn accurately.
Accurate orientation: Define pitch and azimuth for each roof facet or use the wizard button for automatic detection.
Identify obstructions: Mark all obstructions on the roof design or use the wizard tool for automatic detection.
Solar design
Setback compliance: Ensure setbacks are correctly applied. For best results, use the address-based AHJ recommendations from the fire setbacks section where available.
Panel and inverter placement: Position panels and inverters on designated roof facets.
Microinverter branching/module stringing: Ensure that microinverters are correctly branched, or for designs with string inverters, ensure that all modules are appropriately strung.
Battery design
Battery addition: For projects with storage, add the battery configuration from the battery design tool.
Electrical design
Microinverter branching/module stringing: If not already completed during the solar design, ensure all microinverters are correctly branched or all modules are appropriately strung.
Equipment placement: Position all electrical equipment in their exact installation locations.
Single line diagram (SLD): Generate and review the line diagram.
Creating the permit plan set
Permit design page
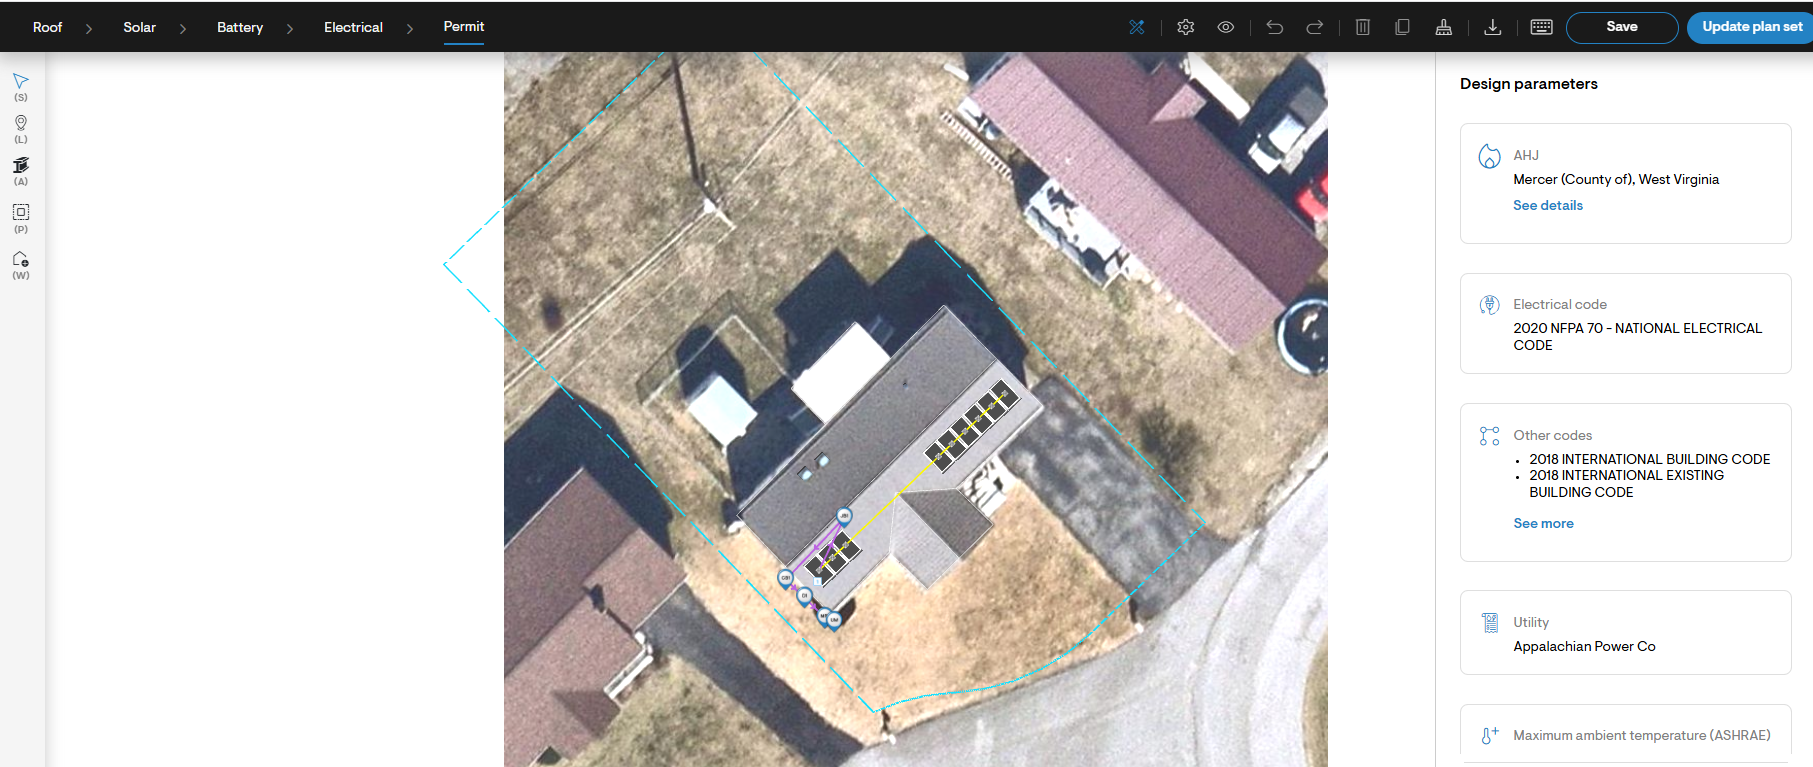
Validate design parameters:
Parameters include weather data (wind, snow load, exposure category), ambient temperature, and more. Click on fields to edit their values.
When applicable, click See details under the AHJ field to view specific requirements for this jurisdiction. Solargraf maintains a database of AHJ information, including all details necessary for permit plan set generation.
Note: This feature is available only for jurisdictions selected from Solargraf's address-based recommendation list.
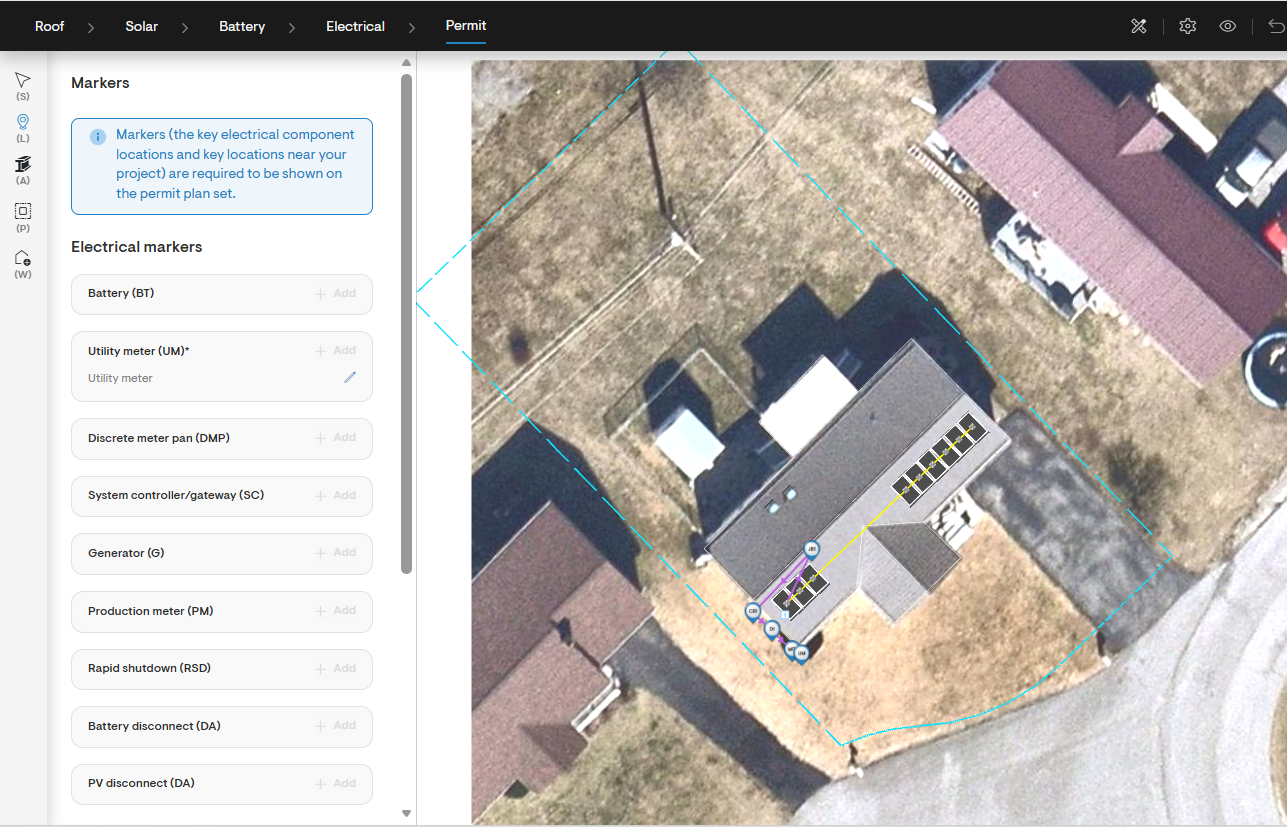
Place electrical markers:
Position additional electrical components in their exact installation locations within the design. These include components such as the utility meter, battery installation point, etc. and are essential for the final permit plan set.
Wiring details for these components can be found in the line diagram section.
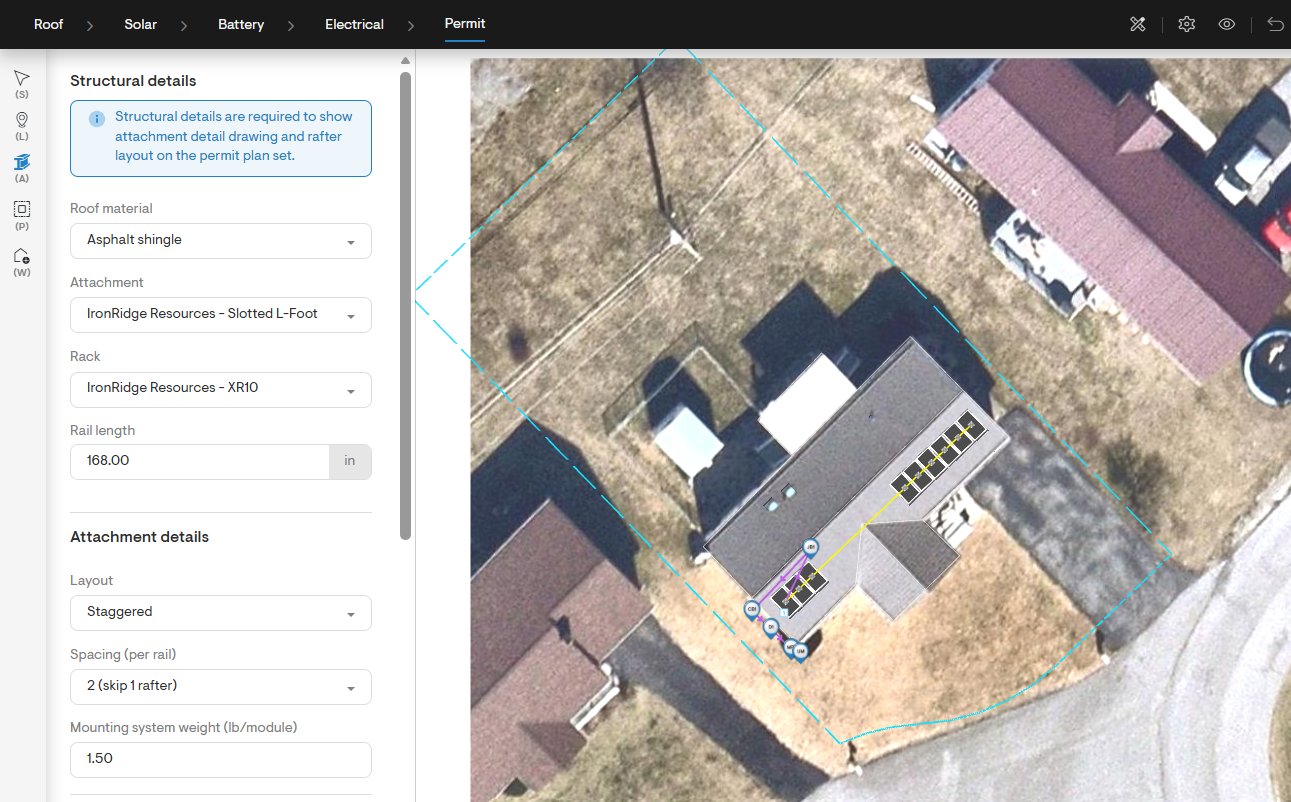
Structural details:
Provide structual details for roof facets where panels will be placed, including roof material, the make and model of racks and attachments, rafter details, and more.
This information is necessary for the attachment detail drawing and rafter layout on the permit plan set.
Generate plan set:
Once reviewed and completed, click the Generate plan set button to proceed to the permit overview page.
Purchasing the plan set
Verify information and purchase plan set:
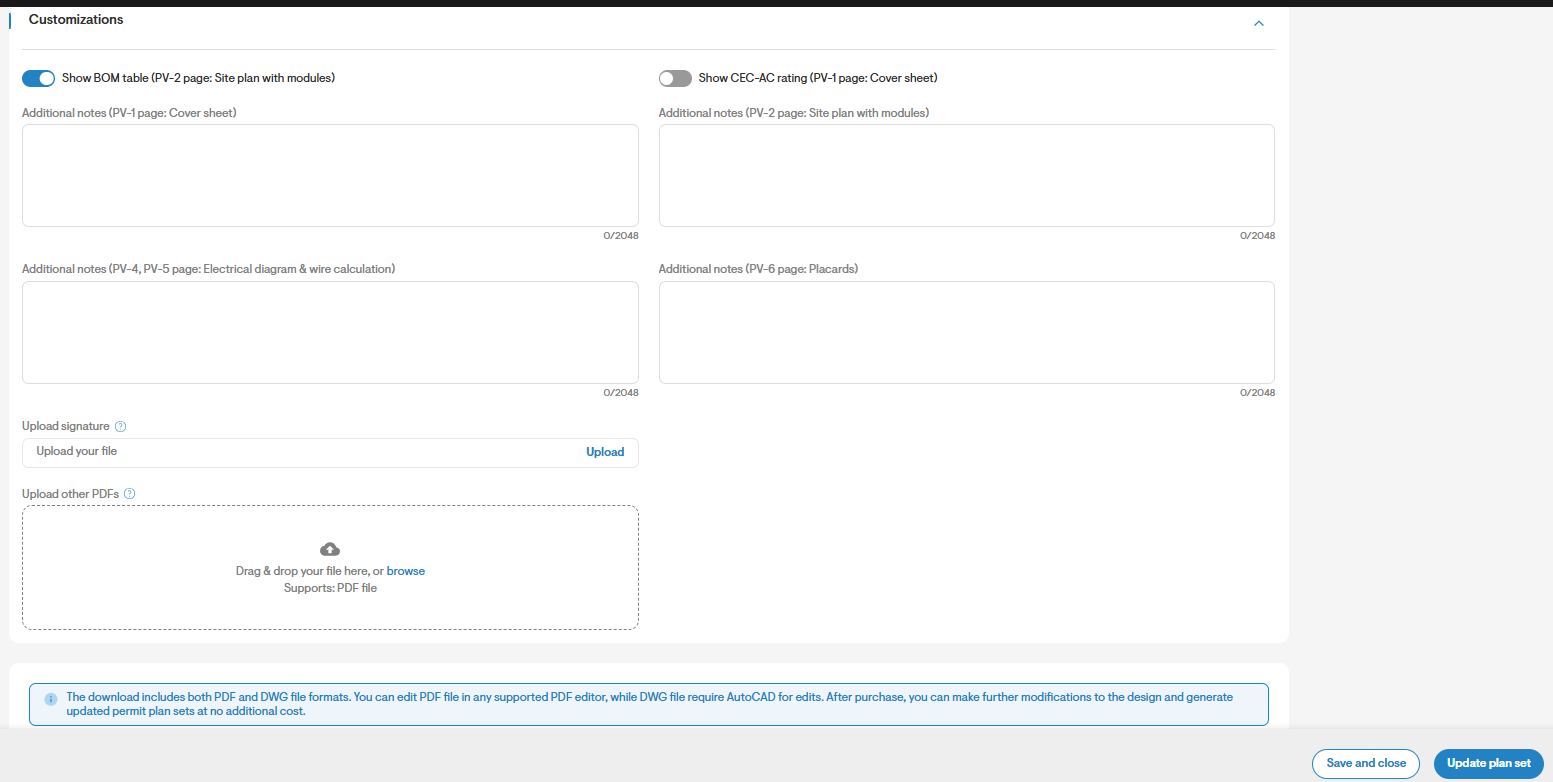
Ensure the client and installer details are accurate and complete.Review the required notes sections and update as needed.
Based on local requirements, upload any additional documents which will need to be part of the final permit plan set. Examples may include homeowner authorization letters, elevation maps, floor plan, etc.
Finalized plan set:
When ready, access the plan set from the Overview page by clicking the Download plan set button under the Permit plan set section.
The download will contain both PDF and DWG files. While the PDF can be modified using any supported PDF editor, edits to the DWG file require AutoCAD.
After purchase, the permit plan set can be updated and regenerated as needed to reflect new changes to the design.
Click here to learn about common questions related to the Permit Automation feature.