Help Center
Setup a custom prepaid lease in Solargraf
Published on 21 Sept 2026
This guide explains creating, enabling, and managing a custom prepaid lease in Solargraf. It focuses on the setup workflow in company and project settings so teams can make the prepaid lease available in proposals quickly and consistently.
Create a custom prepaid lease in Company Settings
Creating a prepaid lease in Company Settings makes it available for use across your organization’s projects.
- Open Company Settings.
- Go to Financing options.
- Select the Prepaid lease tab.
- In the Imported & custom prepaid leases section, click Create prepaid lease.
Complete the prepaid lease details
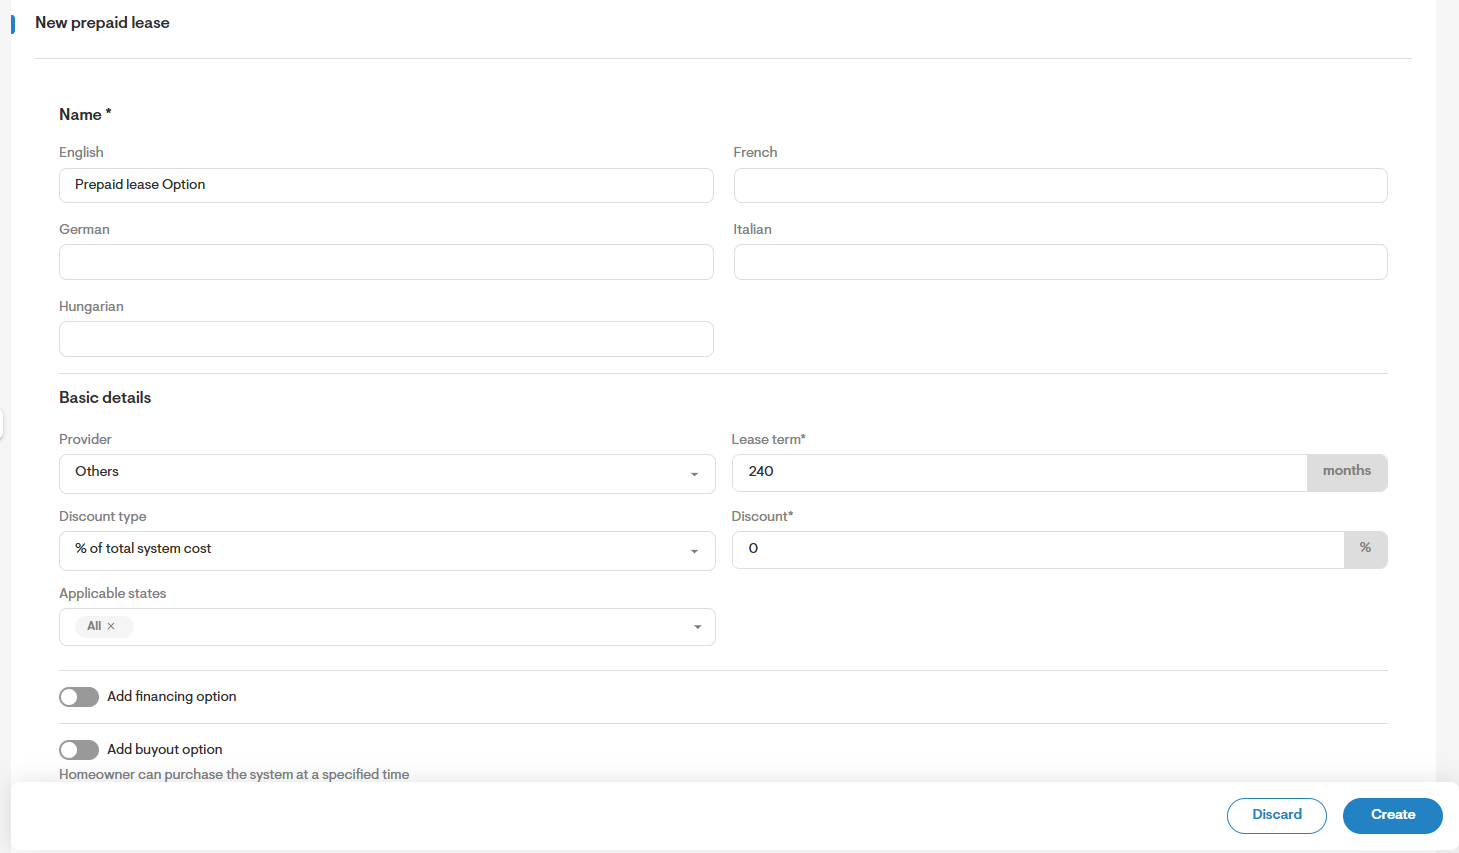
The New prepaid lease form opens. Complete each field carefully before saving.
- Name: Enter a clear prepaid lease name. If multiple languages are enabled, complete the name fields as needed.
- Provider: Select the provider from the dropdown. If the lease is not tied to a listed provider, select Others.
- Lease term: Enter the lease term in months using a positive whole number.
- Discount type: Choose the discount format between % of total system cost or Fixed ($).
- Discount: Enter the discount value required for the selected type.
- Applicable states: Select the states where the prepaid lease can be used.
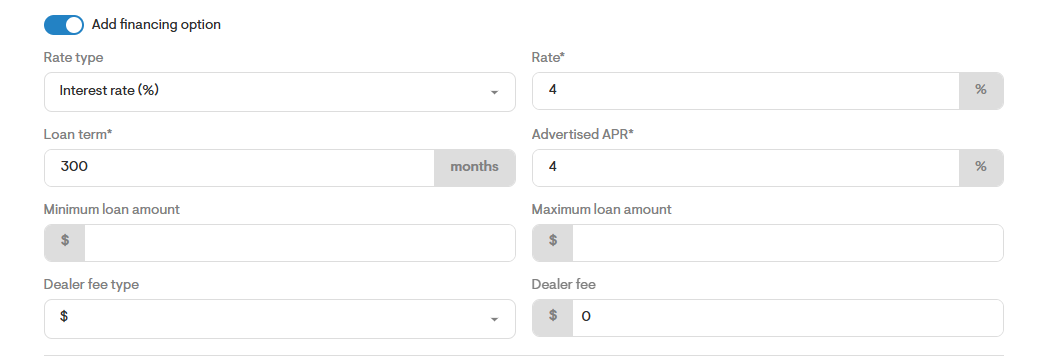
- Turn on Add financing option (if applicable) to add a prepaid lease with financing enabled, with fields specific to a loan option like rate type, advertised APR, loan term, etc.
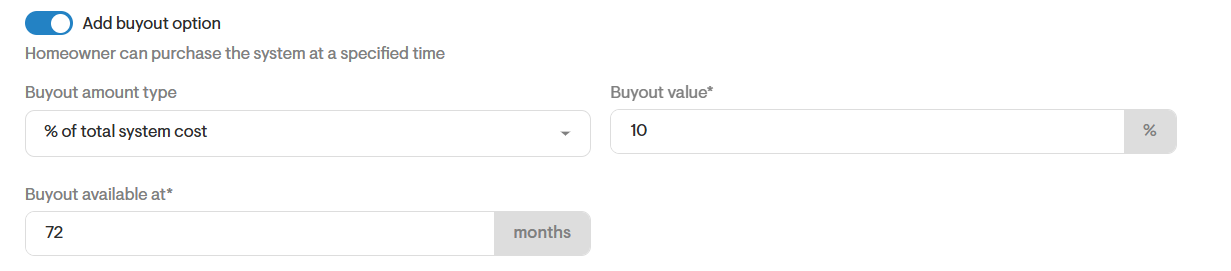
- Turn on Add buyout option (if applicable) if the prepaid lease has specific buyout terms.
- Add any prepaid lease notes in the Notes section, including translated notes if your account uses multiple languages.
- Review the form and click Create. The Create button stays disabled until all required fields are completed.
After the prepaid lease is created, it is enabled by default in the Imported & custom prepaid leases table to be used on projects.
Note: If a prepaid lease is not enabled, it will not appear as an available financing option in the project.
Note: If you want new proposals to open with prepaid lease selected by default, update “Open proposal with” to prepaid lease in company settings. This option is available only if at least one prepaid lease is enabled. If prepaid lease is the default, you cannot disable or delete the last available prepaid lease until another default option is selected.
Create a project-specific custom prepaid lease
Use a project-level lease when the setup should apply only to one customer project instead of the whole company.
- Open the project.
- Go to Project Overview.
- Open Financing options.
- Select the Prepaid lease tab.
- Click Create prepaid lease.
- Complete the form using the same fields used in Company Settings.
- Click Create.
Note: A project-specific prepaid lease is available only within that project.
Prepaid lease on proposal
In Solargraf, how a custom prepaid lease is presented on the proposal (both on webquote and the generated PDF) depends on whether loan financing is enabled or if it is treated as a discounted cash option.
1. Payments section breakdown
A. Prepaid lease without financing (Discounted cash)
When financing is OFF, the option behaves like an upfront cash purchase with an applied prepaid discount:
- Total system cost: Displays the gross system cost before prepaid discounts
- Benefits included: Displays the calculated prepaid lease discount amount
- Initial cash outlay: Discounted amount which becomes the cost to be paid by homeowner
- Buyout amount: If configured, displays as a separate line item below the payment summary
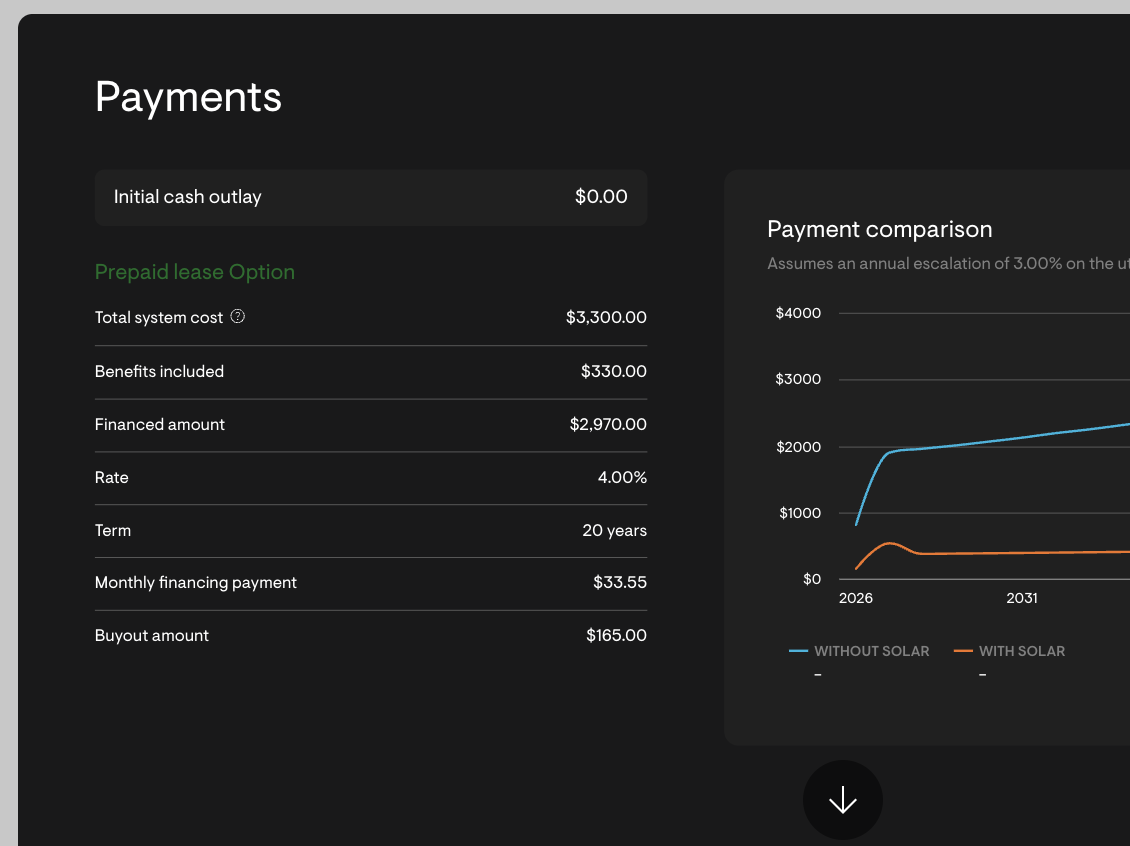
B. Prepaid lease with financing
When financing is ON, the discounted amount becomes the loan principal:
- Total system cost: Displays the gross system cost before prepaid discounts
- Benefits included:
- Shown if the dealer fee is 0
- Hidden if a non-zero dealer fee is added (to prevent confusion since the dealer fee is added on top of the financed amount)
- Financed amount: Displays the principal financed
- Initial cash outlay: Shows as 0 since there’s no upfront cost to homeowner if prepaid lease is financed
- Rate & term: Displays the loan interest rate and financing term
- Monthly financing payment: Amortized monthly payment calculated over the loan term
- Buyout amount: Displays the buyout amount if enabled
2. Buyout terms presentation
If a buyout option is configured at a specific milestone (e.g., month 120 / Year 10):
- Performance analysis & Payment Comparison Tables: The buyout amount is added to cash flow in the exact month when it’s defined
- Estimated 25-Year Total Payments: The buyout amount is factored into the 25-year total payment calculations in both the Savings section and the Financial Comparison chart
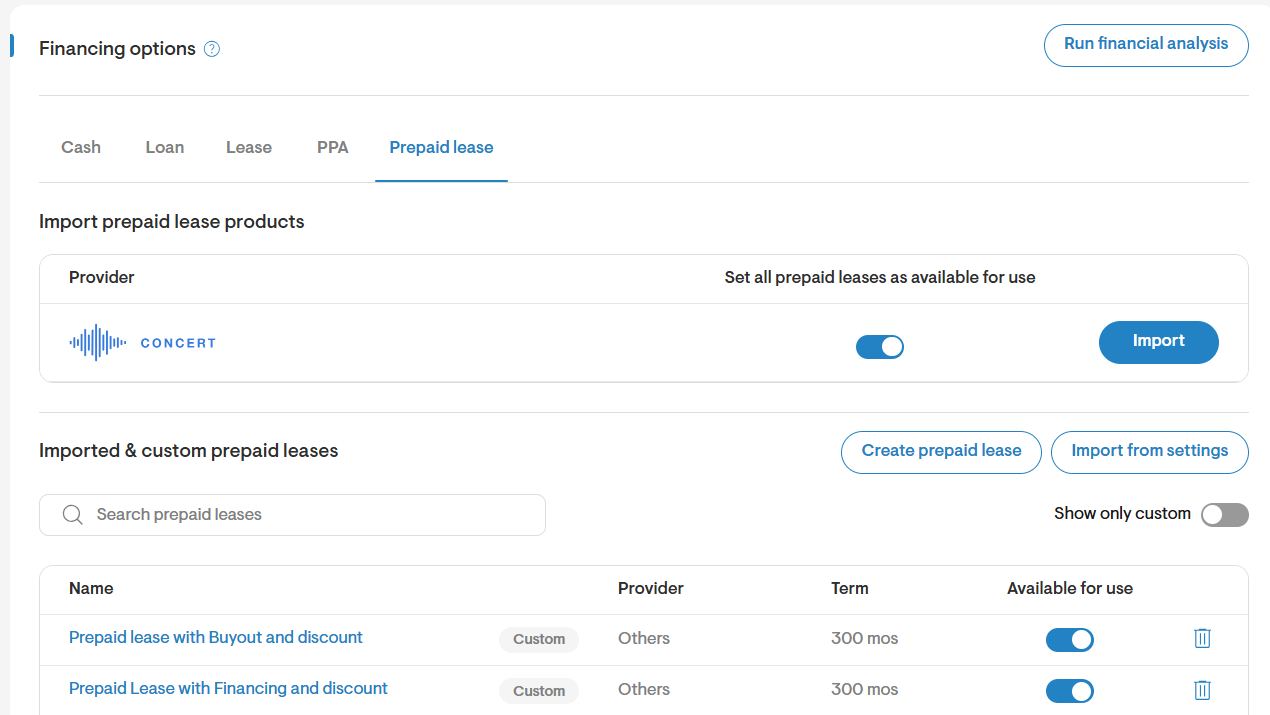
Manage prepaid lease availability in a project
Even when a lease exists at the company level, you should verify it is enabled in the project where it will be used.
- Open the project’s Prepaid lease settings.
- Locate the prepaid lease in the list.
- Turn on Available for use.
Edit an existing custom prepaid lease
If prepaid lease details change, you can update the saved configuration from the prepaid lease list.
- Open the relevant Prepaid lease tab in Company Settings or the project.
- Select the lease you want to update.
- Edit the fields as needed.
- Click Save.
Configure extra costs and discounts for prepaid lease
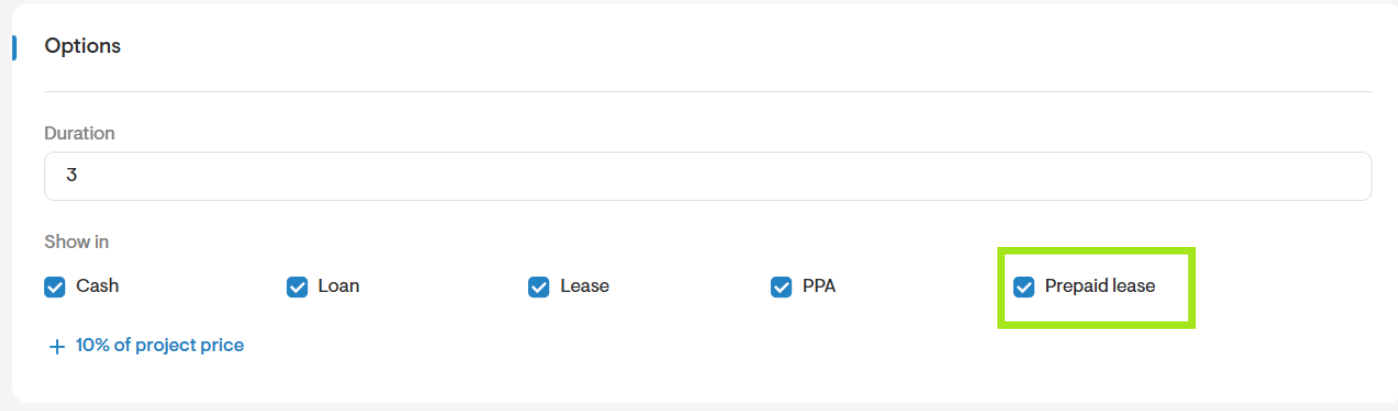
If your team uses extra costs, discounts, or commissions, confirm that each item is set to appear for prepaid lease.
- Open Company Settings or Project Settings.
- Go to Incentives & Extra Costs.
- Create a new item or edit an existing one.
- In the Show in section, select Prepaid lease.
- Save the item.
Note: Existing items do not automatically apply to prepaid lease. Review them individually if they should be included.
Configure timeline steps for prepaid lease
Timeline steps can also be controlled separately for prepaid lease.
- Open Company Settings or Project Settings.
- Go to Timeline.
- Create a new step or edit an existing one.
- Select Prepaid lease in the available options for the step.
- Save the step.
Troubleshooting
| Issue | What to check | Recommended action |
| Create button is disabled | Required fields may be incomplete | Complete the lease name, lease term, and required discount fields. |
| Prepaid lease does not appear in a project | The lease may not be enabled or the state may not match | Confirm the prepaid lease is marked Available for use and that the project state is included in the prepaid lease settings. |
| Prepaid lease cannot be disabled or deleted | It may be the last available prepaid lease while prepaid lease is the default proposal option | Change Open proposal with to another option before disabling or deleting the lease. |
| Extra costs or discounts are missing | The item may not be set to show in prepaid lease | Edit the item and select Prepaid lease in the Show in section. |
| Timeline steps do not appear | The steps may not be enabled for prepaid lease | Edit the timeline step and select Prepaid lease before saving. |