Help Center Document Management
DocuSign: How to Send a Document
Published on 13 Oct 2022
This guide will walk you through how to send a contract to be signed using the DocuSign integration.
How it Works
Users are able to connect a Docusign account to their Solargraf account. Any user within the Solargraf account is able to utilise this integration to send out documents to customers, given they have the correct user permissions. Signees and counter-signees do not require a Docusign account to be able to receive, view, and sign a document.
Each Docusign account is limited by the available number of envelopes that can be sent out. Once the number of available envelopes has been met, you will no longer be able to send documents through Solargraf. To prevent any disruptions to your work flow, you may click here to learn more about using and managing enevelopes in Docusign before you get started.
Document Templates on the Overview Page
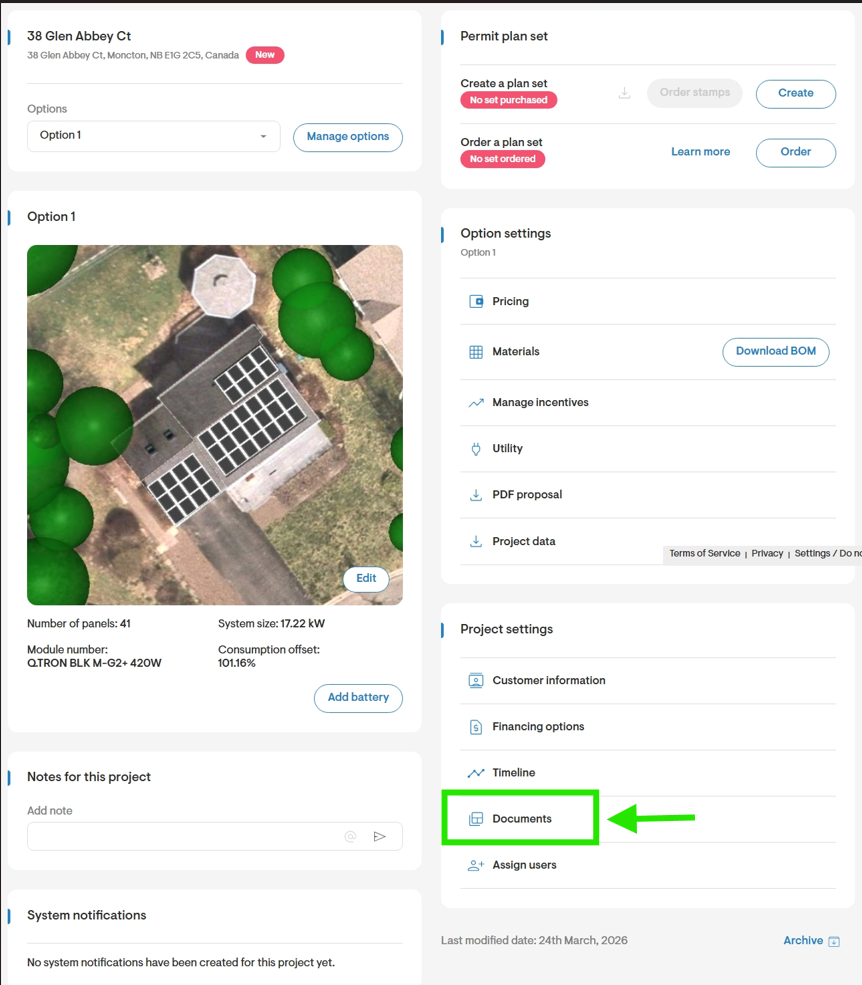
The first step to signing documents using the DocuSign integration is to go to the Document Templates section of your project.
This will load a list of the available documents that may be signed. You will also see the option to Add New Document Template which will allow you to add in a new document template to use.
Import Document templates
You can import and send an existing document from the Company page by following the steps below:
- Click on the dropdown arrow next to Import template.
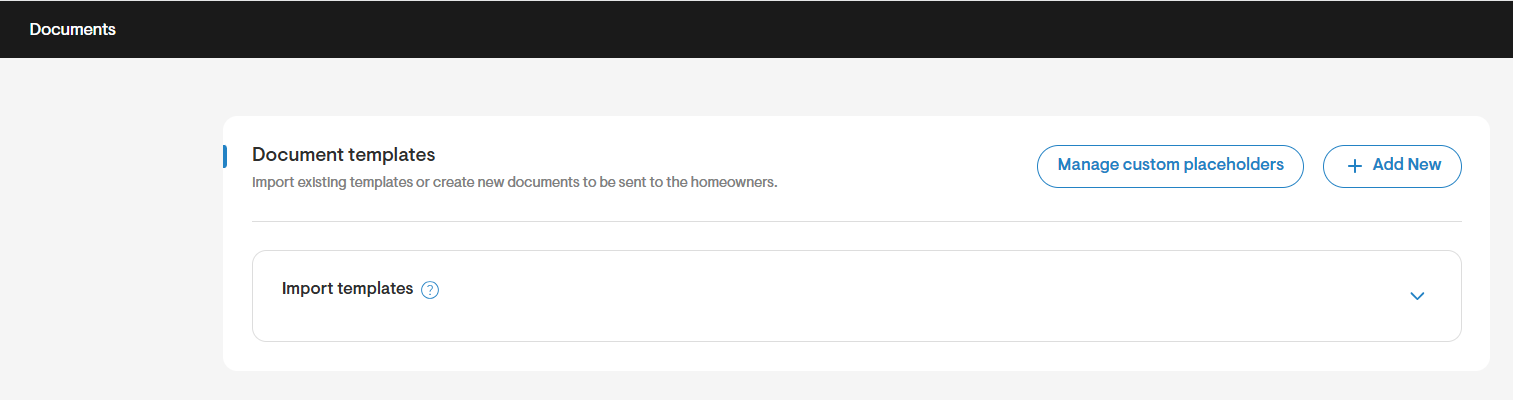
- From the list of available document templates, select the checkmark next to the one(s) you would like to send.
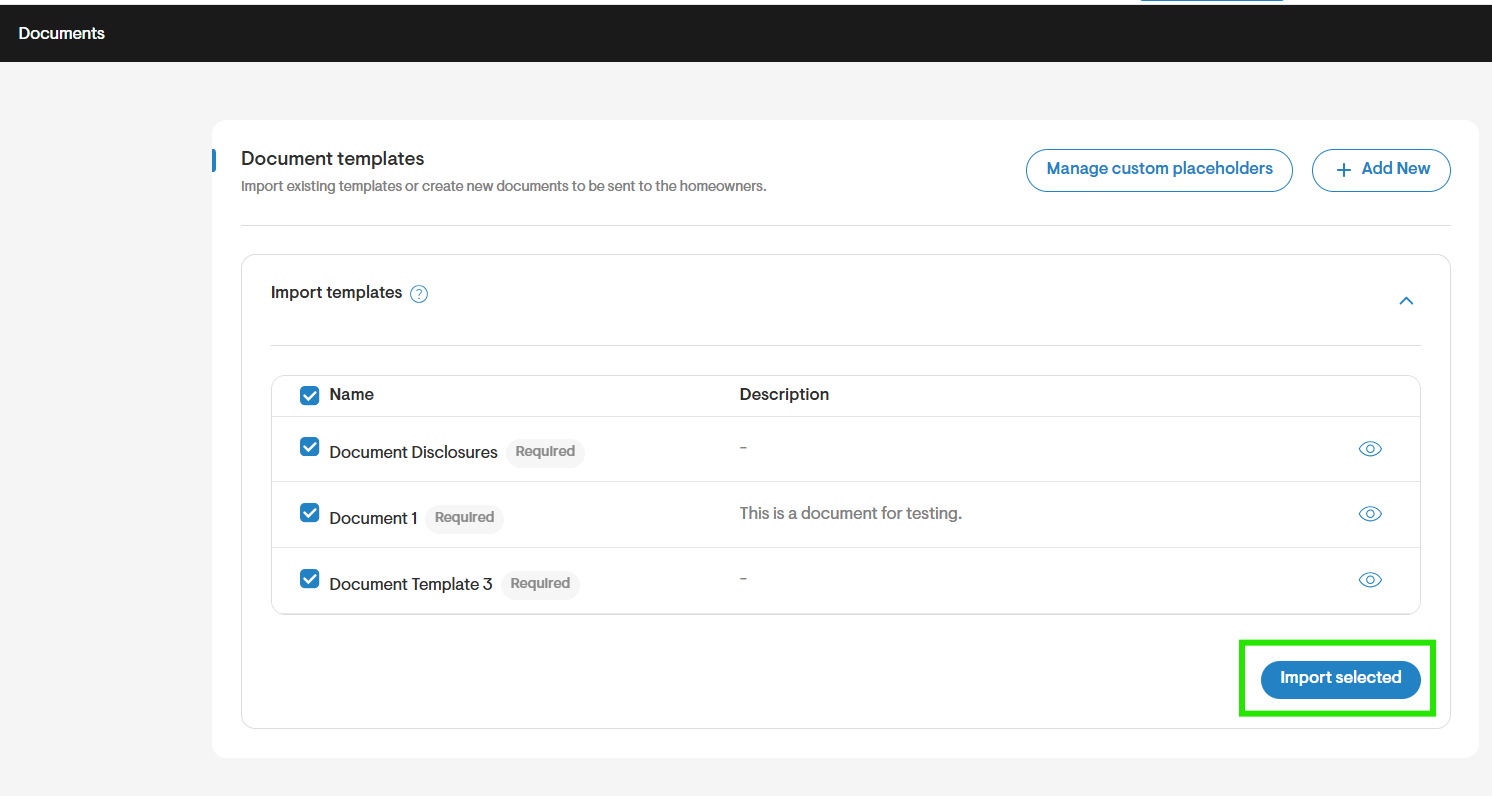
- Click Import selected.
Send the imported document
- To send the imported document use the checkmark again and select the desired document to be sent.
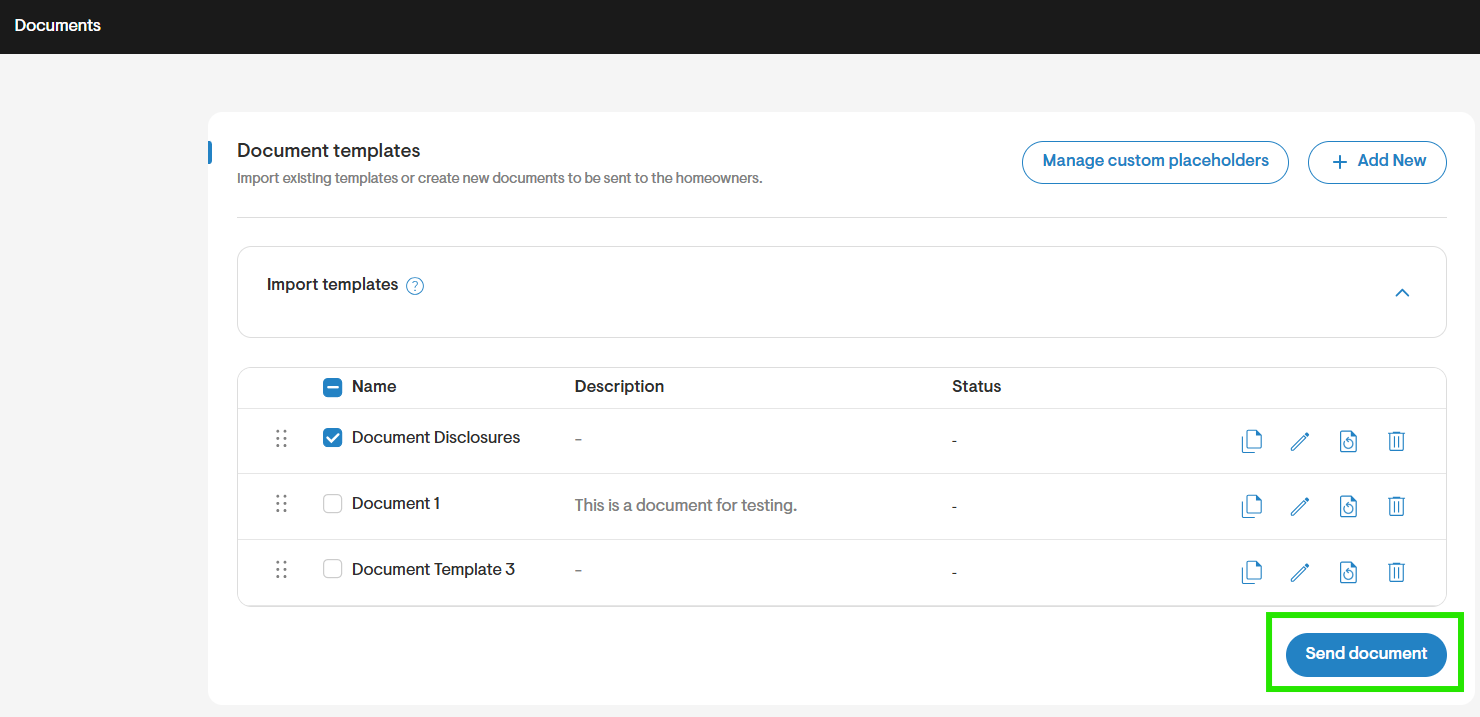
- Click Send document.
- This will prompt you with a pop-up to select the Design Option you would like to send the contract for. Select the correct Design Option and Financial Type.
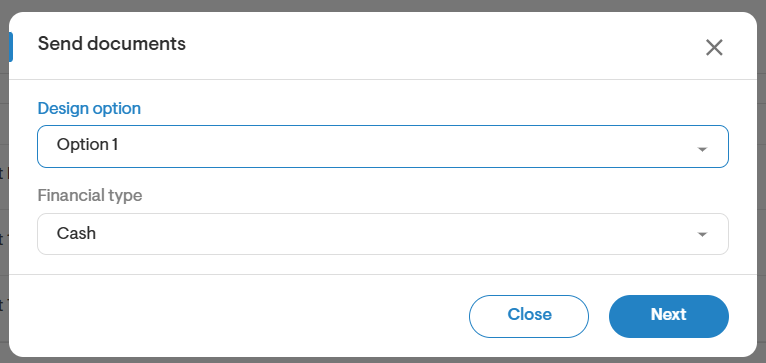
- Click Next.
- Next, you can determine how you'd like to send the document. The options are to send it via SolarGraf or DocuSign. For this example select DocuSign.
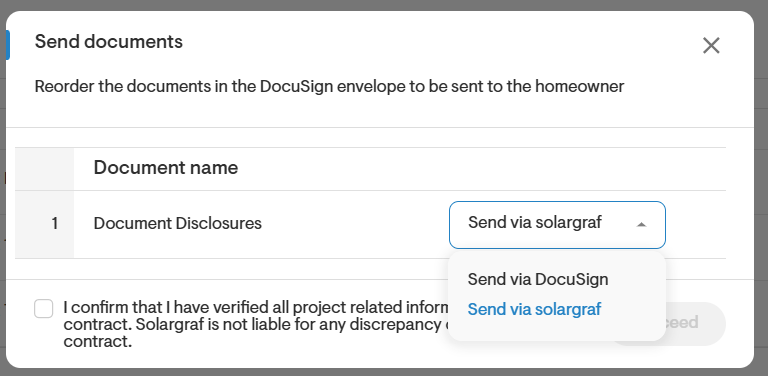
Note: If placeholders in your document are empty (i.e., have no value assigned), you will see a message stating: "Some placeholders do not have values for the selected design option." By clicking "Show More," you can see which placeholders have no value.
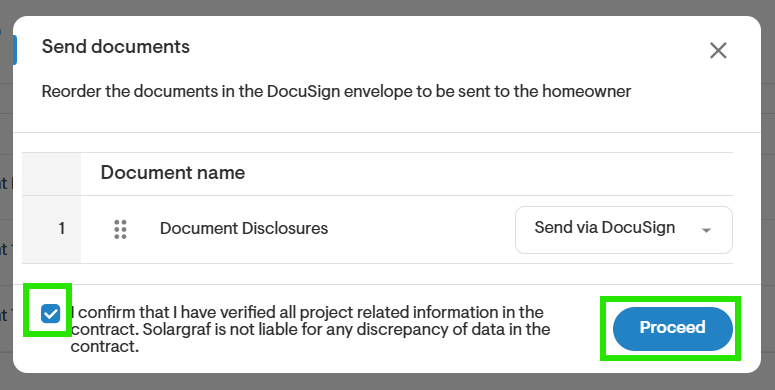
- Confirm the disclaimer by checking the box and clicking Proceed.
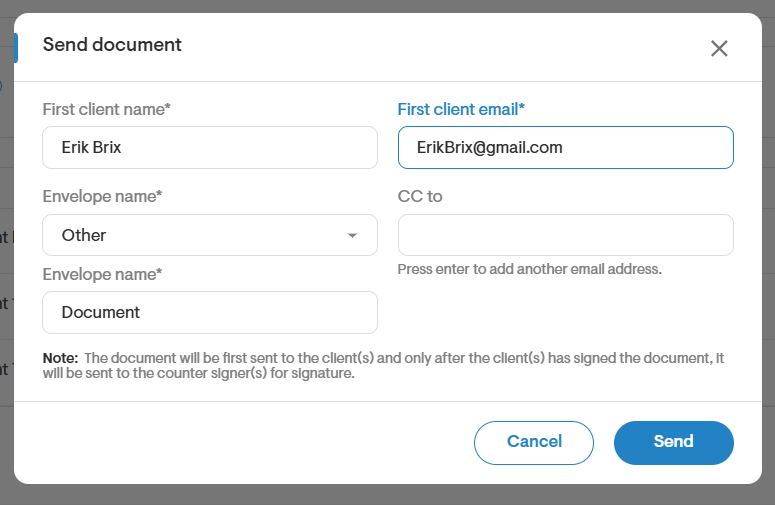
- Finally, you will be prompted to specify the client's information and the counter signee's information. You will also be able to define the expiration time for this contract.
- Once you've shared the document, you can track its status on the same page. When the contract is signed, the status will change from sent to signed.