Help Center Design Tool
Smart Designer Guide
Published on 8 Feb 2024
The Smart Designer feature consists of three tools: Max-Fit, Bill Optimized Panel Placement, and Consumption Offset Panel Placement.
Max-Fit
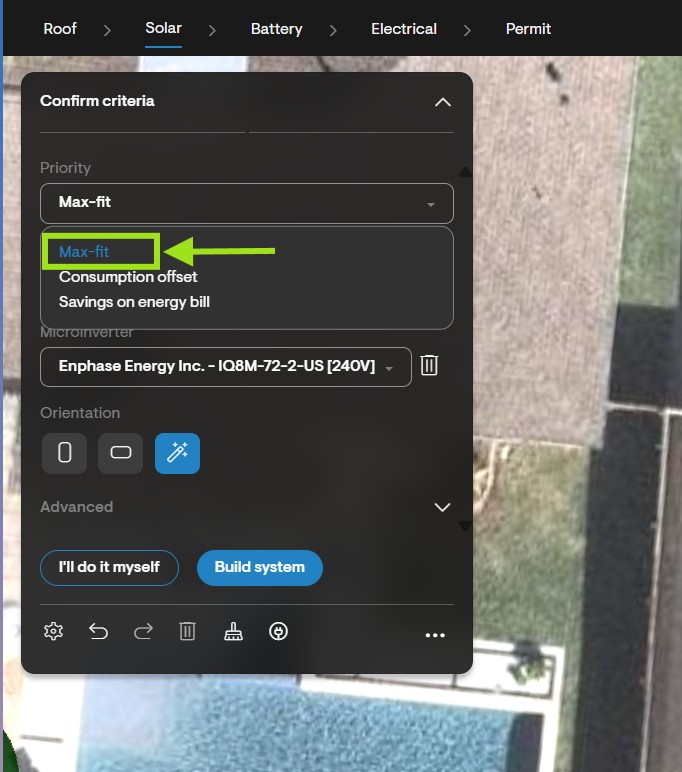
This feature enables you to, with a simple click of a button, automatically place the maximum number of panels that fit within a designated roof area.
- To utilize the Max Fit tool, either select the wand tool from the left menu or use the shortcut (X). This feature will automatically position the maximum number of panels that fit within each array, adhering to the specified fire offsets.
Bill optimized panel placement
This feature assists in generating an optimal panel layout, reducing future utility bills without the potential issue of over-sizing the system, which could lead to higher-than-necessary loan payments.
- To initiate an automated design for optimized bill savings, click on the wand icon, then proceed to click on the piggy bank icon or use the (U) shortcut.
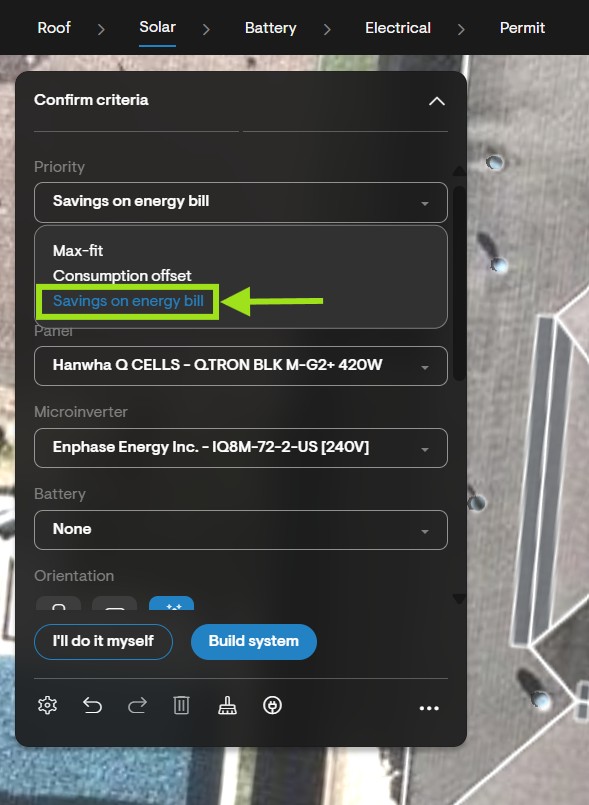
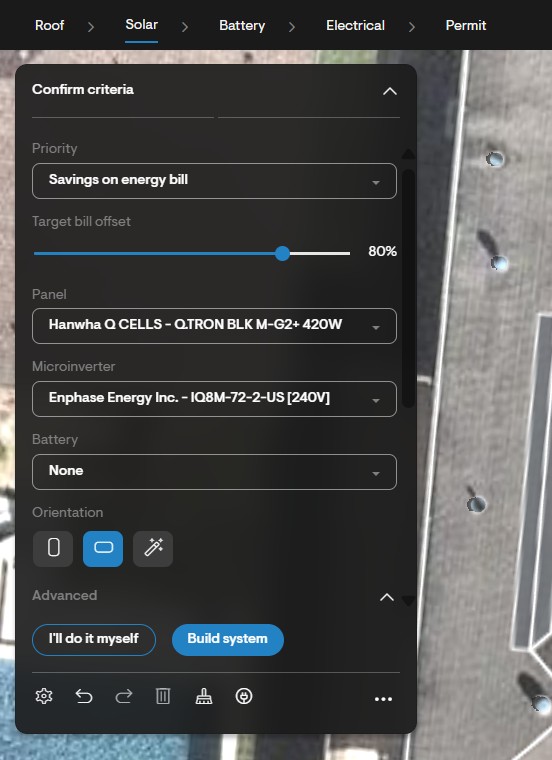
- Upon selecting, a dialog with a form containing essential details, such as panel, microinverter, battery, panel orientation, and mounting type, will appear. It is also required to set the target bill offset using the blue toggle.
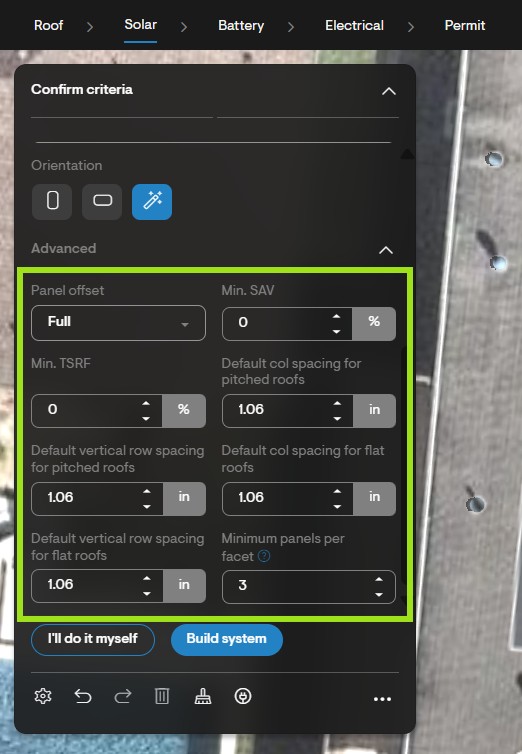
- You can access advanced settings by clicking on the dropdown arrow next to "Advanced." This will reveal options to define the panel offset Min. SAV, default column spacing for pitched roofs, default row spacing for pitched roofs, default column spacing for flat roofs, and default row spacing for flat roofs.
- Upon completion of the form, click on "Proceed," and the design will be generated. After filling out the form, click on "Proceed," and the design will be generated. A dialog will appear on your left, presenting details such as the System size, number of panels, Utility Bill Offset (%), Net Savings ($), Return on Investment, and Payback (years) for this design.
Consumption Offset Panel Placement
This feature assists in generating an optimal panel layout, targeting to reduce the consumption offset by a percentage set by you.
To initiate an automated design for a specific consumption offset, click on the wand icon, then proceed to click on the lighting icon or use the (O) shortcut.
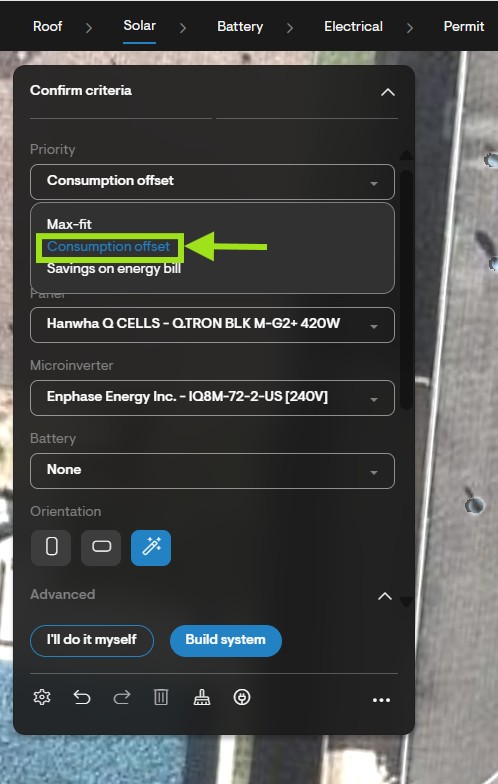
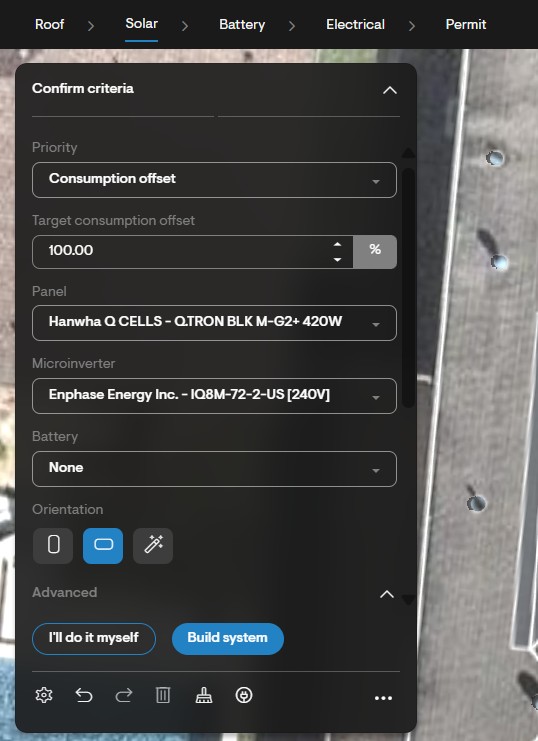
- Upon selecting, a dialog with a form containing essential details, such as panel, microinverter, battery, panel orientation, and mounting type, will appear. It is required to set the target consumption offset by entering a number value according to the desired offset. Once a number has been selected, you can use the up and down arrows to decrease/increase the percentage as needed.
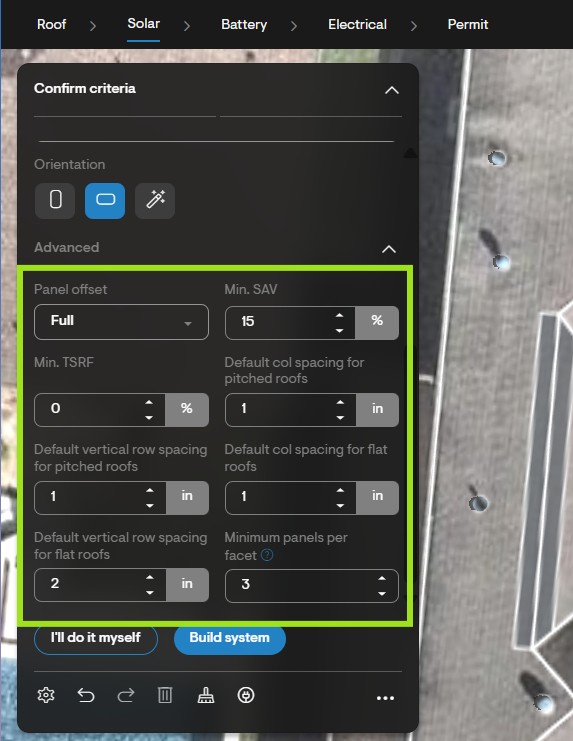
- You can access advanced settings by clicking on the dropdown arrow next to "Advanced." This will reveal options to define the panel offset Min. SAV, default column spacing for pitched roofs, default row spacing for pitched roofs, default column spacing for flat roofs, and default row spacing for flat roofs.
- After filling out the form, click on "Proceed," and the design will be generated. A dialog will appear on your left, presenting details such as Utility Bill Offset (%), Net Savings ($), Return on Investment, and Payback (years) for this design.