Help Center Design Tool
Lidar data selection in Solargraf
Published on 10 Jul 2026
The following guide provides information on the lidar data selection feature in Solargraf's 3D design tool.
When preparing a design, Solargraf may have more than one lidar or DSM (digital surface model) dataset available for a site. Because these datasets can vary in resolution and age, you can choose which one to use, based on your own knowledge of the property (for example, when it was built or last renovated).
Note: Lidar data selection is currently only available in the guided design experience. Support for the expert design experience is expected to be available in September 2026.
Selecting a data source
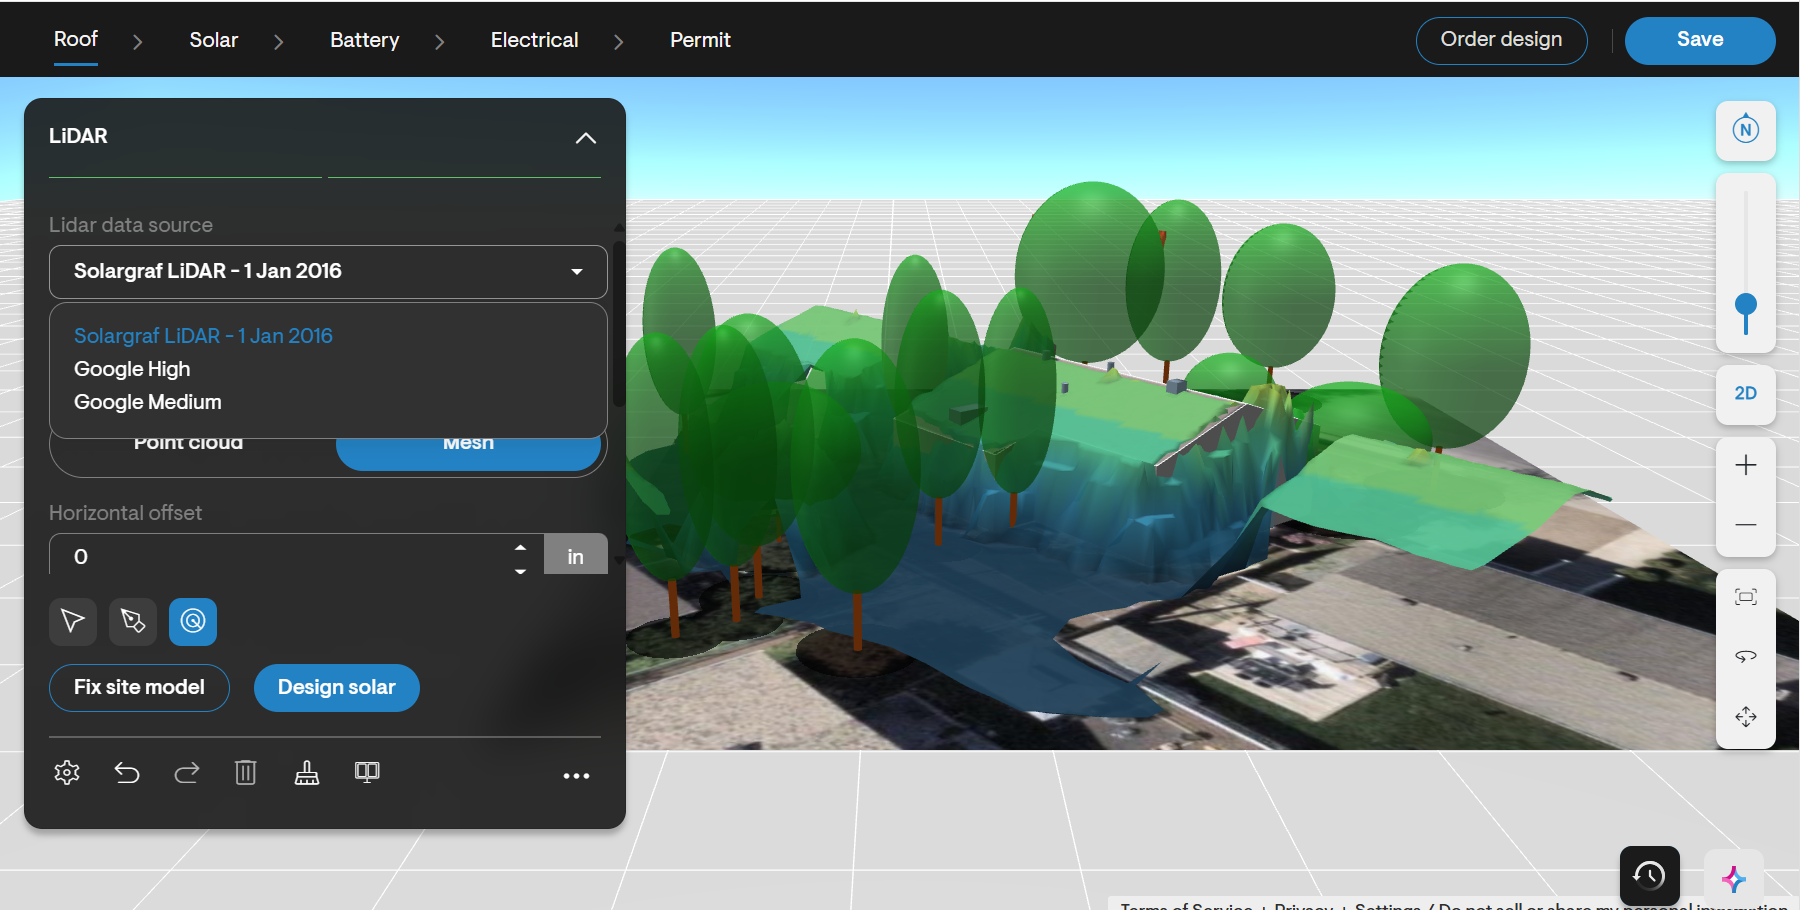
Once lidar has been made visible in the canvas, open the Lidar menu and use the Lidar data source dropdown to choose between the available datasets. Datasets are always listed in this order:
Solargraf lidar
Google high
Google medium
Each dataset is labeled with its capture date, formatted to match the Projects page (for example, “Solargraf lidar – 11 Mar 2026”).
Availability and error handling
If you select a source for which no data is available at the current site, a warning message appears: No lidar data is available from this source for this site.
The previously selected dataset remains selected in the dropdown and continues to be used to display lidar in the canvas. Once it's confirmed that a source has no data at the site, that source moves below the others, listed under a divider labeled “No data at this location,” so you can see at a glance which sources won't work for that address.
Availability and capture dates are remembered between sessions, so you won't need to re-check each source every time you reopen the project.
If a source can't be checked at all — for example, because of a temporary connection issue — an error message appears instead: Lidar failed to fetch. Try another source or try again later. In this case, the source is not moved under the “No data at this location” divider, since its availability is still unknown.