Help Center Design Tool
Generate a Shade Report
Published on 24 Feb 2022
This guide will walk you through generating a shade report using the 3D design tool in Solargraf.
Getting started
Before generating a shade report, you will first need to complete the roof design and solar design for your project.
To learn more about completing these steps, see:
Run shading analysis
Once you have added PV modules and inverters, panel shading calculates automatically each time you calculate a production estimate or save your design.
If you have made changes since the last save, you can also re-run shading analysis by clicking the Shading wizard button in the left toolbar, or by pressing 'C' on your keyboard.
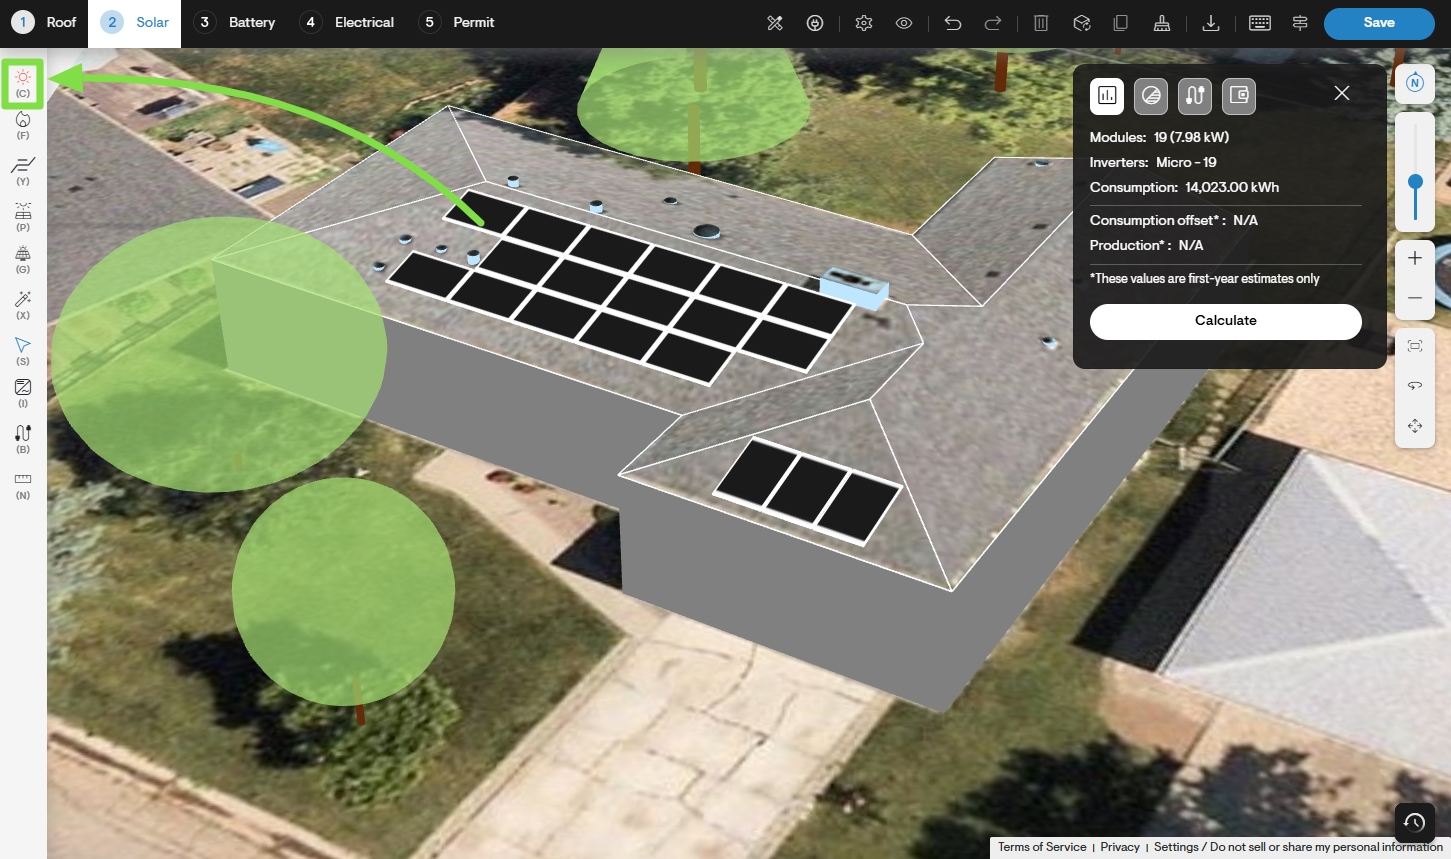
For more information on running shading analysis, see: Heatmaps.
Generate the shade report
- To generate your shade report, first click the Download button near the upper-right corner of the page.
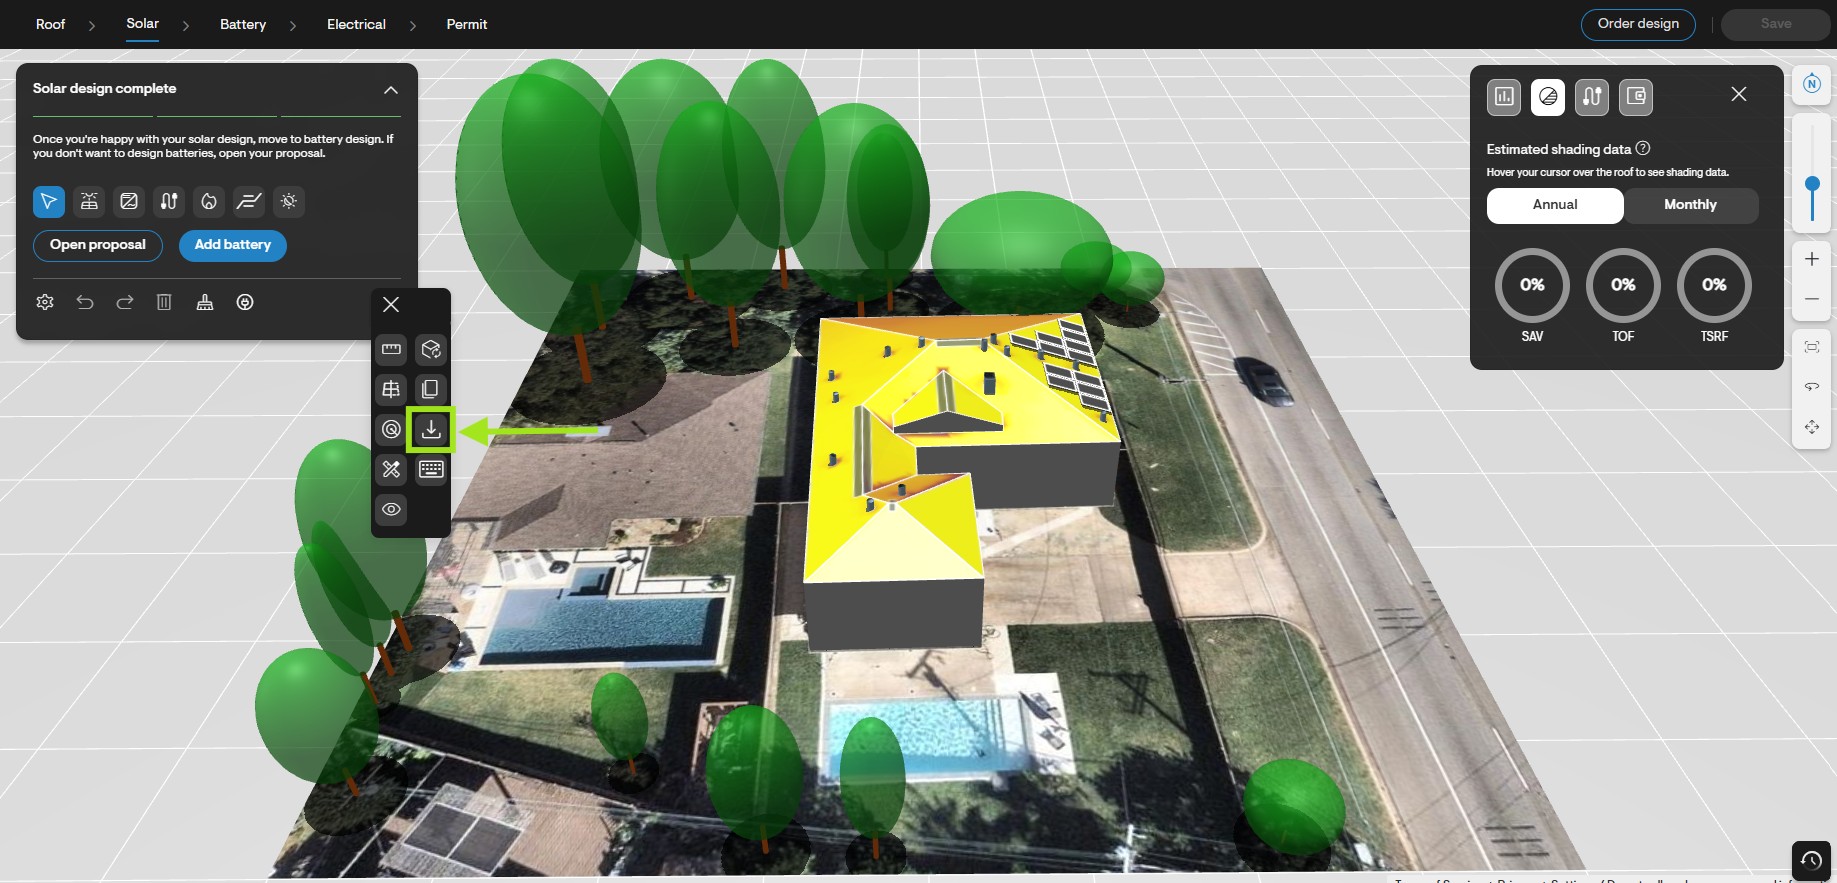
- Next, select the Shade report option from the Downloads menu which opens to the right.
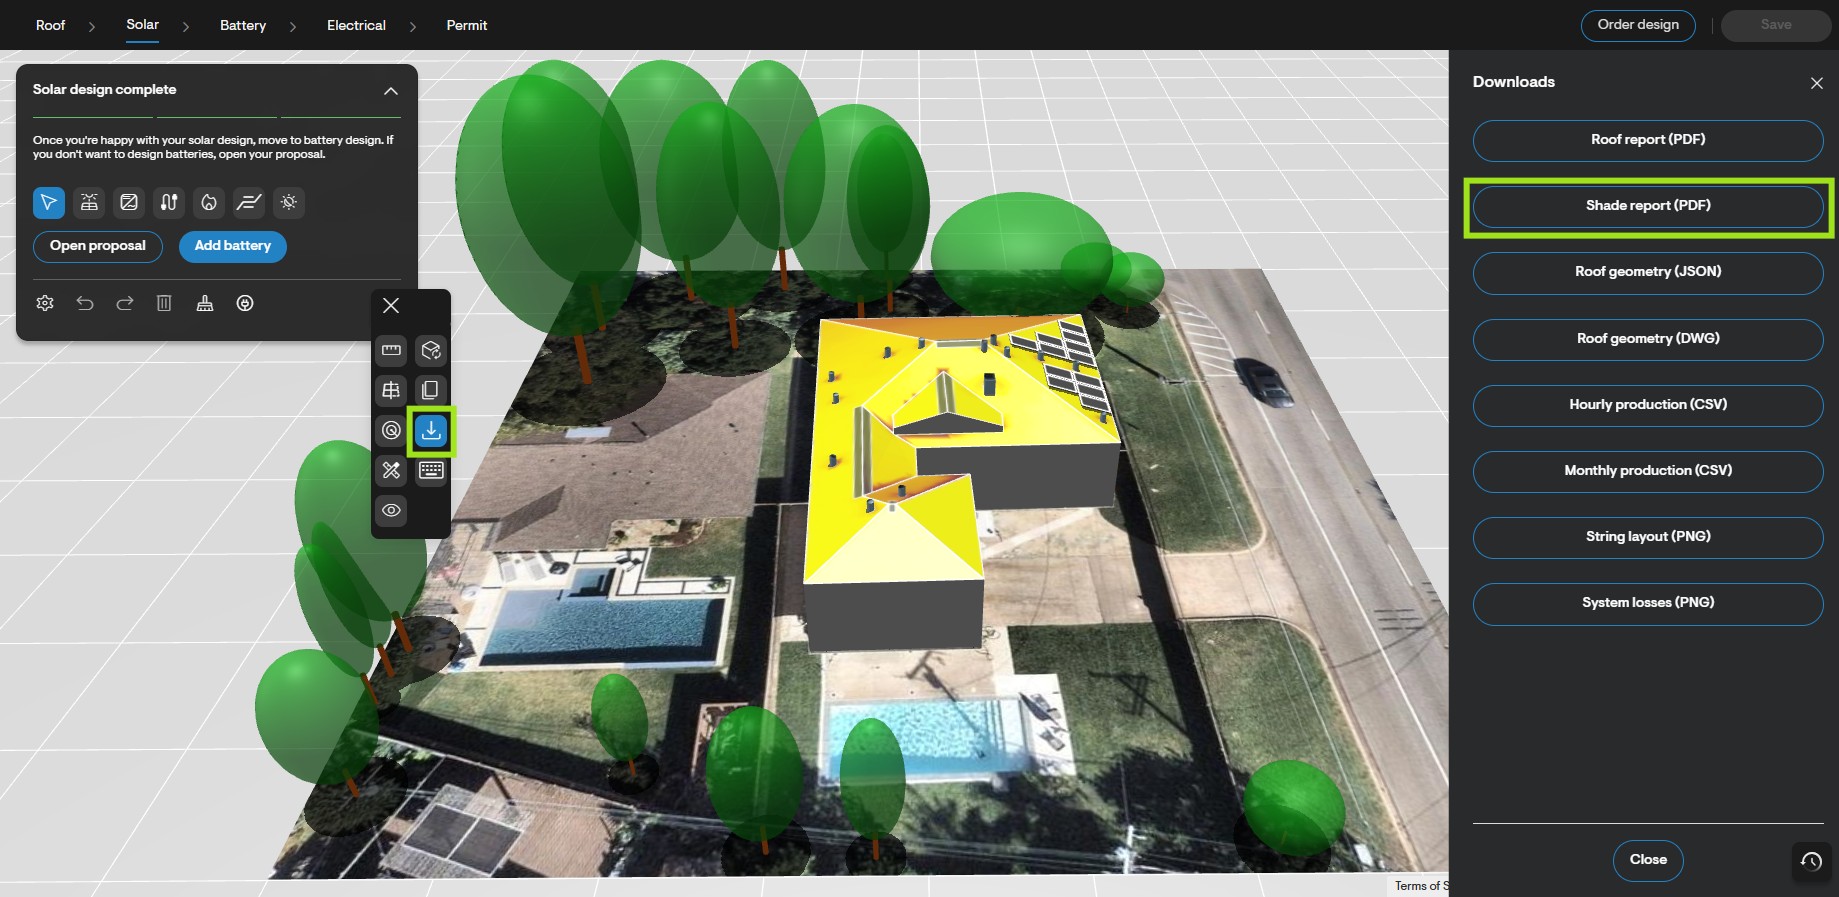
Share/Download the shade report
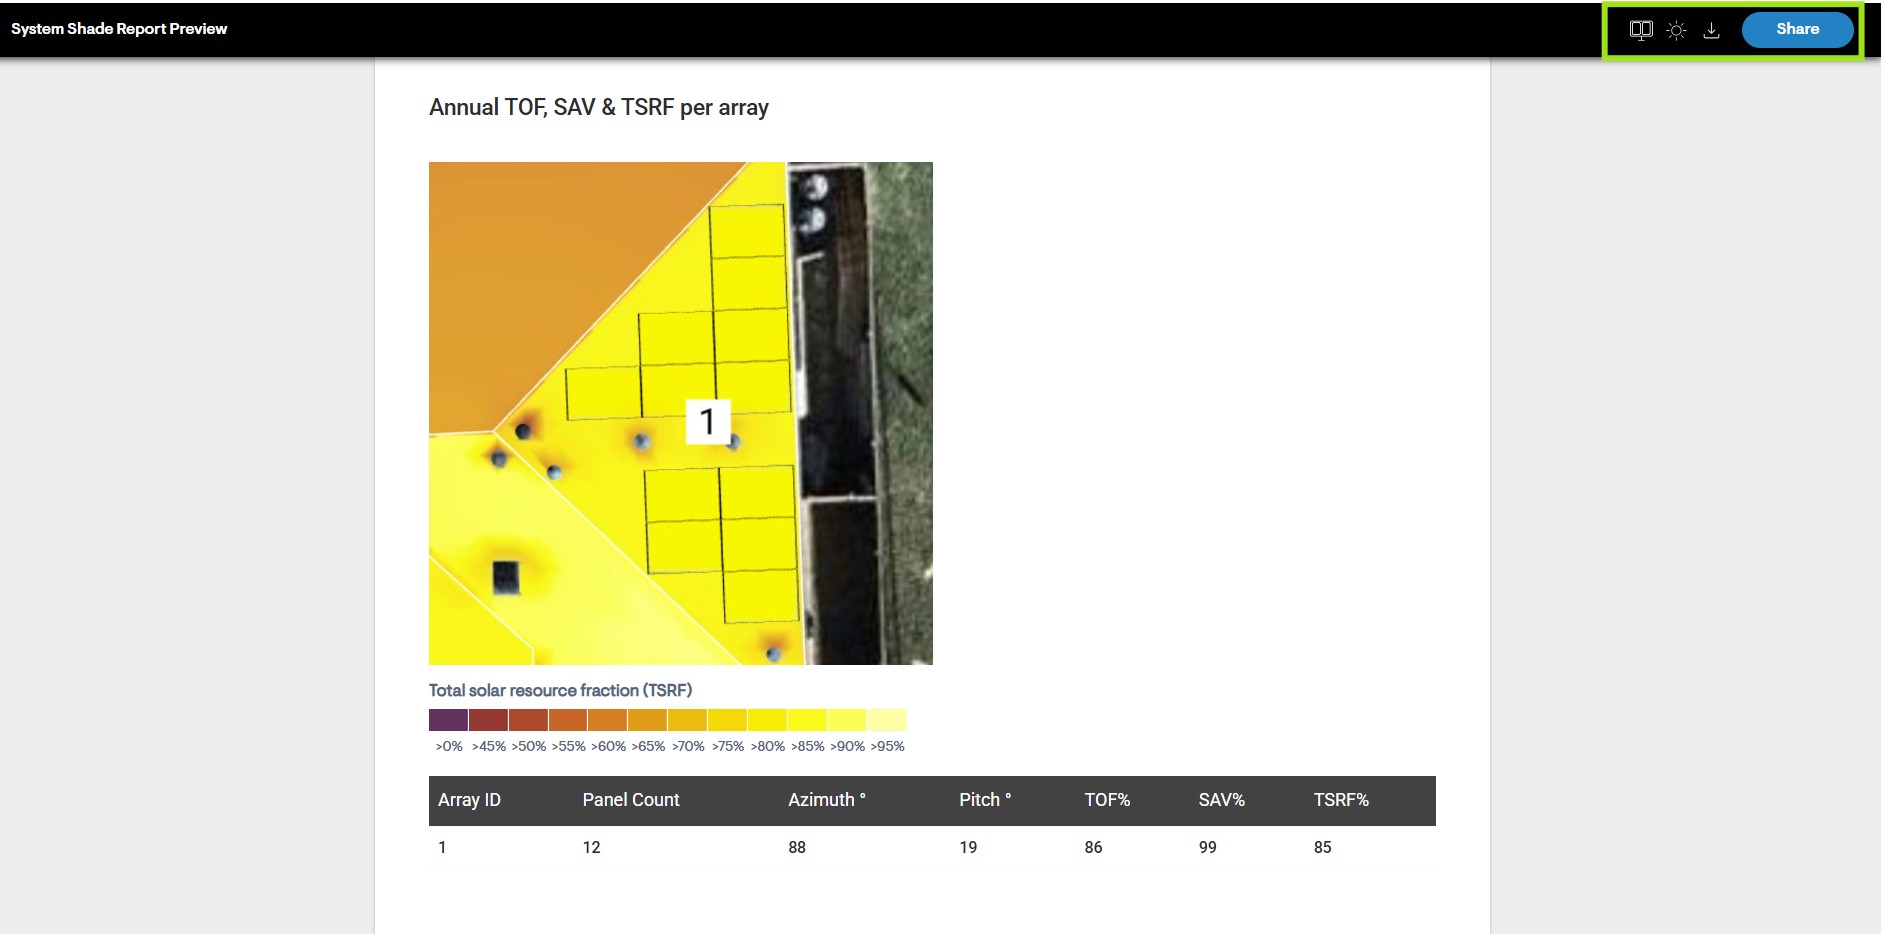
Once your report finishes generating, it will open as the System Shade Report Preview in a new browser tab.
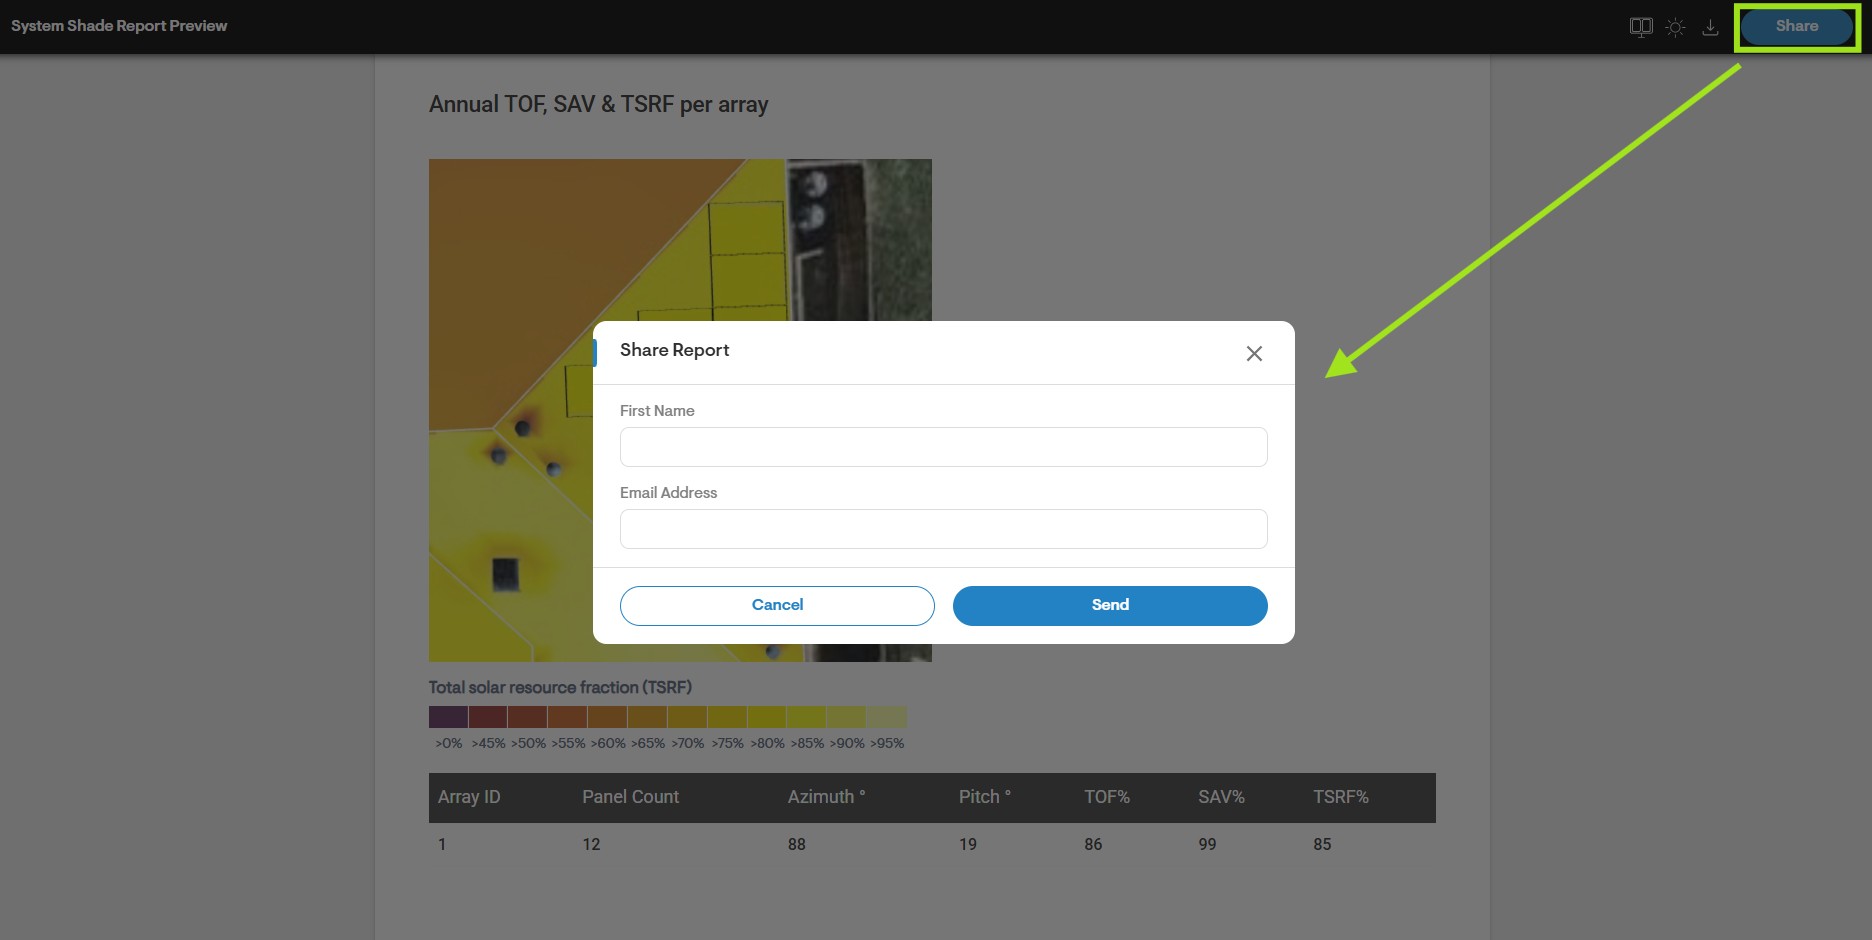
- Use the buttons in the upper-right corner of the page to share a link to the web-version of the report or download a PDF copy.
Share web-version
- Click the Share button to send an email with the web-version of the report, or click the link-shaped icon to copy the URL to your clipboard.
Download PDF
- Click the Download icon to save a PDF copy of the report.
Before generating the download file, you may choose to adjust viewing angle of the design's preview image or proceed with the current angle.