Help Center Design Tool
Create a new project
Published on 3 May 2024
This guide will walk you through the pre-design page from top to bottom; where you will enter in utility information and the home's energy needs. This is the first step in creating a design in Solargraf.
Address
Proposals in Solargraf begin by first setting up a new project for the client’s address. While there are a variety of project types, each one follows the same initial process to get started.
- Navigate to either the Dashboard or Projects page and click New Project in the top-right corner.
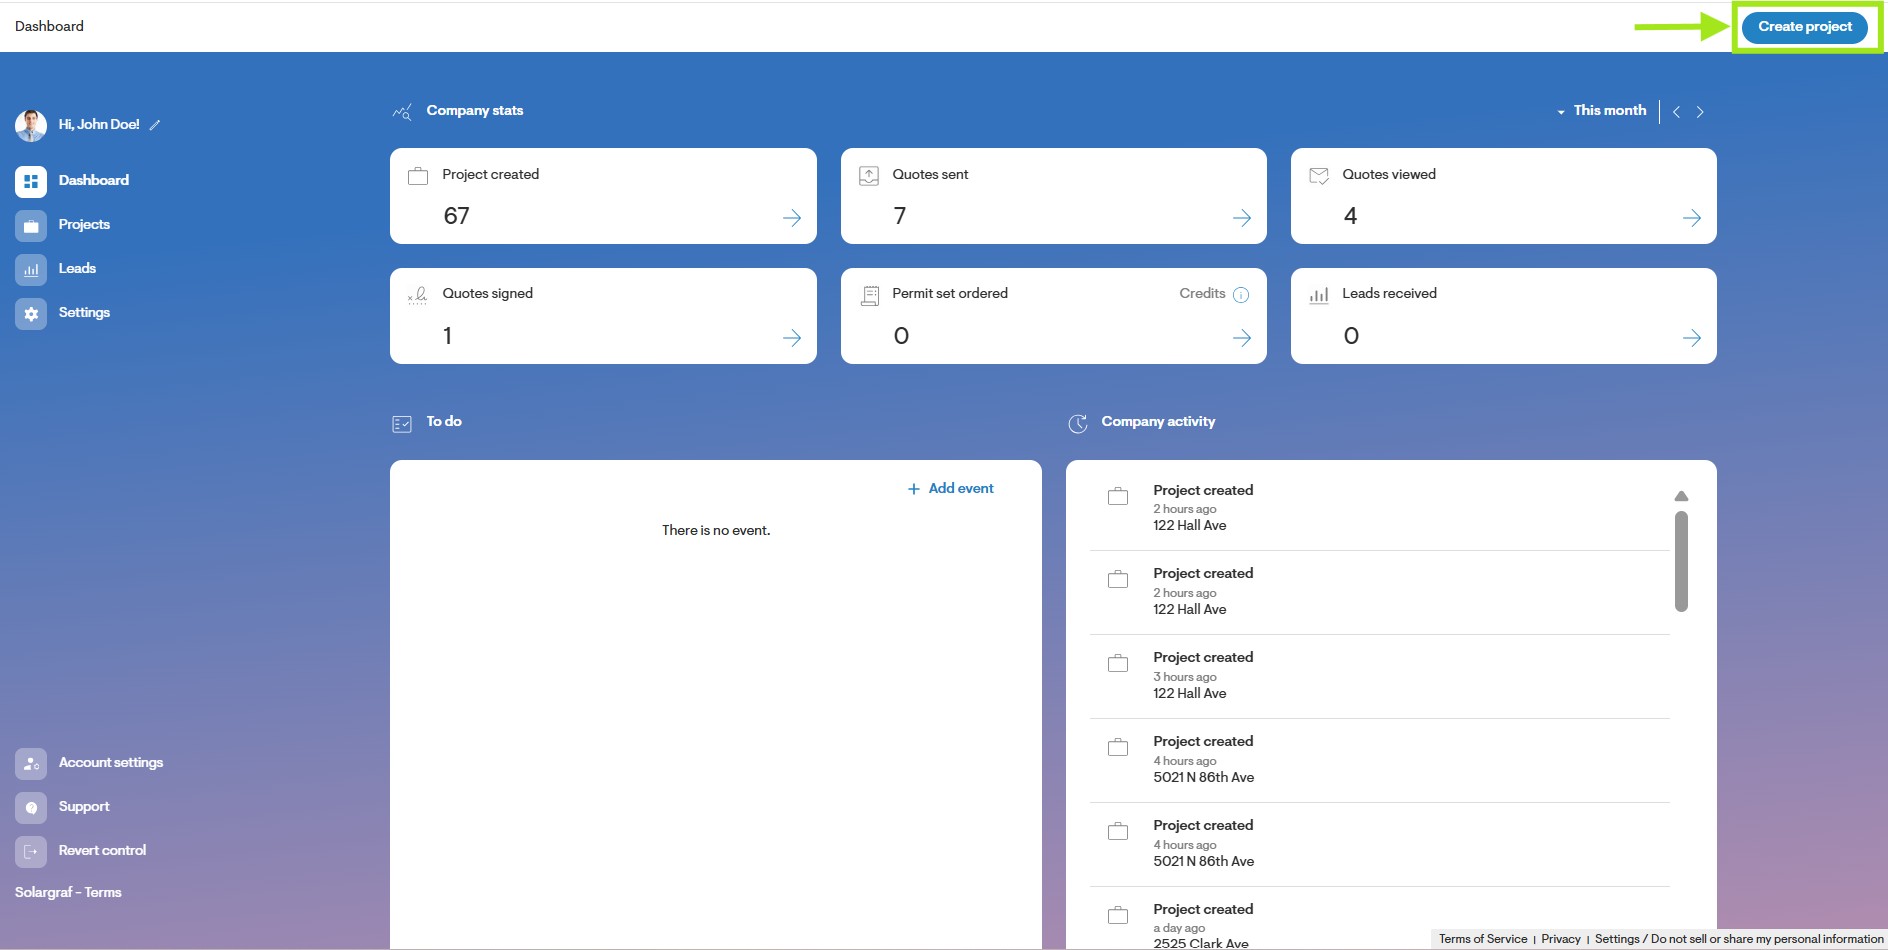
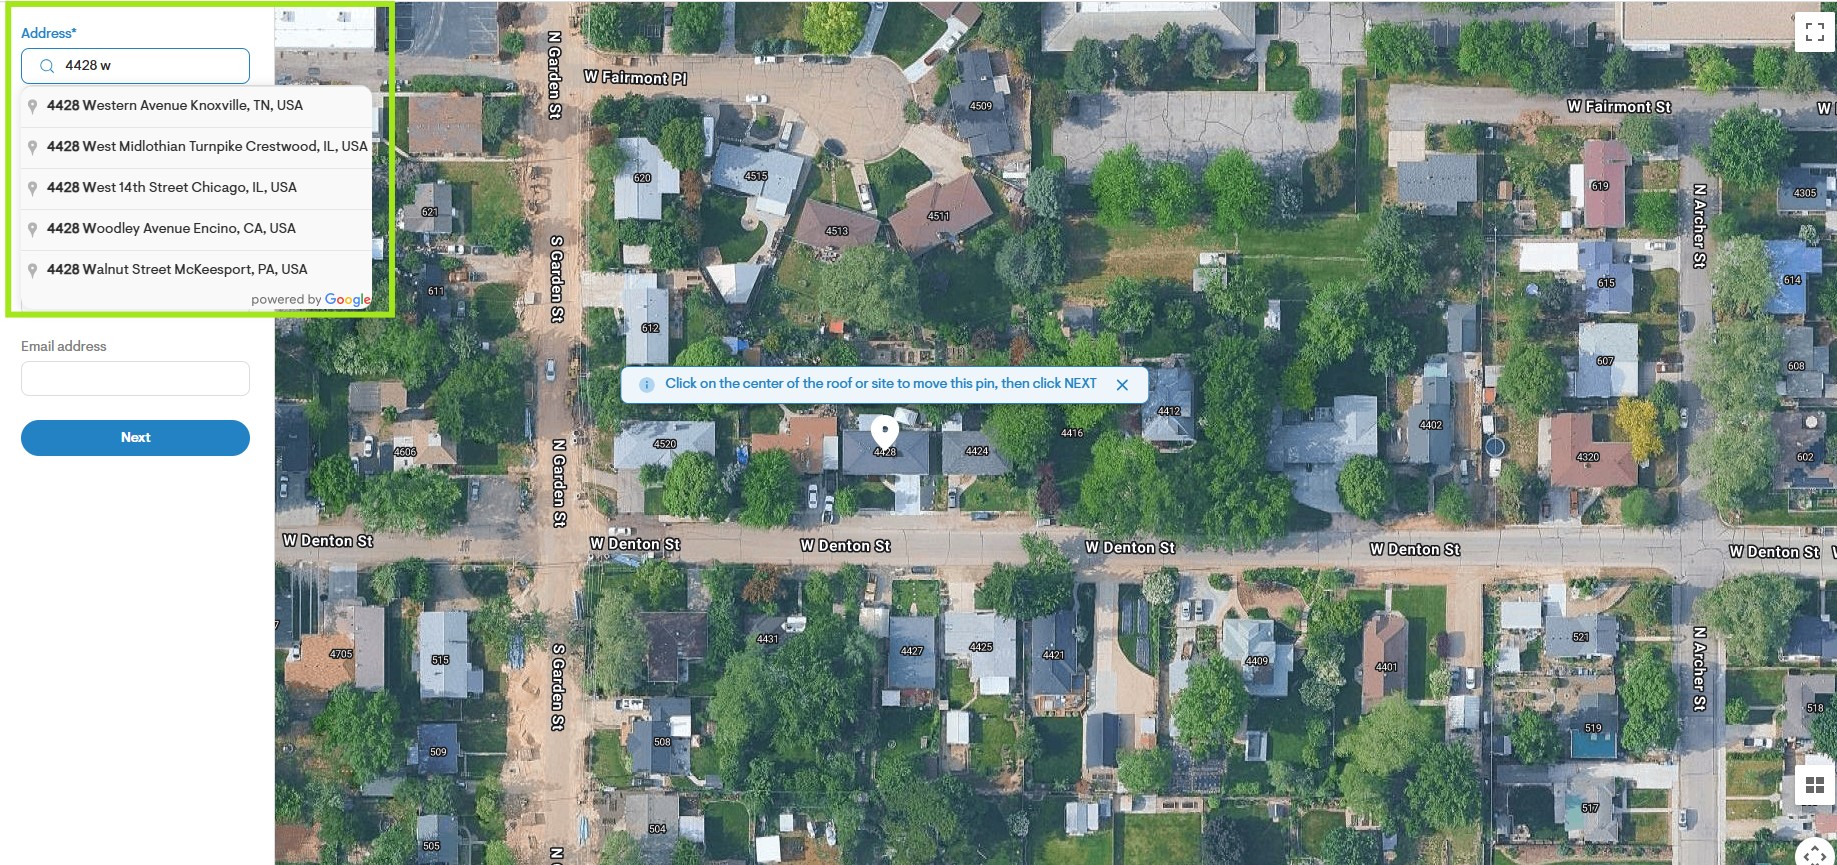
- Complete the Address field. A list of possible matches from Google Maps will appear below the entry field as the address is typed.
- For the most accurate location data, finalize the address lookup by selecting the matching result from the list.
Client Information
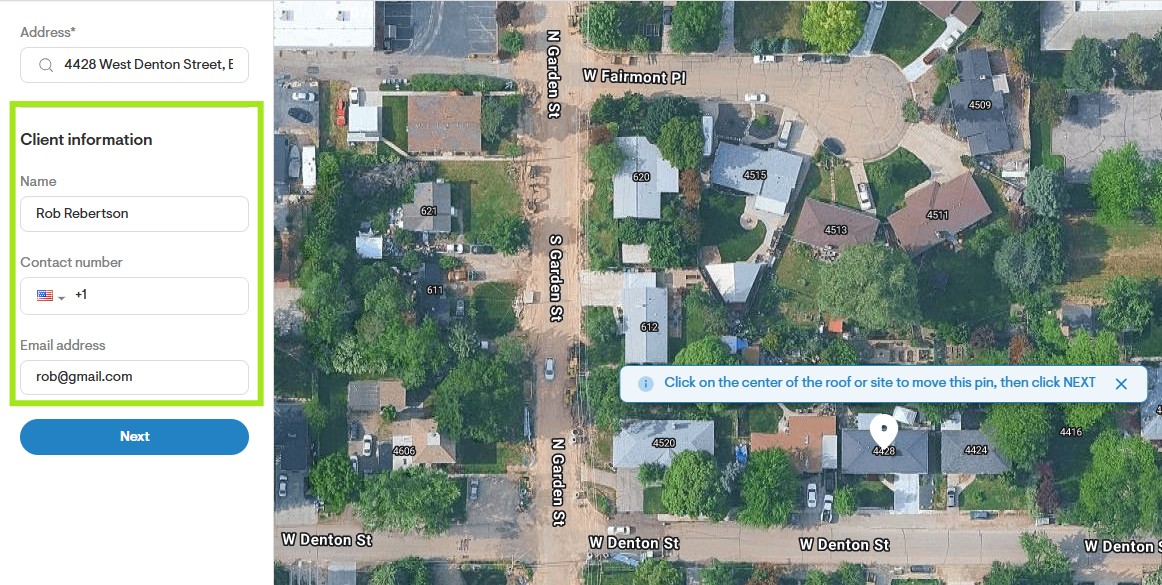
- Complete the Name, Contact number, and Emailaddress fields.This information can also be added or adjusted later from the project’s customer information settings.
- Once finished, click Next.
Project Details
After recording the address, it’s time to determine the scope of the project, whether the initial proposal will be prepared in-house or ordered through Solargraf, and which drawing tool to use.
Project type
- Select either Residential or Commercial. Classifying the type properly will ensure that only relevant tariff and incentive options are available for the project.
Service type
- Create design is enabled by default. To have a proposal prepared by a Solargraf designer instead, select Order proposal.
- For more information, seeHow to order a Proposal in Solargraf.
System type
- Select either New system, System expansion, or Battery only add-on.
- For more information, see:
How to Create a System Expansion Project
How to Create a Battery Only Proposal
Design tool selection
- Choose between 3D design, 2D design (3D compatible), and Classic 2D design.
Note: Classic 2D design may not be available on all accounts. - For more on each option:
Create a 3D Model on Solargraf
How to Create a 2D (3D Compatible) Design
Create a New Drawing (Solargraf Classic)
Site Imagery
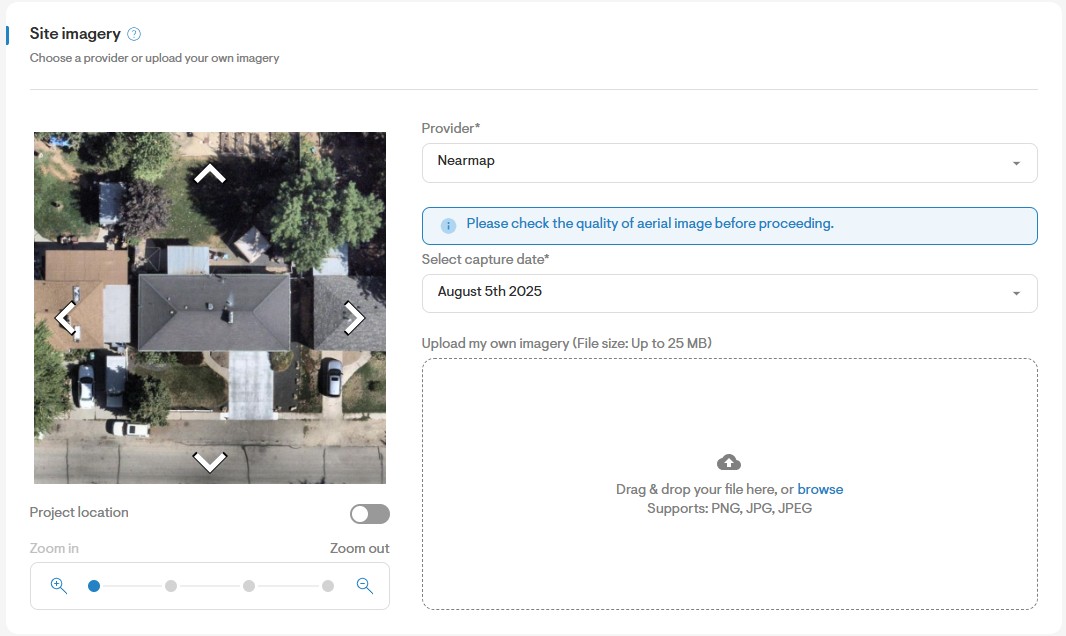
Choose an image with a clear view of the property. For rooftop solar projects, look for options with clearly distinguished rooflines.
Satellite images
Most locations have high-quality satellite captures available from Nearmap, Google, Google HD, and Azure, which can be previewed from the Provider dropdown menu. (Nearmap is recommended)
- Make adjustments such as panning using the arrows in the image preview or zooming out to ensure you select the most ideal image placement for your design.
Upload image (Optional)
There is also an option to instead upload imagery such as blueprints or drone aerial photography. This is often the best choice for projects with planned or very recent construction where satellite images are not yet available.
For more information, seeHow to: Upload Your Own Imagery.
Utility & tariff
Once the client has supplied their energy consumption information, enter the utility provider, tariff, and grid connection type for the project.
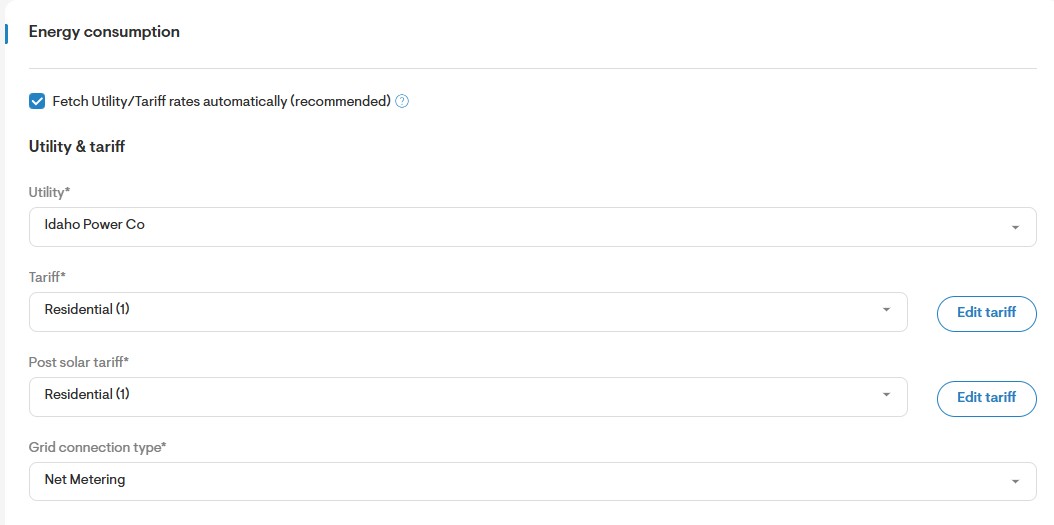
Automatic utility data
When the checkbox for Fetch Utility/Tariff rates automatically is enabled, Solargraf’s integration with Genability uses the project’s ZIP code to find the utility and tariff options available for U.S.-based addresses. Projects located outside of the U.S. will not show the checkbox.
Custom-defined utility
If not using automatic data or if the feature is unavailable for the address, utility details can be set up manually. A standard utility configuration will populate in the Utility dropdown menu by default, which can then be adjusted for the current project as needed.
To create either new default values or additional preset configurations, seeHow to: Add a Custom (Unspecified) Utility Tariff.
Electricity bills & consumption
In order to model the project’s anticipated savings, the proposal requires a consumption history for the property to use for comparison. There are two primary options for entering a client’s energy usage.
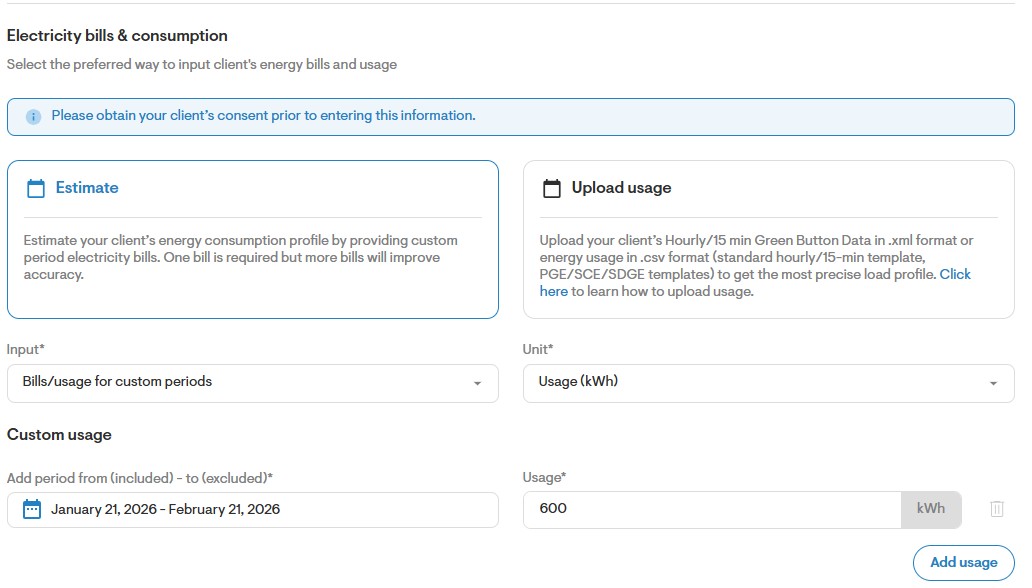
Estimate or Manual input
The first option allows for consumption to be entered using the client’s recent utility bills. When the consumption history is unavailable, such as with new construction, Solargraf can instead estimate annual energy usage based on property size.
Upload usage
If the client has access to their interval usage through their utility, this data can be uploaded to the project using either the XML or CSV file formats.
For more information, seeHow to Upload Interval Usage Data.
Consumption Profile
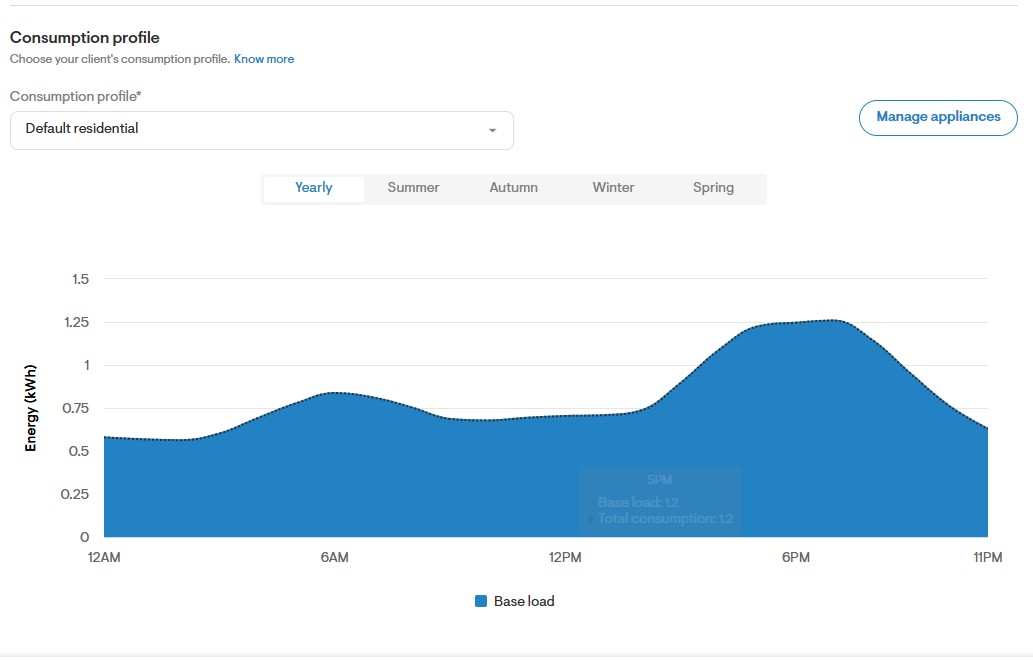
Consumption profiles allow a project to model the ways a client’s energy usage can vary over the course of a typical day and throughout the year, without the need to upload interval data from a file.
- Multiple pre-defined profiles are available to quickly select for common usage scenarios.
For a description of each, click the Know more link below the Consumption profile heading. - Residential projects have the additional option of creating a customized consumption profile.
- Use Manage appliances to add anticipated future increases to the home’s consumption, such as the purchase of an electric vehicle or other heavy-load appliances.
Next Steps
When ready, click the Create design button in the bottom-right corner and continue on to Roof Design (Step 2).