
Solar panel wiring or stringing panels together is one of the essential skills every solar installer and contractor needs to understand if they want to succeed in the industry.
Whether you’re brand new to the solar industry or a seasoned professional looking to brush up on your wiring skills, this guide will cover everything you need to know about wiring solar panels together in the most optimal way possible.
From wiring basics, connecting solar panels in both series or parallel, and considering some crucial factors throughout the planning and installation process, here’s everything you need to know about stringing solar PV panels.
How to Wire Solar Panels
Before we get into the nitty-gritty of solar panel wiring, there are a few basic terms and considerations that you should know.
Important electrical terms
1 – Voltage
Voltage (V) is the “push” that makes electrical charges move through a wire or other conductor. In the context of solar PV, voltage is determined based on how much sun (or solar irradiance) hits the solar array. The stronger the sun, the higher the voltage.
2 – Electric Current
The stream of charged particles, such as ions or electrons moving through a current or space, is called an electric current (I). Alternating current (AC) is when the movement of these charged particles periodically reverses directions, while direct current (DC) is when the current only moves in one single direction.
When it comes to solar modules, direct current is produced by the panel. DC must be converted into AC by an inverter for the electricity produced to be usable by a home.
3 – Power
This is the rate at which energy is transferred through an electric current. Electric power (P) is measured in Watts. This is the output of your solar array and can be optimized or maximized by an inverter.
Information Necessary to Properly String Panels
To properly string solar panels, two factors need to be taken into consideration before you begin your proposal or solar installation. You’ll need to look up the manufacturer’s datasheets for your modules and inverters to get this information.
Solar Panel Information
Every solar panel will come with a datasheet that outlines the maximum power voltage, power current, and the peak power of the module. When designing your system, choosing a panel that will work with the system you’re looking to install is essential.
You don’t want your panels to underperform based on their specifications. Still, you also don’t want them to overperform, which could create issues down the line, especially if this causes your panels to overheat.
Inverter Information
Like solar panels, inverters also come with datasheets that will help you determine which model and size might be suitable for the system. These are your maximum input current, DC input voltage, “start” voltage, and how many Maximum Power Point Trackers (MPPT) it has (dual or single). The inverter you choose should be able to handle and optimize the power coming from your built solar array.
Solar Panel String Sizing
Sizing your strings involves a little bit of math and understanding temperature coefficients. After all, panel performance is affected by how hot or cold the modules are. For example, as the temperature increases, the voltage decreases, and vice versa.
The maximum amount of panels on a string uses a value called Temperature Coefficient of Voc and is measured in %/°C, (percentage per degree Celsius). In contrast, the minimum number of panels uses a value called the Temperature Coefficient of Vmp, which can be found on your chosen panel’s datasheet.
For example, if you have a solar panel with a Voc of 20V and a Temperature Coefficient of 0.33%/°C, for every degree Celsius drop in panel temperature, the voltage will rise by 0.66V. The calculation looks like this:
20V x 0.0033 = 0.66V
Once you understand how to calculate your Temperature Coefficient, you can use this calculation to determine the optimal size of your strings with two additional equations:
1 – Calculate the Minimum String Size
The minimum string size is the minimum number of panels required to keep an inverter running during the hottest summer months. To get this value, you need first to calculate the minimum output voltage (VmpMin) that each module will produce, then calculate the module minimum voltage using the highest temperature of the installation site when the modules would produce the lowest expected voltage.
Finally, take the inverter minimum voltage (Inverter Vmin) and divide it by the module minimum voltage to get the minimum number of modules.
The formula for the minimum string size is as follows:
Min String Size = Inverter Vmin/Module VmpMin
2 – Calculate the Maximum String Size
Your maximum string size is the maximum number of panels you can connect in a string not to exceed the inverter’s maximum voltage limit. This value is calculated by taking the module maximum voltage (Module VocMax) using the lowest expected temperature when your panels produce the highest voltage (VmpMax). Just like calculating the minimum size, you’ll want to divide the inverter maximum voltage (Inverter Vmax) by the module maximum voltage.
The formula for the maximum string size is:
Max String Size – Inverter Vmax/Module VocMax
3 – Determine How Many Panels to Install
These equations together will give you a minimum-maximum number of panels that can be safely installed in a string. Look at the roof and its dimensions, the amount of solar irradiance, and the client’s energy needs and budget, and choose a number of modules accordingly.
How to Wire Solar Panels in Parallel and Series
Connecting solar panels might seem a little daunting, but it is actually quite simple. Solar panels can either be wired in series or parallel, each with its own set of pros and cons. The first step to setting up your array is to determine which style of wiring you’d like to use based on what works best with the specifications of the inverter that you’re using for the job.
Connecting Solar Panels in Series
Solar panels have two terminals, positive and negative. Wiring panels together to form an array is simply connecting the modules via these terminals. When wiring panels in series, you’re joining the positive terminal of one panel to the negative terminal of another.
The benefit to connecting your PV modules in series is that each panel increases the total voltage output of the entire system while the amperage stays the same.
If your inverter is rated to handle the combined voltage of all the panels in the string, then you could choose a series connection. If the inverter isn’t rated for this system, consider finding a better inverter option or looking into a parallel connection.
Connecting Solar Panels in Parallel
Wiring solar panels in parallel means connecting the positive terminal of one panel to the positive terminal of another, and then the negative terminals together as well. These connections are made in a combiner box, and the results of this connection are often called a PV output circuit.
Opposite to a series connection, a parallel connection increases the system’s amperage while the voltage remains the same. For this reason, parallel wiring is an excellent choice for someone wanting a large number of panels to produce a lot of energy while still keeping the voltage low not to exceed the limits of their chosen inverter.
A parallel connection will safeguard the system from underperforming if a single panel in the string receives less sunlight than the rest due to shading or other factors such as a loose wire or bad connection.
Think of your array the same way you think of Christmas lights. If your lights are wired in series, one bad bulb or connection will cause every other bulb after it to cease to work as well. This won’t happen in a parallel connection, which is why this type of connection is often more recommended than the other.
Series-Parallel Connections
In addition to choosing between a parallel or series connection, solar arrays can be connected in both configurations on the same roof. This is accomplished by connecting one string in series and then a second string in parallel. As long as the strings have the same number of panels, this connection style works very well.
A series-parallel connection is a great choice when you want to double both the voltage and amperage of the system, allowing you to benefit from both types of connections simultaneously. However, when considering this type of connection, make sure to consider your inverter’s limits as you would for the other two types of connections.
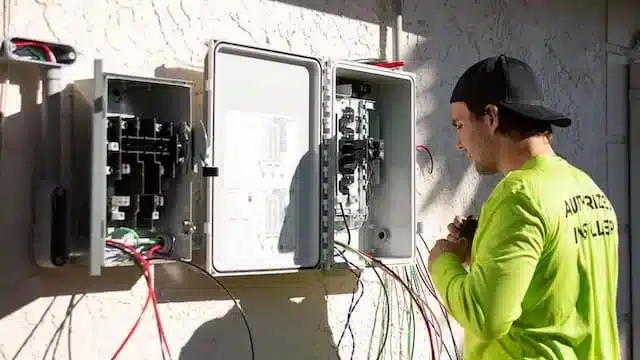
Connecting Solar Panels to House Wiring and Putting it all Together
Once you’ve looked at the specifications for your modules and inverter, it’s time to put the rest of the system together. After wiring your panels together in either a parallel, series, or series-parallel configuration, you’ll need to connect everything to your inverter.
From the inverter, connect it to the home’s AC power box, and, if you’re installing a grid-tied system, to the electrical grid. If the system you’re installing includes solar storage, you’ll want to wire that to a charge controller to regulate the voltage coming from the panels and your inverter.
Finally, ensure you’ve wired your AC and DC disconnects, which are required by most building codes across the United States. DC disconnects are usually found inside the inverter or placed nearby, while AC disconnects are installed near the electric meter. These enable people to quickly cut the power coming from the panels into the home or from the house to the grid in the event of an emergency or for maintenance purposes.
When your system is wired and ready to go, you’ll want to make sure your array is grounded and bonded and ensure that there is no shock hazard associated with the system. Metal parts of the system need to be bonded (connected) to the ground, and conductive materials like metal boxes must be grounded together.
Tips for Stringing Solar Panels
Now that we have the types of solar panel connections down, we can take a look at some additional tips to ensure that your system will work all day optimally.
Consider your Inverter’s Voltage Range and Specifications
As we mentioned earlier, it’s imperative that you are well-versed in the specifications of your chosen inverter before you begin your installation or planning. Inverters must be able to handle the energy capacity that your array is producing, but they also must receive a minimum voltage, or else they might not work at all.
To size an inverter to a system, you can use the array-to-inverter ratio by dividing the DC rating of your solar array by the maximum AC output of your inverter. You should aim for a ratio of around 1.15 – 1.55. Surpassing a ratio of 1.55 could cause issues and isn’t recommended.
At the same time, consider your location when choosing an inverter. For example, hot, sunny areas such as Nevada and Arizona receive more sun than, say, Washington State, but they are also warmer, which could decrease the panels’ output. The inverter you select should account for how much possible power can be generated in a given day, depending on what state and conditions you’re operating in/under.
Avoid Inverter Clipping
Inverter clipping happens when the inverter you selected can’t handle all the power being fed through it, causing the additional electricity generated to go to waste. To avoid this, choose an inverter with a power rating above what you expect the system to generate on an average day, or take this into account when sizing your system.
Separate Strings by Condition
Inverters have Maximum Power Point Trackers (MPPTs) in their builds, which are circuits that convert DC to DC current to maximize the system’s energy output. Suppose an inverter with a single MPPT is connected to a series of strings with wildly different conditions (different tilts, orientations, azimuths, solar irradiance levels, etc.). In that case, your system won’t perform optimally.
One way to account for this is to build your strings based on similar conditions. For example, suppose you’re installing panels on more than one facet of a roof. In that case, you’ll want to separate these strings and connect them to separate MPPT ports in the inverter so that the inverter can maximize the power from each string on an individual basis based on the different amount of sun exposure each group of modules will see.
This concept works for shaded panels as well. If there’s a large tree shading a portion of the roof for an hour or so every day, string all the affected panels together to output a similar amount of power while the rest of the system isn’t affected.
Pitch Microinverters Where Possible
Microinverters have been taking off in the solar industry lately, and for a good reason. Microinverters are tiny inverters attached to each solar panel that are capable of converting and maximizing electricity on a panel-by-panel basis.
Using a microinverter instead of your traditional string inverter will ensure that each panel is outputting an optimal amount of power and will account for the issues we mentioned above when panels or strings experience different conditions, affecting the performance of the whole array.
If you don’t sell or pitch microinverters yet, now is the time to start. Not only do they eliminate a lot of common issues associated with string inverters, but they also allow for better system monitoring and make it very easy to add to solar systems in the future since all you need to do is install an additional panel/microinverter to the array without having to rewire the whole system.
Use Identical Panels from the Same Manufacturer to Avoid Issues
No matter how much of a solar professional you are, it’s considered a best practice to use only one type/size of solar panel from a single manufacturer per system. Using panels with different ratings could lead to unexpected results or be dangerous.
Plan your Wiring and the Route to the Home in Advance
If you want to install the cleanest, most visually appealing system possible, plan out where each component will attach and lead before getting up on the roof and starting the installation process.
If the home has an attic, consider running the wiring through it to hide all the cables from view and use cable clips where necessary to group wires together into bundles. Make sure any holes made in the roof are sealed and protected from the elements. Mapping out your route in this way will also make your installation a breeze.
Using Software to String Solar Panels and Design Systems
Manual calculations used to be the most time-consuming part of the solar design and installation process. Handling many different formulas and values created tons of opportunities for human error, but they also left much to be desired in terms of working with the client and finding good solutions to their problems quickly.
Today, Solargraf is here to help you design the most accurate systems possible and fast by doing all the heavy lifting. Here’s how.
Automatically Determine the Optimal Amount of Panels
Outline the roof facet you’d like to place the panels on, and let Solargraf fit the system for you. With an extensive library of solar panel makes and manufacturers pre-loaded into the software, you can choose your panel of choice from a drop-down menu or import your own if you have a datasheet on hand.
Solargraf will take the specifications/dimensions of your panels into consideration and fill the surface with the optimal number of modules for the job.
Size Inverters in Seconds
Like the panel tool, Solargraf will also determine the number of inverters required for the number of solar panels based on the type and model of inverter you select from a drop-down list or import into your account via its datasheet.
Instead of calculating all of this information by hand, you can now have it automatically determined by software and complex algorithms in a few clicks, leaving you with more time on hand to focus on sending out more quotes and growing your business.
Offer Multiple System Configurations and Make Changes on the Fly
On top of enabling solar professionals to design their systems from anywhere in seconds, Solargraf also offers users the ability to display up to three separate solar designs on one single proposal with its good, better, best feature.
You can now prepare three options for homeowners using different panel configurations, models, pricing, financing options, etc. You’ll only need to determine your panel strings after the client selects the design and price they would prefer, opening up the opportunity to create as many new proposals for them as you’d like beforehand without all the extra work usually associated with revising quotes.
Have your Strings Determined by a Design Team
When you complete your solar design and the software has determined the ideal number of panels, orientation, and best configuration possible, you can order your permits through the tool with a 24 – 48 hour turnaround time where our design team will do all the heavy lifting for you and define the panel strings.
Instead of all the extra planning, math, and busywork, all you need to do is define your offset, select the roof surfaces you’d like the system to be installed on, and pass it on to Solargraf to get the rest of the job done.
This makes for a more streamlined design and sales process. Fewer revisions are required when the client signs on the dotted line and you need to begin the permitting process to get the installation started. This makes each individual job easier and also opens up more time in the workday for booking more meetings, generating more proposals, and spending time on the roof installing other systems.
In Closing
Correctly wiring solar panels might seem challenging, but it is quite simple with the right knowledge, tools, and software in your back pocket. From determining whether your system is best wired in series or parallel, calculating the number of panels in a string manually, and using our tips and best practices, solar panel wiring doesn’t have to be as complicated as it appears on the surface.
Take your PV designs and proposals to the next level with Solargraf’s solar software designed to help you get more done faster, and more accurately. With team and project management capabilities, accurate and easy solar designs, fully customizable proposals, speedy permits, financing integrations, and more. Book your free demo today to learn more about how Solargraf can help busy solar professionals close more deals than ever.

 United States
 Germany/Austria
 Brazil
 Netherlands
 Japan
Japan