Help Center External Integration
Web Plugin for Lead Capture
Published on 24 Sept 2026
The Solargraf Web Plugin allows you to capture homeowner leads directly from your company website. When visitors click the lead button, an interactive form guides them through entering their address, monthly power bill, and contact information. Leads are automatically delivered to your Solargraf account and sent to your team via email.
1. Setting up the plugin in Solargraf
To configure your plugin, you will need the Edit Company Settings permission.
- In Solargraf, go to Company Settings from the left navigation menu.
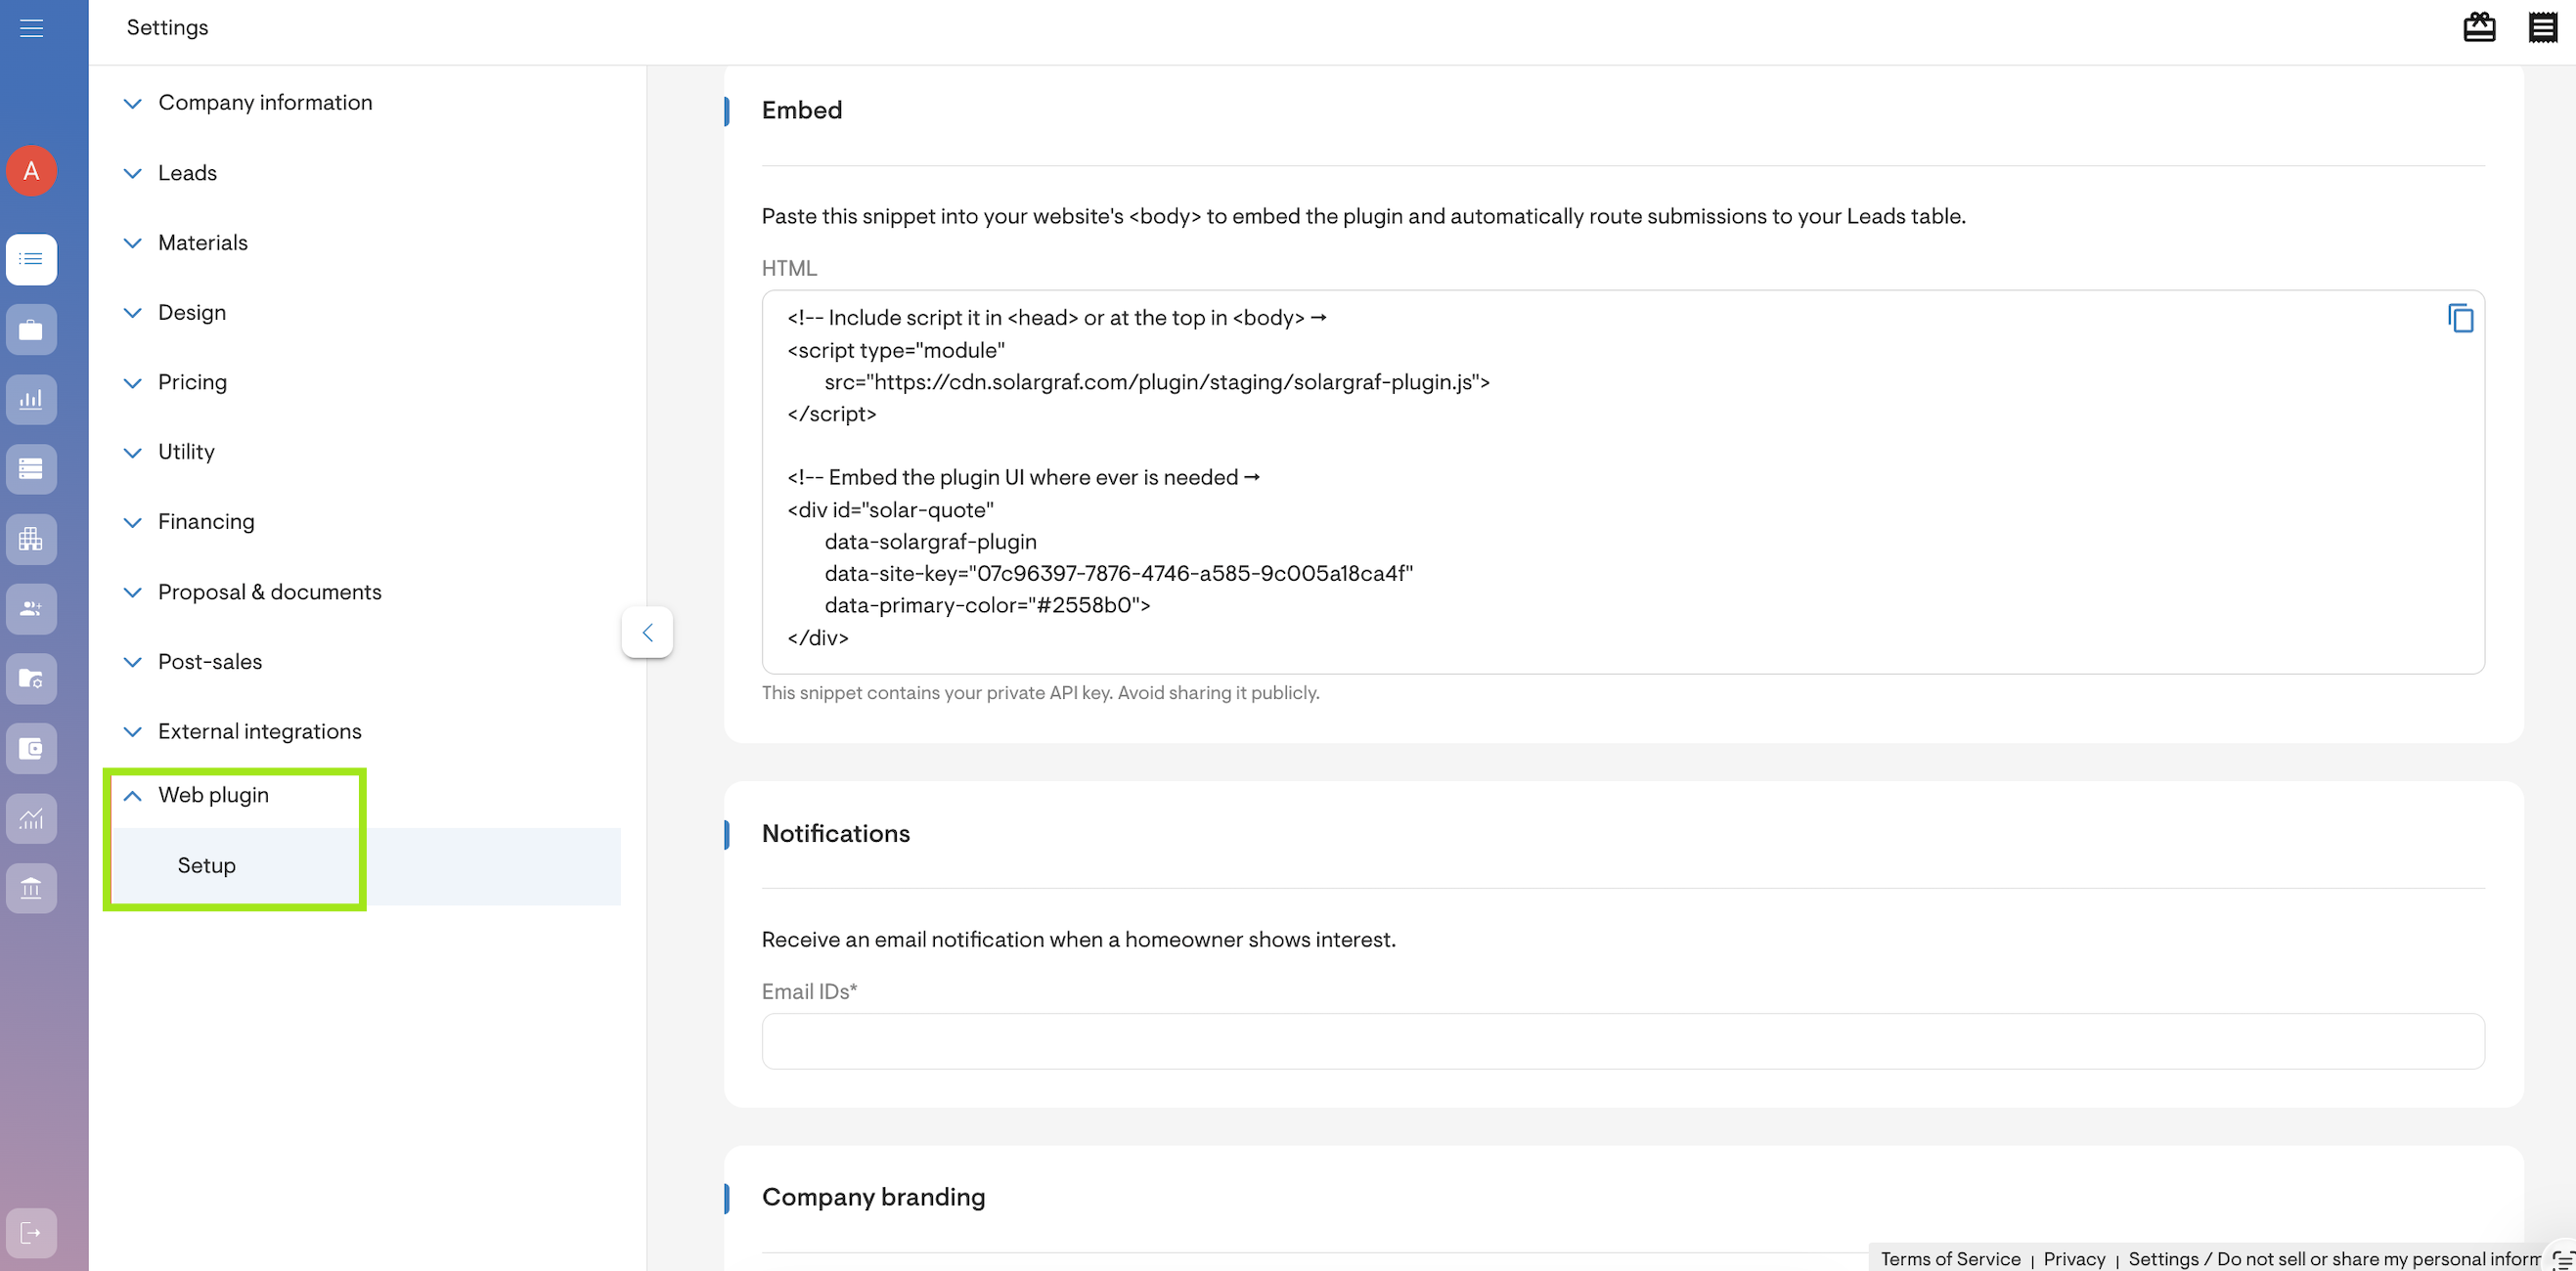
- Select Web Plugin (located near the bottom of the menu).
- Configure the following sections:
- Company branding: Choose a primary brand color using the color picker. Your company logo from Company Settings will automatically appear in the form header.
- Notifications: Enter up to 5 team email addresses to receive instant alerts whenever a new lead is submitted.
- Embed snippet: Solargraf generates a customized HTML script snippet containing your unique company key. Click the Copy icon to copy this code for your website.
2. Embedding the plugin on your website
The Solargraf Web Plugin is designed to be lightweight and simple to install on any standard website or CMS platform (such as WordPress, Squarespace, Wix, Webflow, or custom HTML).
Standard installation
Paste the copied snippet into your website’s HTML where you want the Show interest button to appear, or directly before the closing </body> tag on your target pages:
| <!-- Solargraf Web Plugin --> <script src="https://cdn.solargraf.com/plugin/solargraf-plugin.js" data-site-key="YOUR_COMPANY_KEY"></script> |
Installation tips
- Site key security: The data-site-key is a public identifier unique to your company account. It is completely safe to include in your public website code and does not expose your account passwords or API credentials.
- Button placement: Once added, the Show interest button will render in your selected brand color and launch the lead capture pop-up when clicked.
- Spam & bot protection: Built-in security and rate limiting protect your form against automated spam submissions.
3. What your website visitors see
When a homeowner clicks the Show interest button on your site, they are guided through a quick 2-step quote request:
Step 1: Site and utility details
- Property address: The homeowner types their address using Google Places autocomplete.
- Interactive map: A satellite map confirms the location, allowing the homeowner to drag the pin or zoom in for exact roof placement.
- Monthly electric bill: The homeowner enters their average monthly electricity cost.
Step 2: Contact information & authorization
- Contact details: The homeowner provides their full name, email address, and 10-digit phone number.
- Consent & terms: The homeowner checks the consent box authorizing your company to contact them regarding their solar inquiry.
- Confirmation: After clicking Show interest, a success message confirms their request has been received.
4. Managing incoming web leads
Every completed submission is routed directly into your Solargraf workspace:
- Instant email alerts: Notification emails are sent to your designated team addresses with the homeowner’s contact information, address, electric bill, and a direct link to View lead in Solargraf.
- Leads dashboard: New leads appear in the Leads tab with a Pending status and a dedicated Web plugin tag.
- Filtering & exporting: Use the Show only web plugin leads toggle at the top right of your Leads list to view web submissions, or include them when exporting leads to a CSV file.