Help Center Design
Upload Your Own Image for Roof & Solar Design in Solargraf
Published on 24 Mar 2026
The custom imagery feature allows users to upload a custom image - such as a blueprint, drone photo, or other site image - to use as the base layer for a roof and solar design in Solargraf. This is most useful for sites where the property has not yet been constructed, or in rural locations where Solargraf’s imagery providers do not offer high resolution aerial imagery.
Feature details
Before creating your design, take a moment to ensure:
- The image is clear and captures the full roof.
- It respects the following format and max file size: JPEG, PNG, max 25 MB.
- The length of an edge that is parallel to the ground – an eave or ridge – is known.
Steps to create a design with custom imagery
1. Enter the project address and confirm the site’s location.
2. Define the project’s zoning and system type (new, system expansion, etc)
3. Under Site imagery, choose Upload My Own Imagery.
4. Select and upload a JPEG or PNG file from your device.
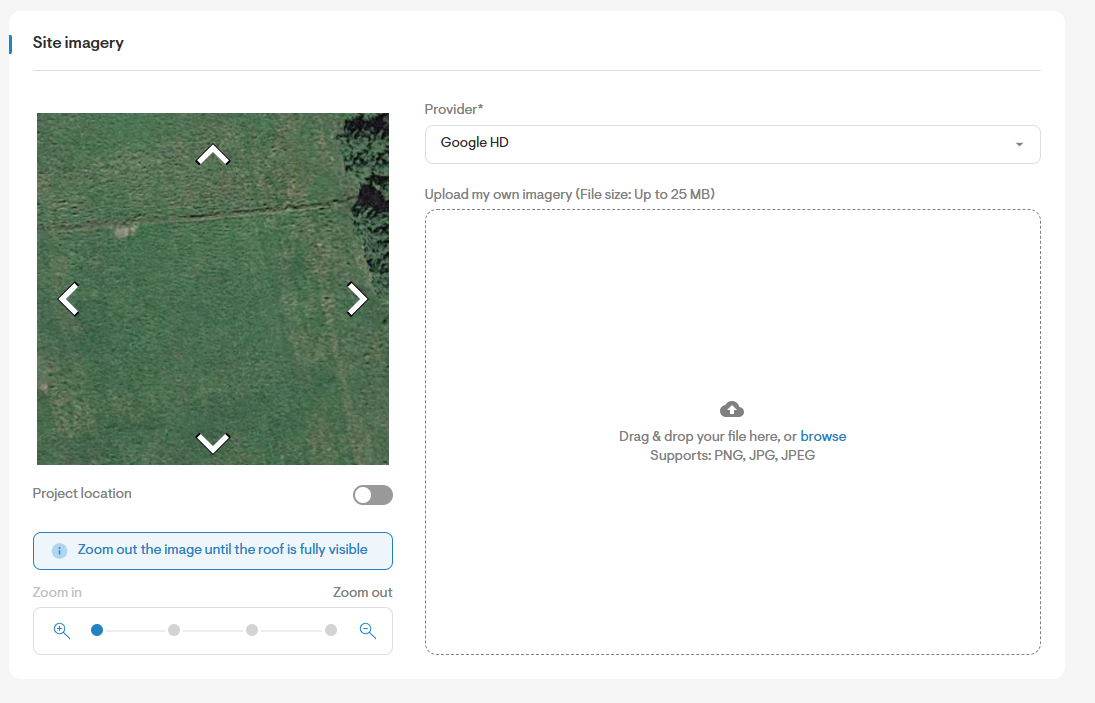
Once a valid file is uploaded, it is necessary to crop the image. When cropping the image, it is important to ensure that:
- The cropped version of the image is a perfect square
- The full roof is visible
- North faces the top of the screen.
Within the crop window, use the zoom and rotation tools to ensure these criteria are met.Whenever a custom image has been uploaded and cropped, when the user proceeds to “create design”, they’ll be re-directed to set the scale of the image.
Steps to set the scale for a custom image
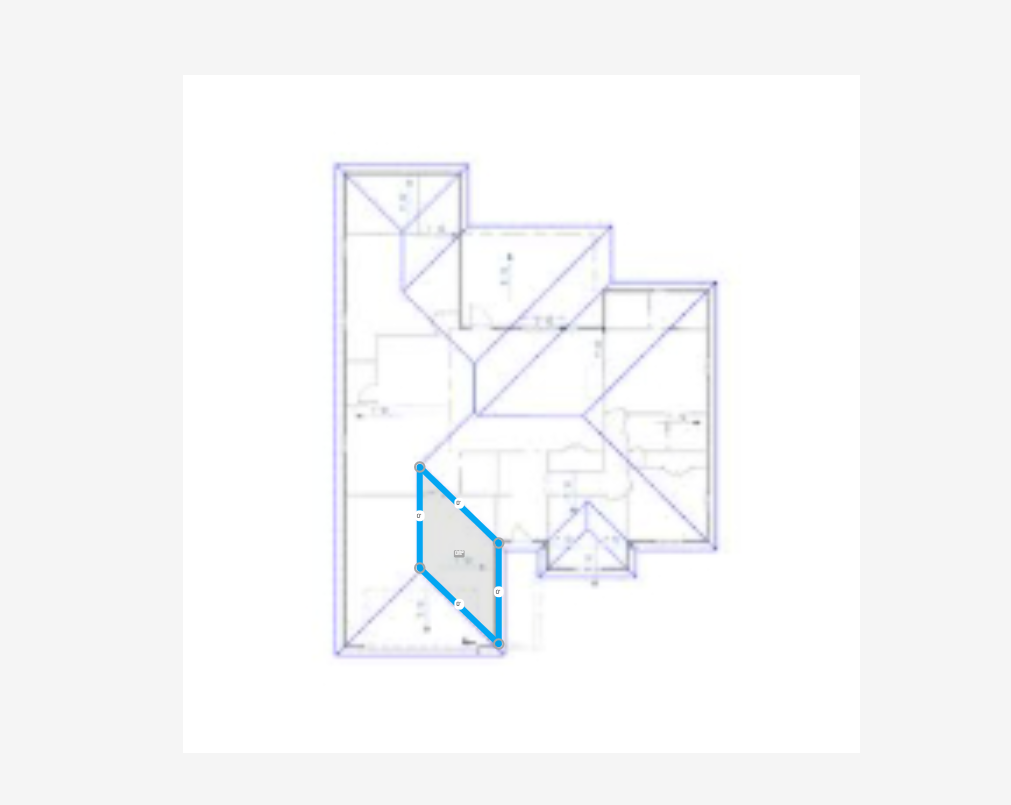
1. Trace a roof facet that includes an eave or ridge.
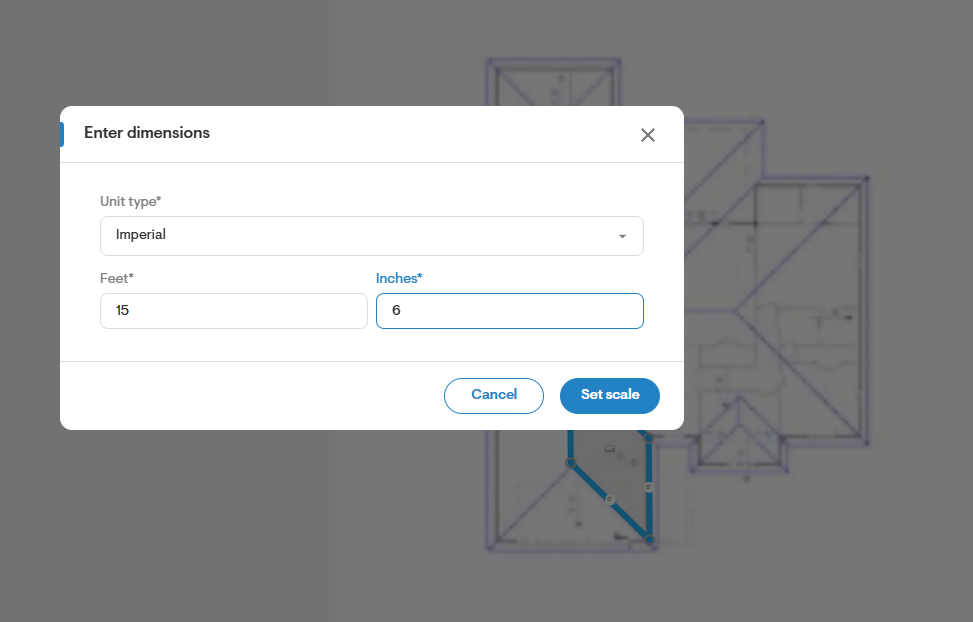
2. Select the eave or ridge (any edge that is parallel with the ground) and enter its real‑world length (in metric or imperial).
3. Select “Set scale”.
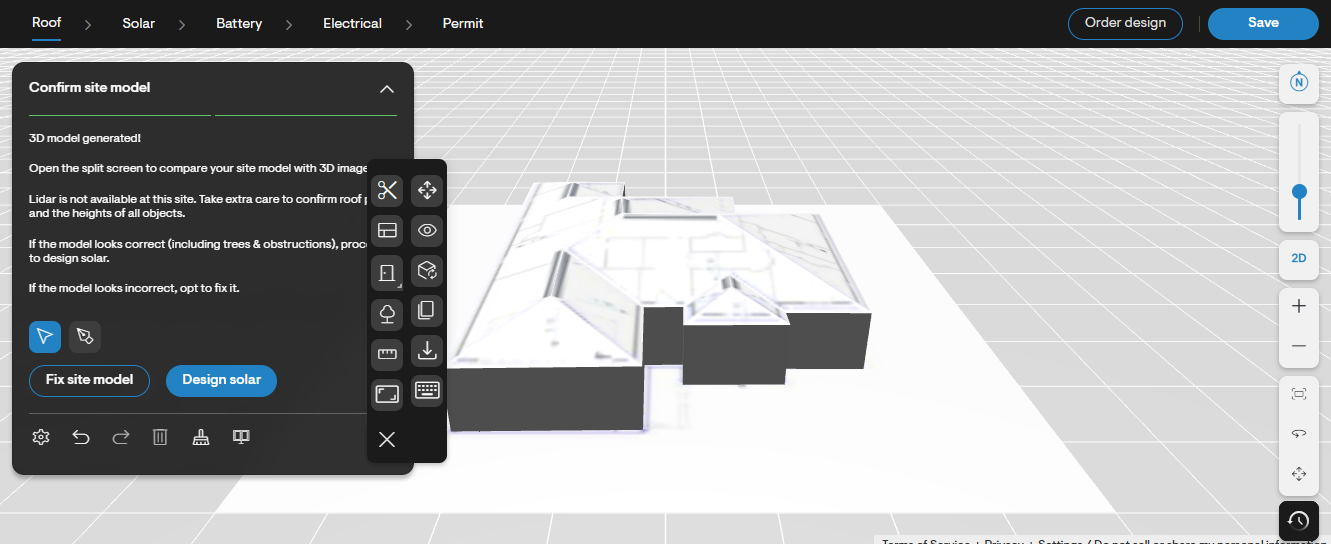
4. Once inside the design tool, users can reset the scale by selecting the appropriate tool.
Important considerations when designing with a custom image
Roof detection algorithms are not trained to work on third-party images. It is therefore recommended to trace the roof’s outline manually for maximum accuracy.
Lidar-based automations such as pitch & wall detection are not supported on custom images. It is therefore critical that these are defined manually.
Neighboring buildings and trees are not typically included in architectural blueprints. It is advised to use the split screen function to identify their position and approximate size. Modeling these is important for accurate shading calculations.
The solar design workflow is unchanged compared to designing on a Nearmap or Google image.