Help Center Permit Services
Submit a Permit-Set in Solargraf
Published on 26 Oct 2026
Use this article to submit a new permit set application for a Solargraf project using the current workflow. Submit only when the design, materials, and project details are final to avoid delays or revisions.
Best practice: Before ordering a permit set, confirm that the selected design option, equipment, address, and installer details are final. Later changes can delay delivery and may require a paid revision.
Before you start
- The proposal should be signed.
- The project address must be correct.
- Final equipment should be selected.
- Photos and supporting files should be ready.
Open the project
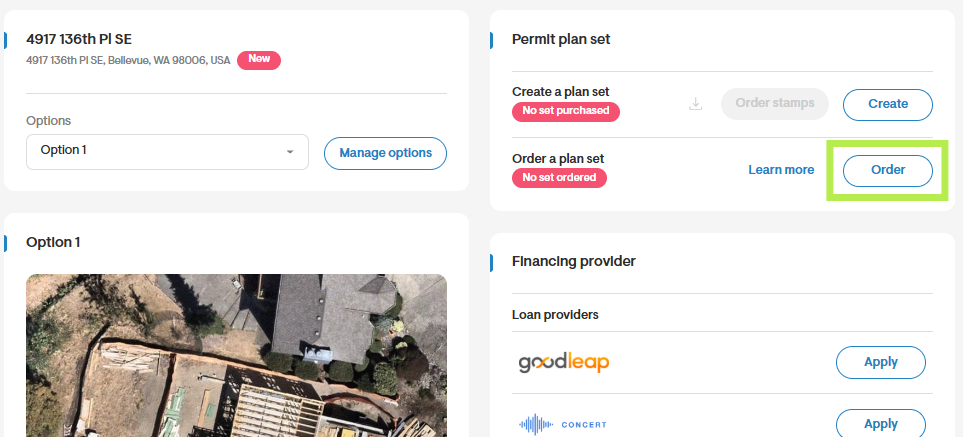
- Go to the project from your dashboard, open Manage Project, and click Order a plan set (Order).
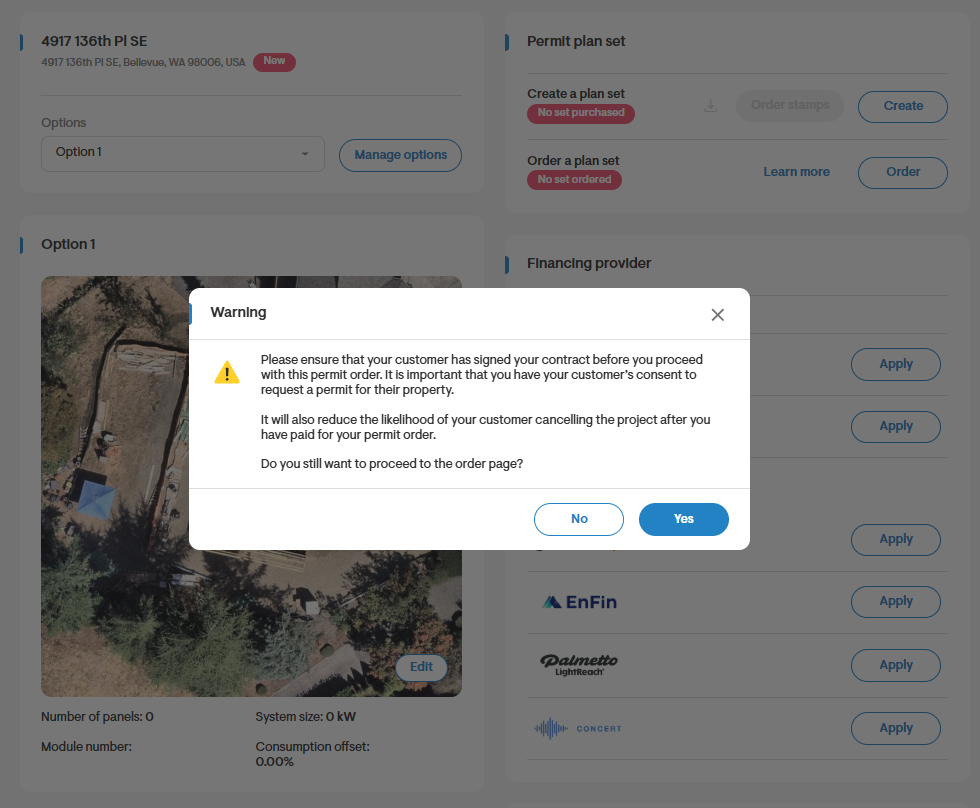
- You may see a confirmation message asking you to confirm customer consent and proposal signature before continuing.
Select the correct design option
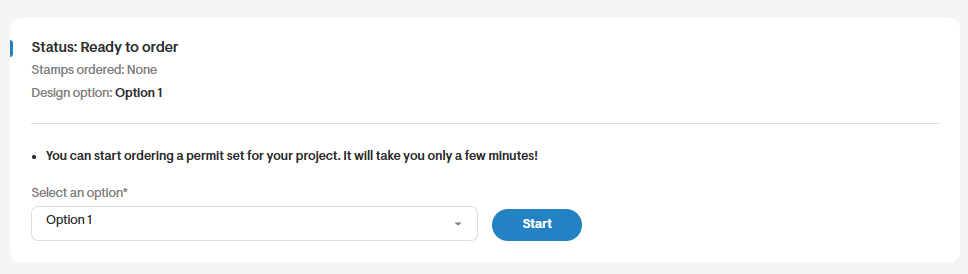
- If the project has multiple design options, choose the exact option you want permitted, then click Start.
Step 1: Complete the layout
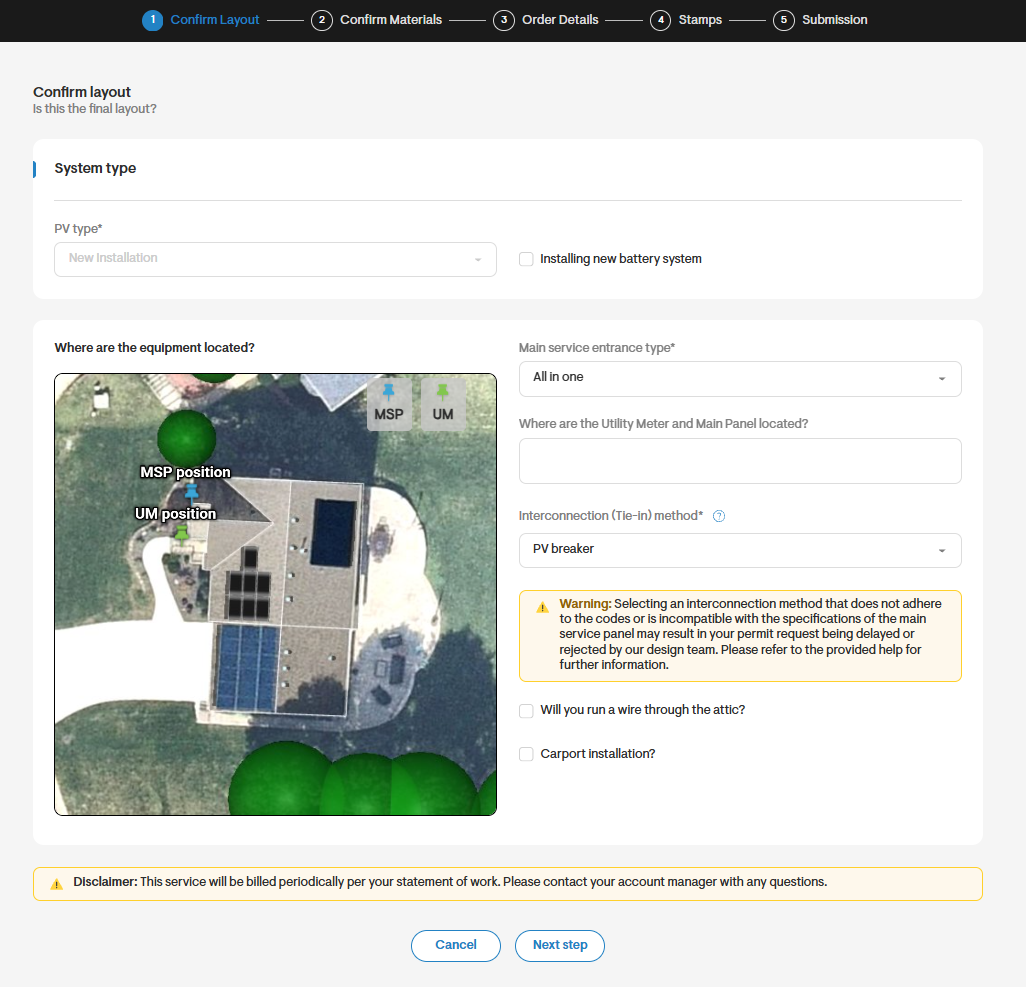
Review the roof and site layout carefully. Mark the required locations on the imagery using the green and blue pins, including the Main Service Panel (MSP) and the Utility Meter (UM).
- Select the main service entrance type, such as all-in-one, detached, or adjacent near.
- Confirm the interconnection method, or allow the permit team to design using best practices.
- Indicate battery-related details if a new battery system is being installed.
- Provide any other installation details requested on the form, based on project type.
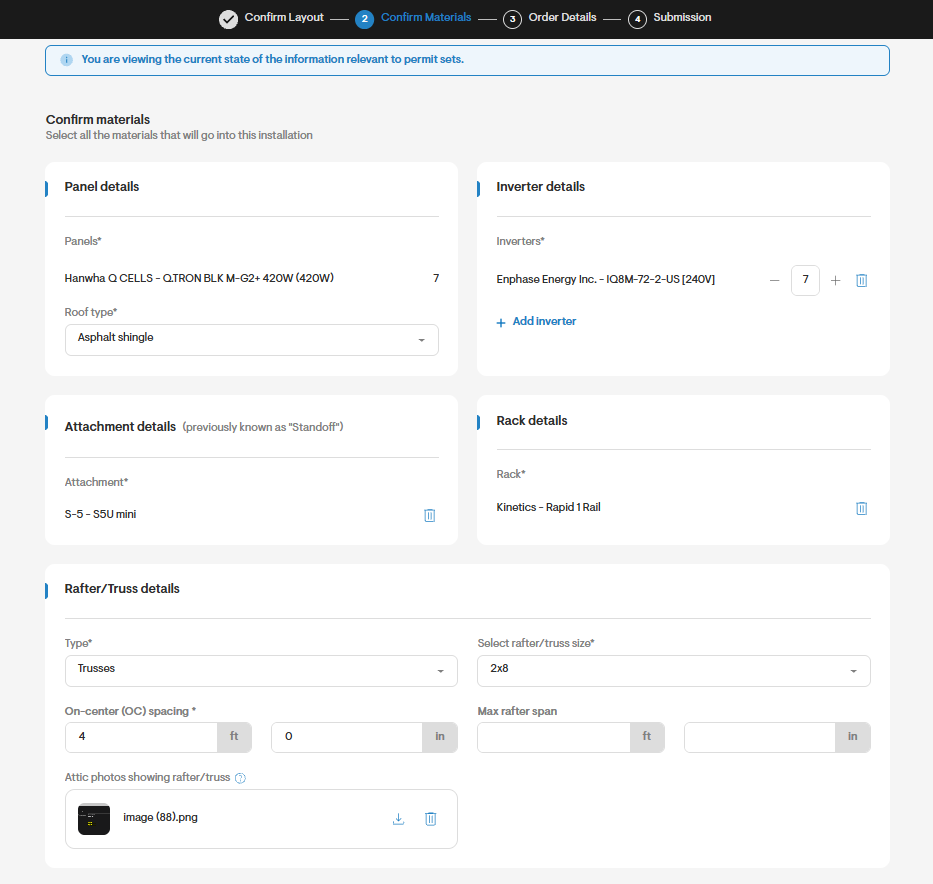
Step 2: Confirm materials and structural details
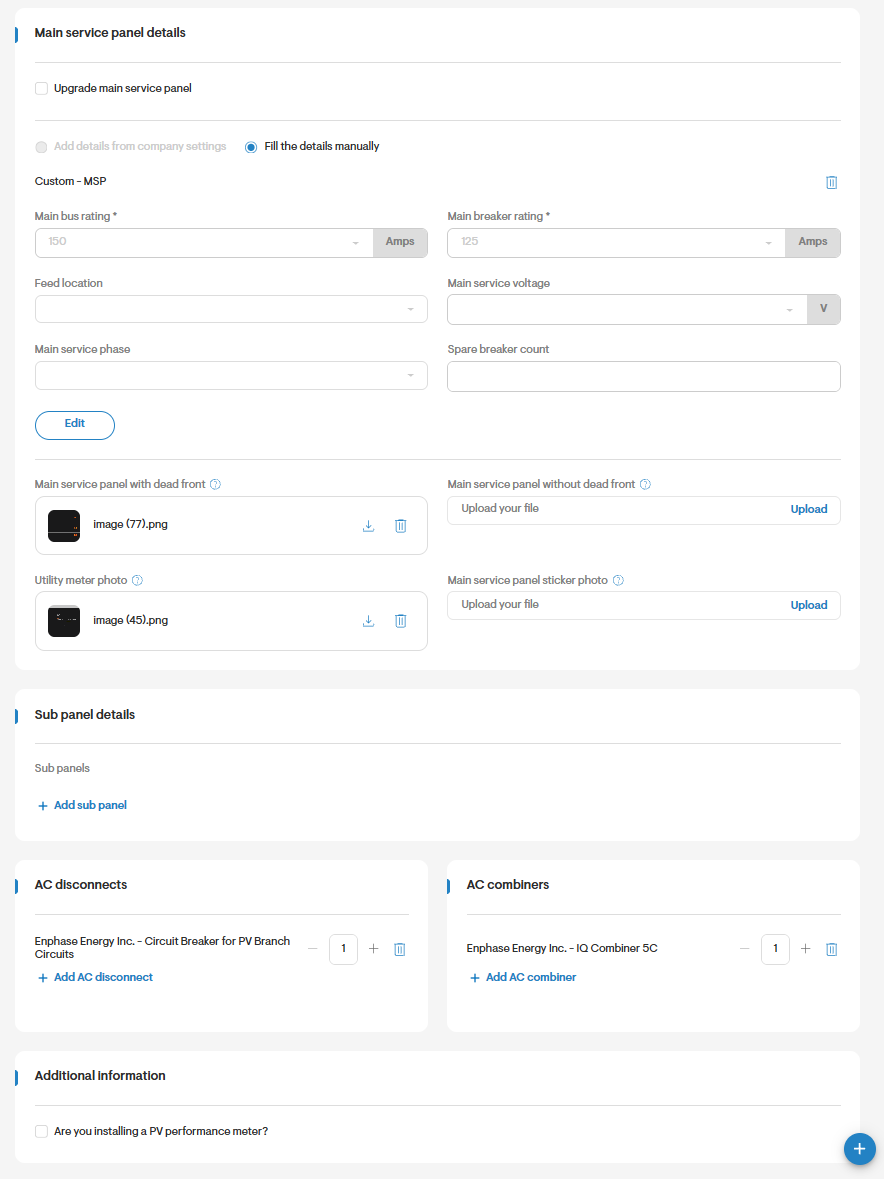
This section pulls in equipment already added to the project. Review it carefully and add any missing items where allowed.
- Panels must be added in the design or drawing workflow before permit submission.
- Include MSP details, such as bus rating and breaker rating, when requested.
- Upload required photos, which may include the MSP and Utility Meter (UM), plus panel labeling.
- Provide roof mounting, roof type, racking, standoffs, and framing details if required.
- Add optional materials, such as a PV performance meter or other equipment, through the additional material options.
Step 3: Complete order details
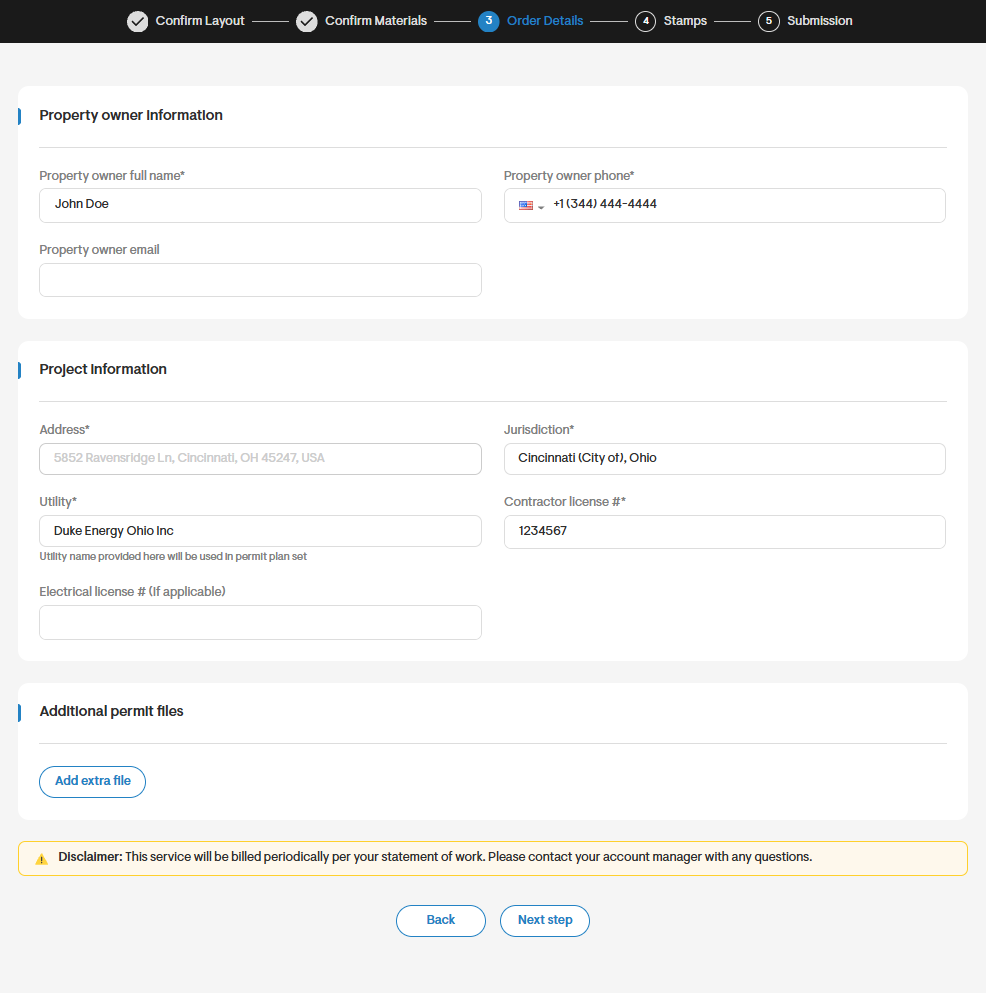
Enter or verify the permit application details:
- Property owner information
- Project address
- Jurisdiction or authority having jurisdiction (AHJ)
- Contractor and electrical license details, where applicable
- Utility details, if requested
- Additional permit files
Some account-level information may auto-fill from company settings or customer records. Verify everything before continuing.
Select stamps if needed (Step 4)
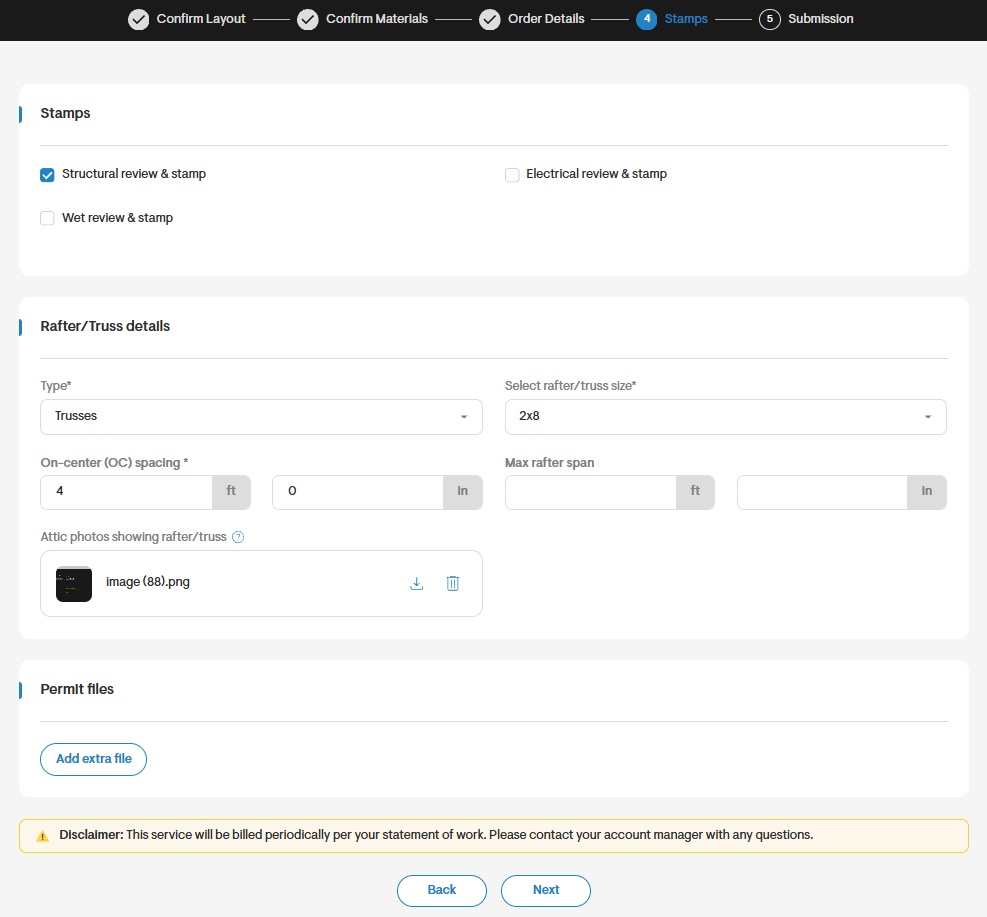
Use the stamps step to order structural, electrical, or wet stamps where available.
- If ordering a structural review and stamp, complete all additional required fields.
- Upload attic photos or other supporting files when required for structural review.
- For wet stamps, confirm the mailing address in company settings and select the number of copies needed.
Review the submission page and submit (Step 5)
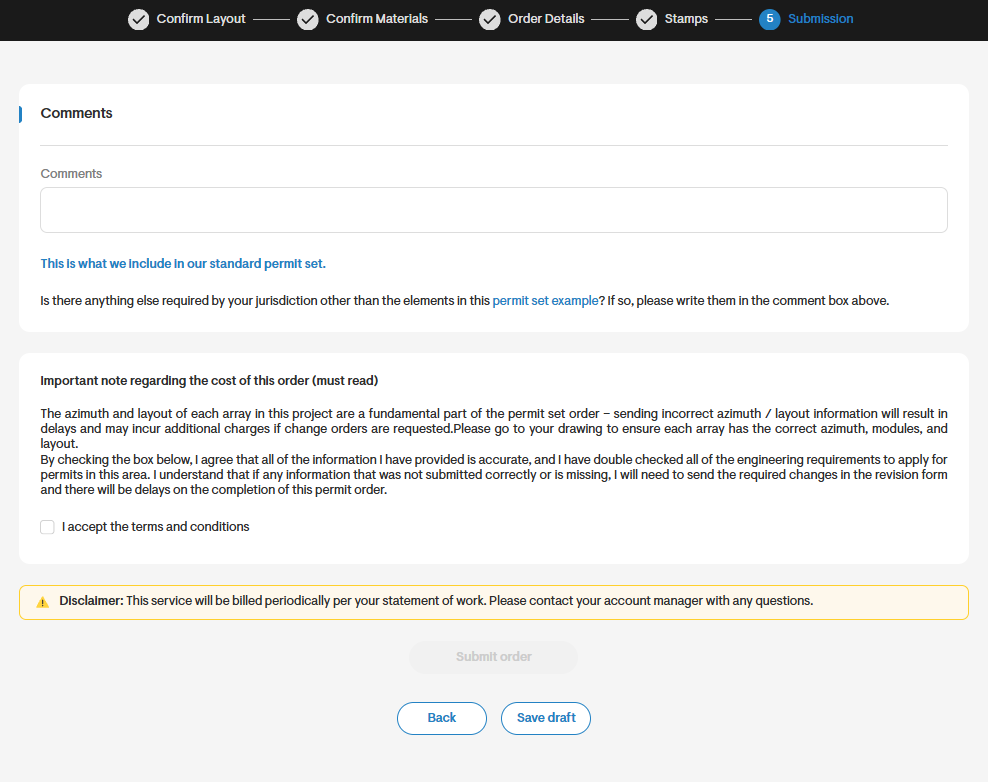
Add any comments that will help the permit team complete the order accurately. Read and accept the terms and conditions, then submit the application.
Notes:
- If you are not ready to submit, use Save Draft if that option is available in your account. You can return later from Manage Project > Order a plan set (Order).
- Some older instructions mention fire setback fields and attic wire-run prompts as standard inputs. Current permit intake may differ by market or project type, so follow the fields shown in the live form.
- Do not rely on older guidance that says MSP photos are only needed when the panel cannot be added as a material. Current intake commonly requires panel and meter details as part of a complete submission.
- Stamp availability varies by country and jurisdiction. In the United States, structural, electrical, and wet stamps may be available. Availability can be more limited in other regions.
What happens after submission
- The permit set enters the production workflow.
- You may be contacted if required details or files are missing.
- Status updates may appear in the project permit workflow, such as ordered, missing details, pending revision, or received.
- If revisions are needed later, you can request them, though charges may apply depending on timing and scope.
Typical expectation: Permit plan delivery is often targeted within about 48 hours once all required information is complete, though exceptions can apply.
Common mistakes to avoid
- Submitting before the design option is final
- Using the wrong project address or jurisdiction
- Leaving out MSP, meter, or attic photos when required
- Forgetting battery, roof, or framing details
- Ordering a stamp without the supporting information needed for review
Quick checklist
- Proposal is signed and customer consent is confirmed
- Final design option is selected
- Equipment and materials are complete
- MSP and Utility Meter (UM) details are provided
- Address, jurisdiction, utility, and license details are verified
- Required photos and supporting files are uploaded
- Stamp requirements have been reviewed
FAQs
Can I submit before the design is final?
It is not recommended. Submitting before the design and materials are final can cause delays, missing-detail requests, or later revisions.
Can I add solar panels directly in the permit form?
No. Panels should be added in the project design workflow before you begin the permit set application.
Can I save the application and finish later?
Many accounts support a draft workflow. If available, use Save Draft and return through Manage Project > Order a plan set (Order).