Help Center Proposal
Good/Better/Best: Creating multiple project options
Published on 10 Dec 2021
This guide will walk you through using the Good/Better/Best feature on Solargraf to create multiple proposal options for the same project.
Why use the Good/Better/Best feature?
The Good/Better/Best feature offers a streamlined way to present multiple proposals to the same client. It’s a powerful tool for negotiation, allowing you to prepare and showcase different options tailored to your client’s needs.
Each version of the proposal featuring its own solar design, materials, and pricing is referred to as an Option. All options are grouped under a single Project, making it easy to manage and compare them throughout the sales process.
Cloning a Project Option
You can clone an option after creating a project.
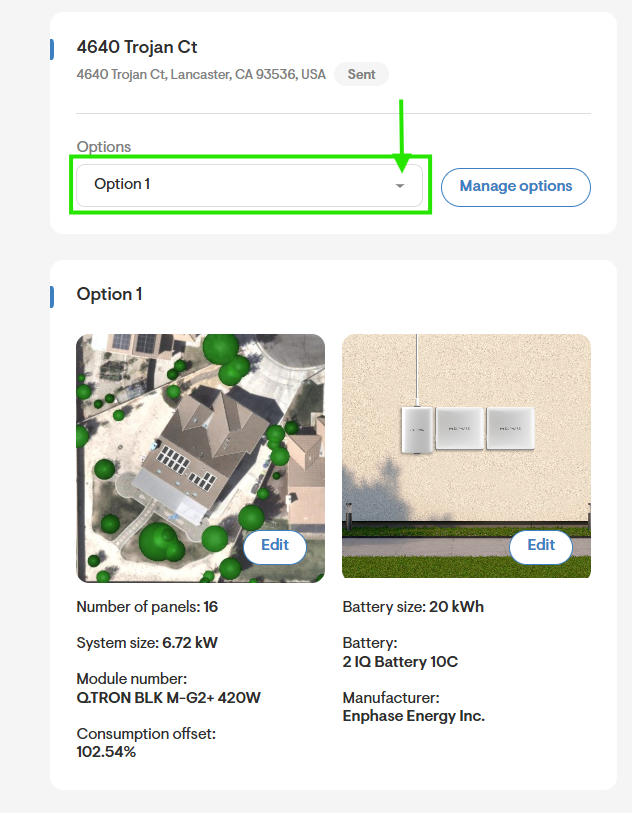
- To begin, click the arrow next to the Option 1 title.
Under each project option, you’ll see key details including: number of panels, module number, base price, system size, offset, and whether the project includes storage.
- To clone or delete an option, use the copy and bin icons located to the right of this information.
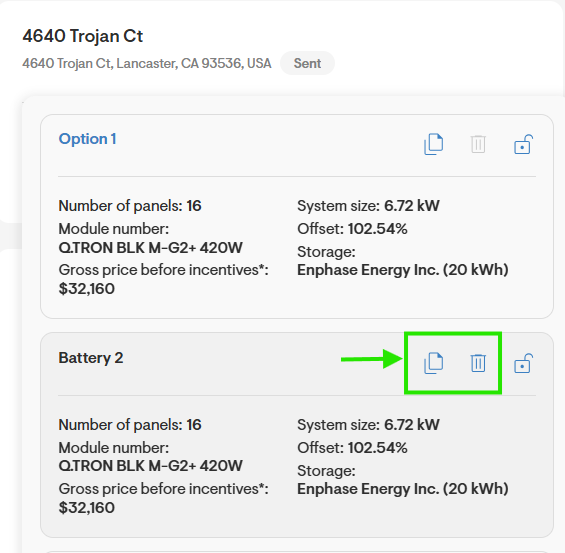
Note: You can only delete an option if it hasn’t been set as the default.Manage Options
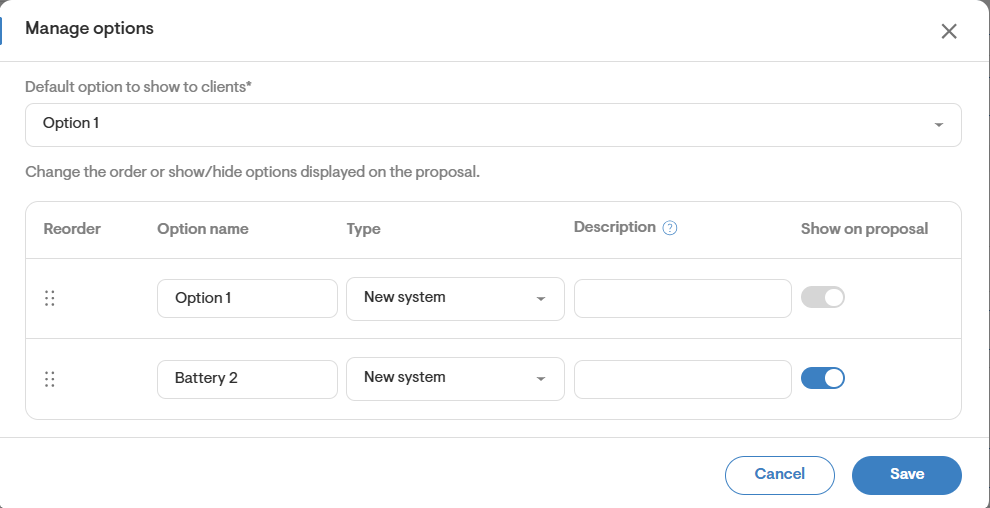
You can manage each project option by doing the below steps. While there’s no limit to the number of options you can add, only three can be displayed at a time on the proposal.
- To set the default option, use the dropdown menu under Default option to show to clients.
- Toreorder options, click the six-dot icon to the left of the option name and drag it to the desired position.
- To change the name displayed to the client edit the Option name box.
- To change the option Type select one of the following from the drop-down: New system, Battery add-on, System expansion.
- Edit/Add a description by using the Description box. The description will appear in the proposal.
- Tocontrol visibility, use the toggle button under Show on Proposal to choose whether an option appears in the final proposal.
Configuring Each Option
Once you have created a project option, you can modify the following pages:
- Drawing: You can make changes on this page to update the project design. This includes selecting a different panel model, adding or removing solar arrays or individual panels, changing the tilt or azimuth of each array, as well as adding a different type of array such as a ground mount.
- Pricing: This page may be updated automatically once you've made changes to the Drawing. However, you can also add or remove Extra Costs or Discounts specific to this option.
- Materials: The selected modules may have changed if these were updated on the Drawing page. However, you can also add a different inverter or make changes to all other materials listed, such as adding a battery to this option.
Comparison Chart
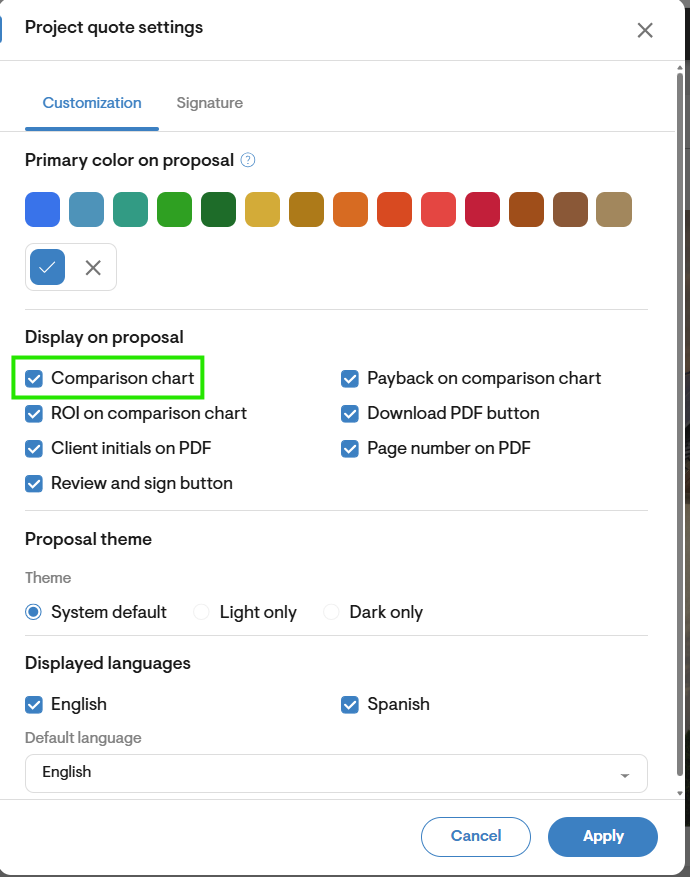
- The comparison chart is an optional feature you can enable under your Project quote settings by clicking on the gear icon at the top of the Web-quote.
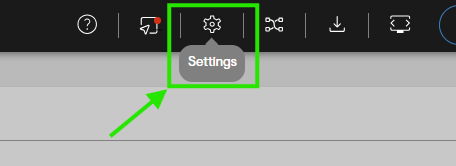
- A window will appear under the Customization tab, you can enable the checkbox for Comparison Chart.
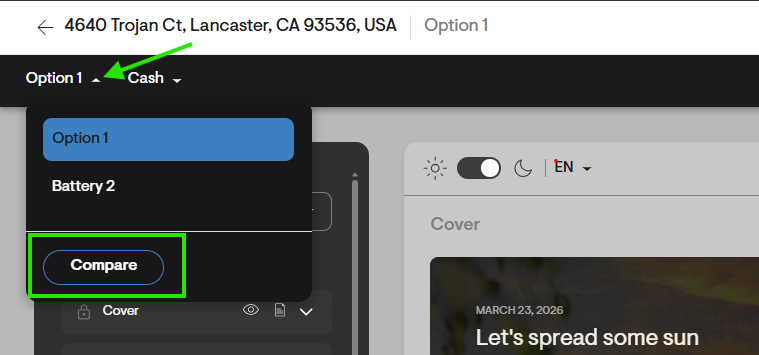
- To access the comparison chart, click the Options menu at the top left. At the bottom of the drop-down, the Compare button will appear select it to view the comparison chart.
The comparison chart provides a side-by-side overview of each project option, helping to evaluate and present different proposals. Depending on the project setup, the chart may include the following types of information:
- Specs: Basic system details such as solar size and battery size (if applicable).
- Performance: Metrics like consumption offset and backup hours.
- Cost: Breakdown of system and project costs, including gross and net values.
- Payment: Financing-related figures such as estimated monthly payments for the first year, estimated total payments for 25 years, and levelized cost of energy.
- Financials: Long-term projections including estimated NET and BILL savings over 25 YRS, utility bill offset, payback period, and return on investment.
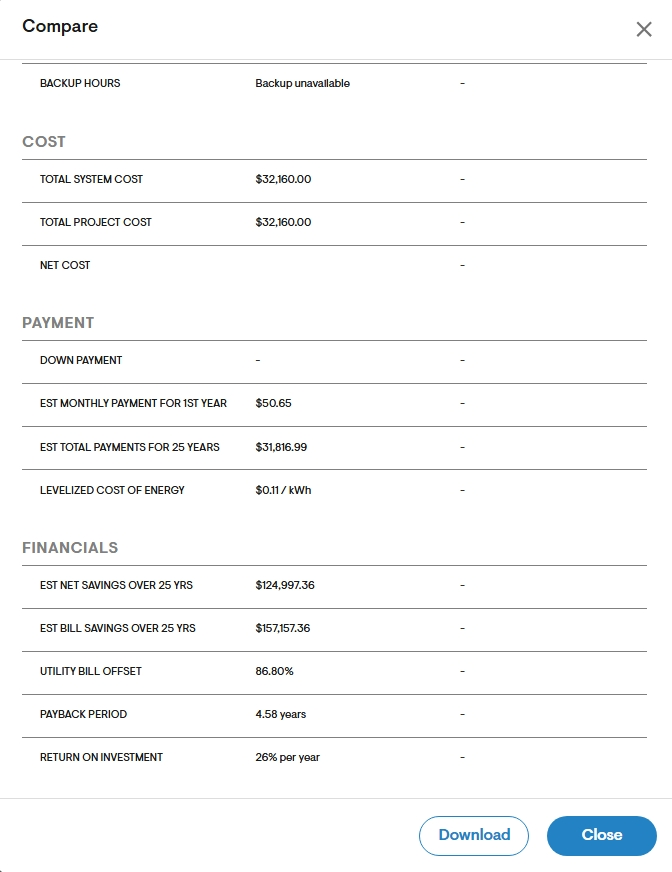
- On this page, select the design option and financing type for each option using the dropdown menus. This allows you to choose which offers will be compared in the chart.
Best practices when using the Good/Better/Best feature
Prepare backup options ahead of time
Even if you don’t plan to display all options to the client immediately, it’s helpful to have backup options ready. If needed during your conversation, you can quickly enable them from the Manage Options settings on the Overview page.Enable the comparison chart for the homeowner
The homeowner can access the comparison chart when it has been enabled by the Solargraf user. This allows them to easily review and compare the different options presented.