Help Center Proposal
Create a Tesla Powerwall 3 proposal
Published on 29 May 2024
The following guide provides information on how to create a Tesla Powerwall 3 (PW3) proposal on Solargraf.
Utility Setup and 3D Roof Design Creation
Before designing a Powerwall 3 system, make sure you have the following pre-requisites correctly set up:
The homeowner’s utility and tariff information.
The homeowner’s past bills or consumption data.
- A 3D model of the roof with shading calculated.
Panel Placement and Stringing
- Select the Add panel (P) tool and place panels on the roof in desired locations. Ensure the panels are placed without any microinverters selected.
- Next, click the Inverter (I) tool.
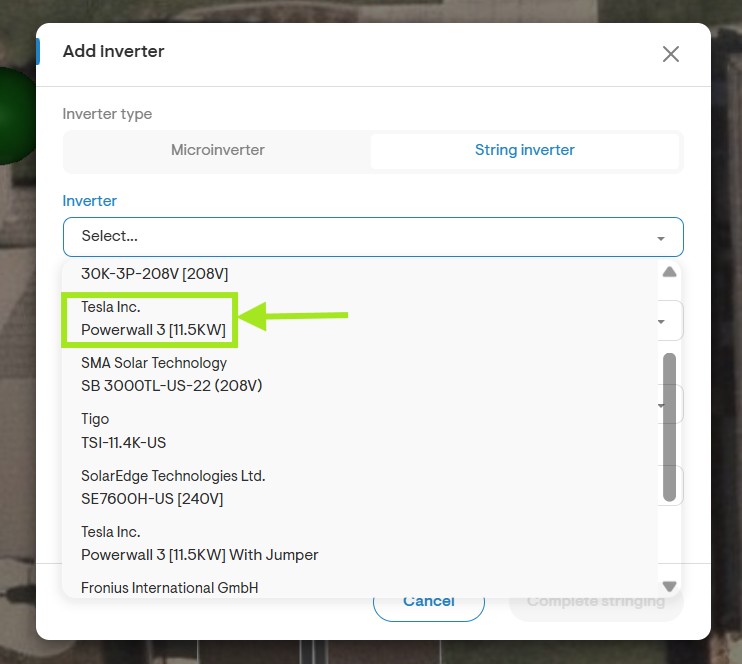
Use the Inverter dropdown to select the Powerwall 3 inverter from the list.
Note:Ensure that you add Powerwall 3 to your favorite inverters. We recommend selecting the inverter from Solargraf’s list, selecting the manufacturer as Tesla.Inc and the model as Powerwall 3.
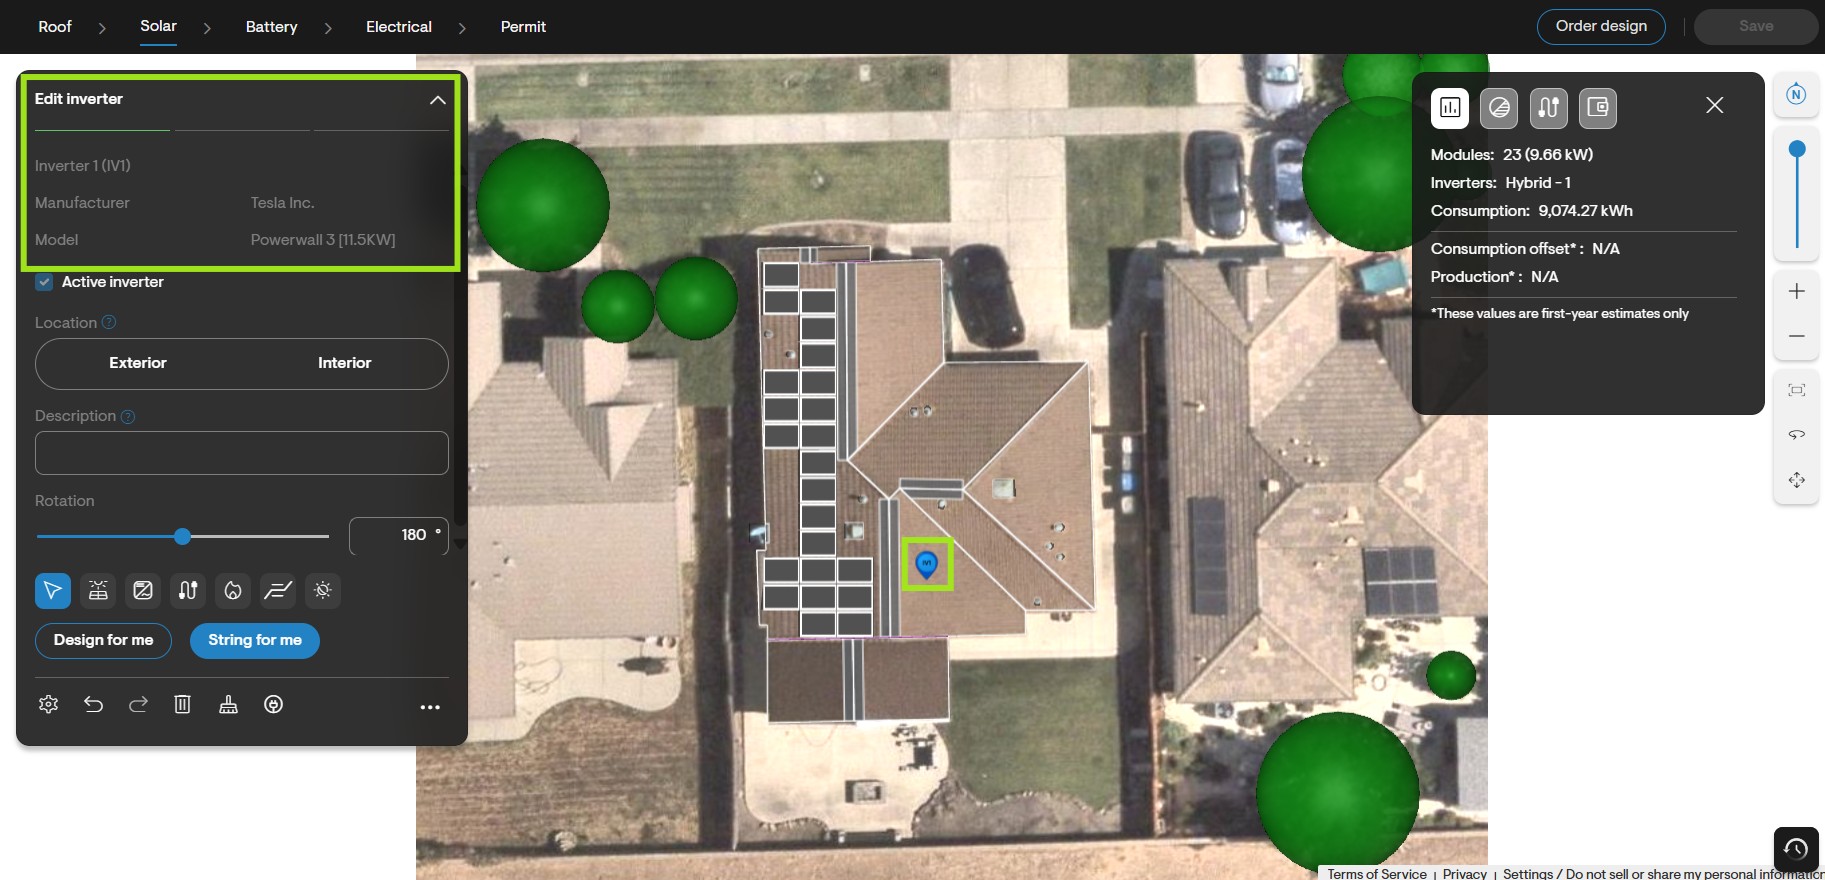
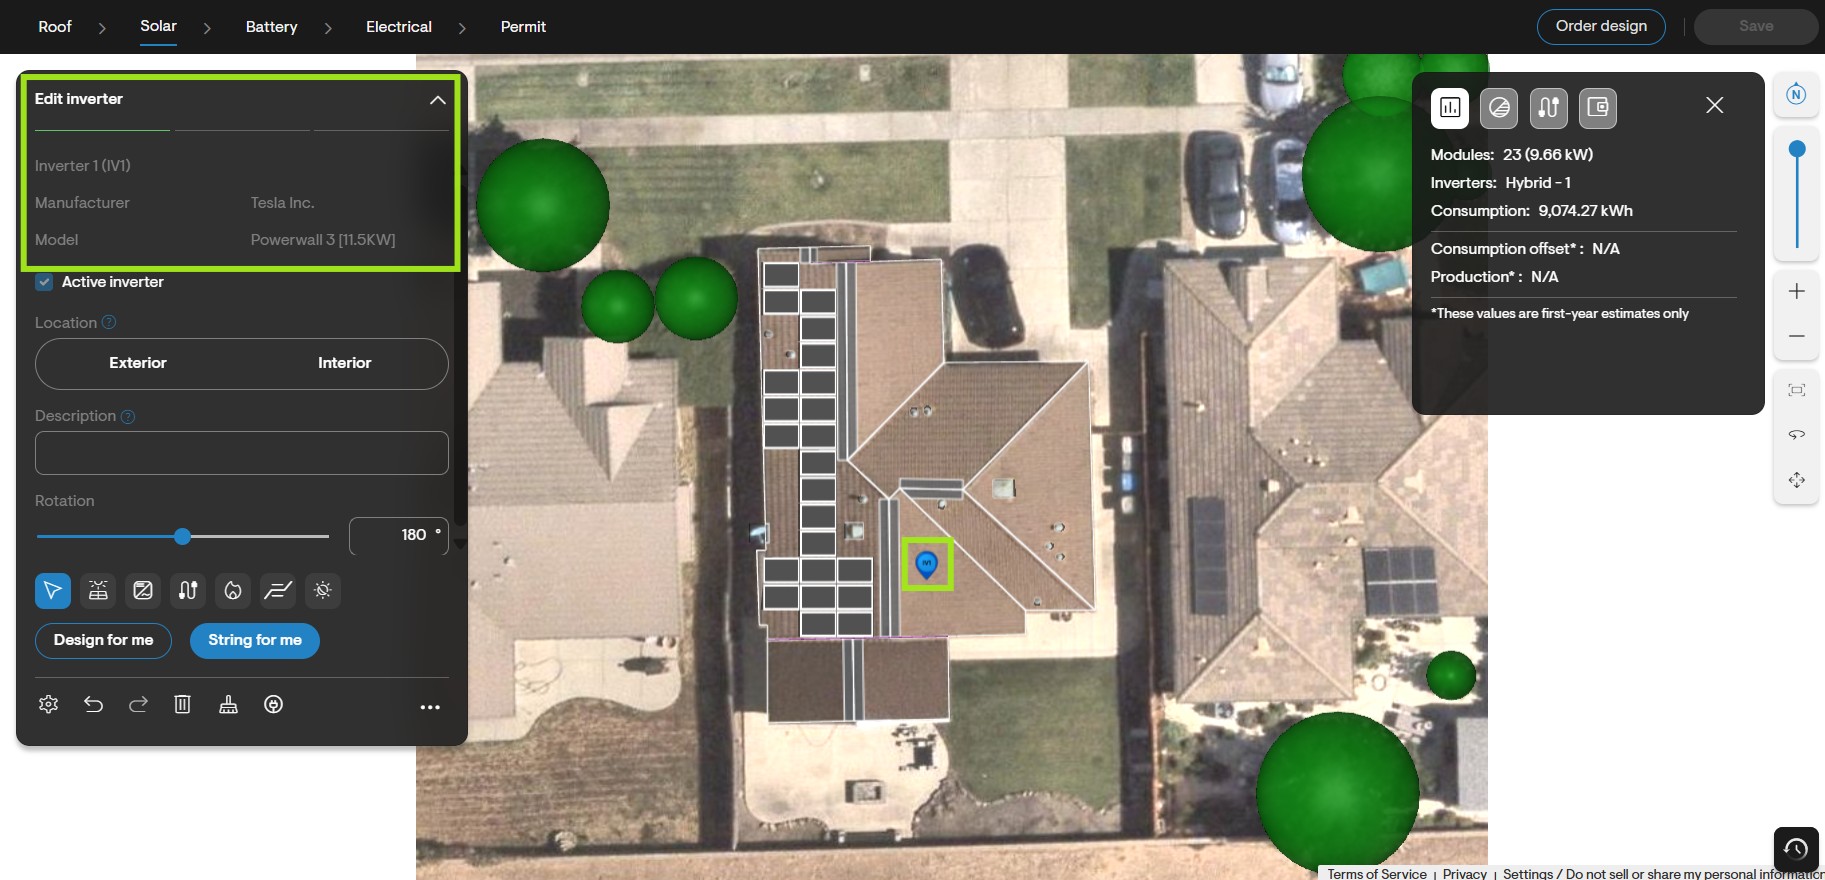
The inverter will now be available for placement. Position it as needed on the roof. The inverter details will appear on the left side of the screen, where you can adjust the rotation and view the inverter properties.
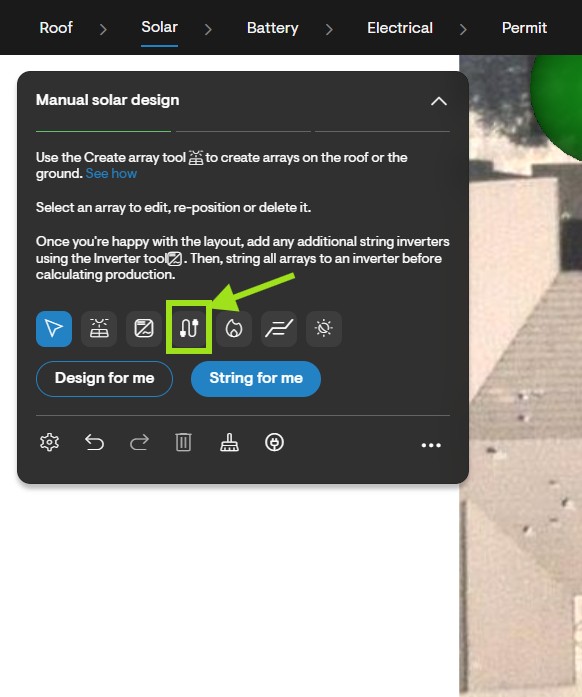
- Navigate to the left sidebar menu and select the Stringing (B) tool.
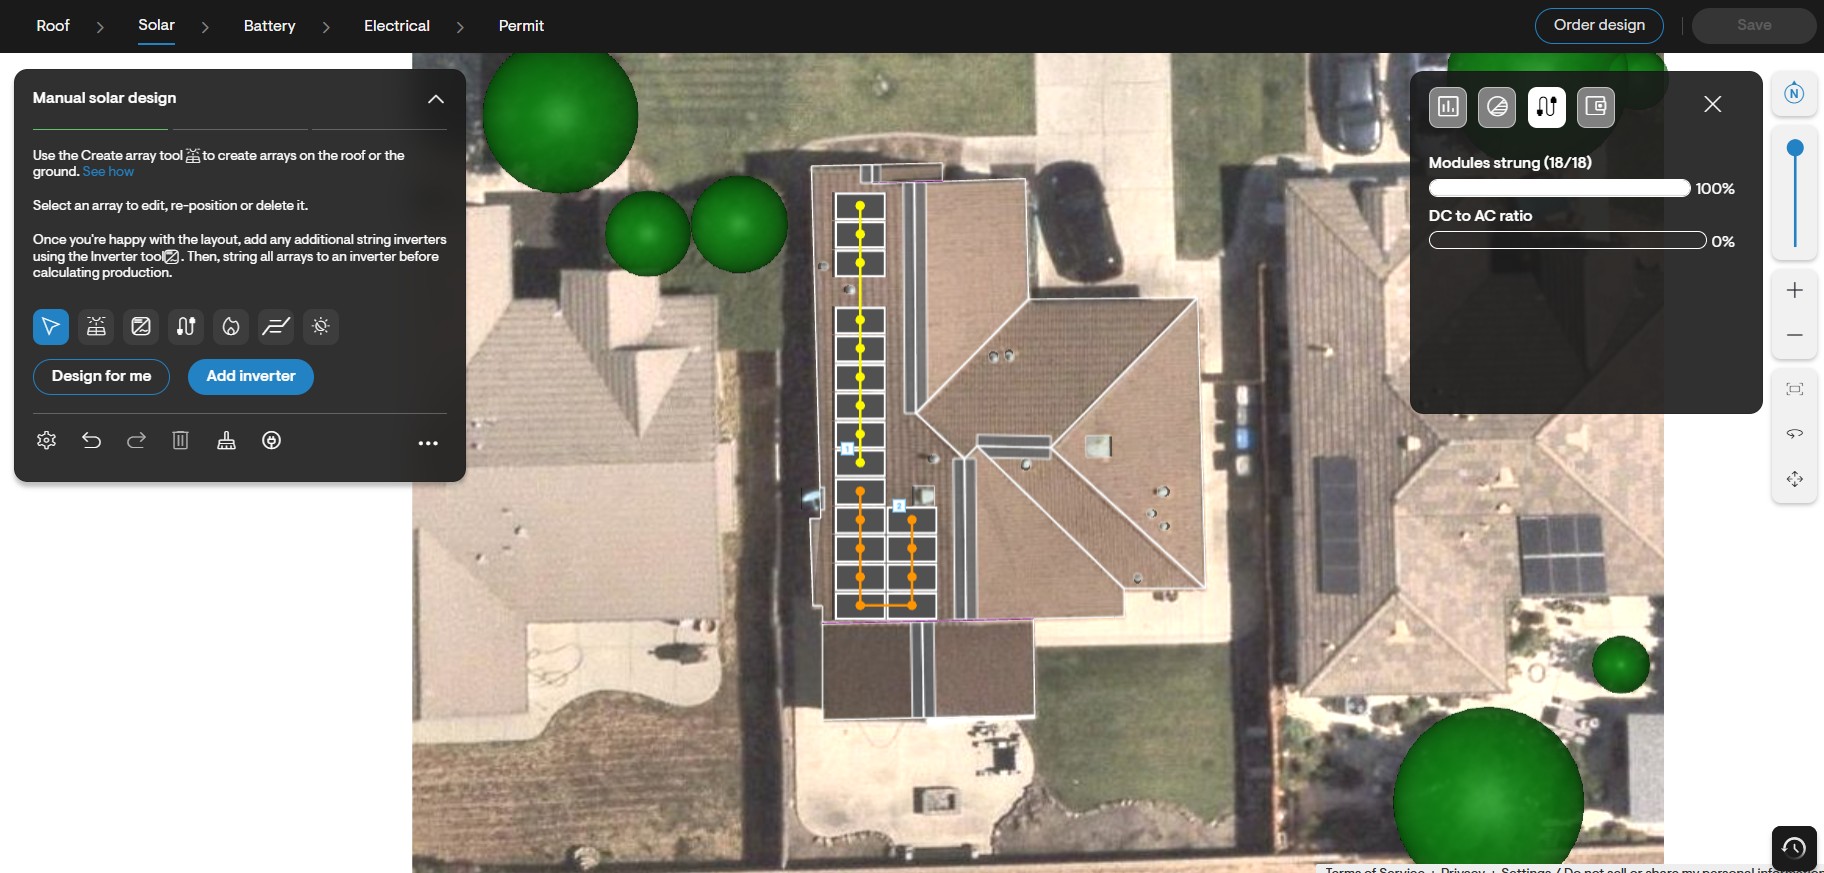
- Connect panels by left-clicking and dragging the cursor across the desired group of panels.
- Connect the strings to the inverter by selecting the inverter icon on the roof. The inverter details will appear on the left side of the screen. Ensure the checkboxes under Input Connections for each panel string are selected.
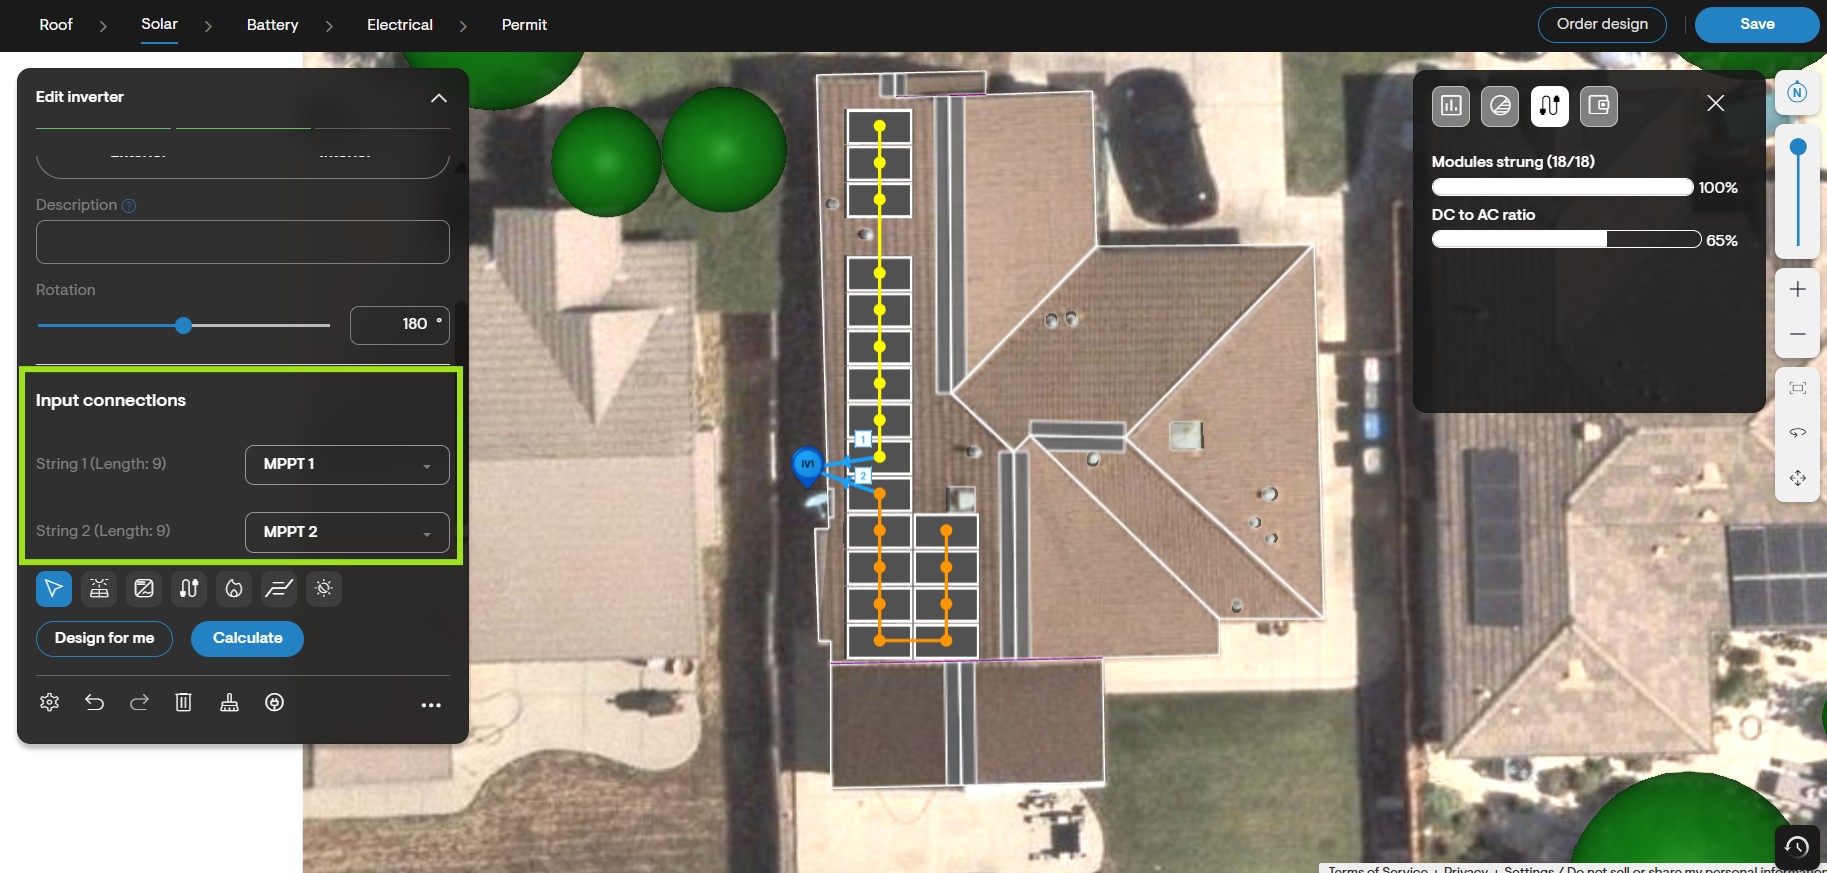
Note: Stringing a Powerwall 3 inverter to panels is mandatory to ensure the production calculations are accurate as per the design.
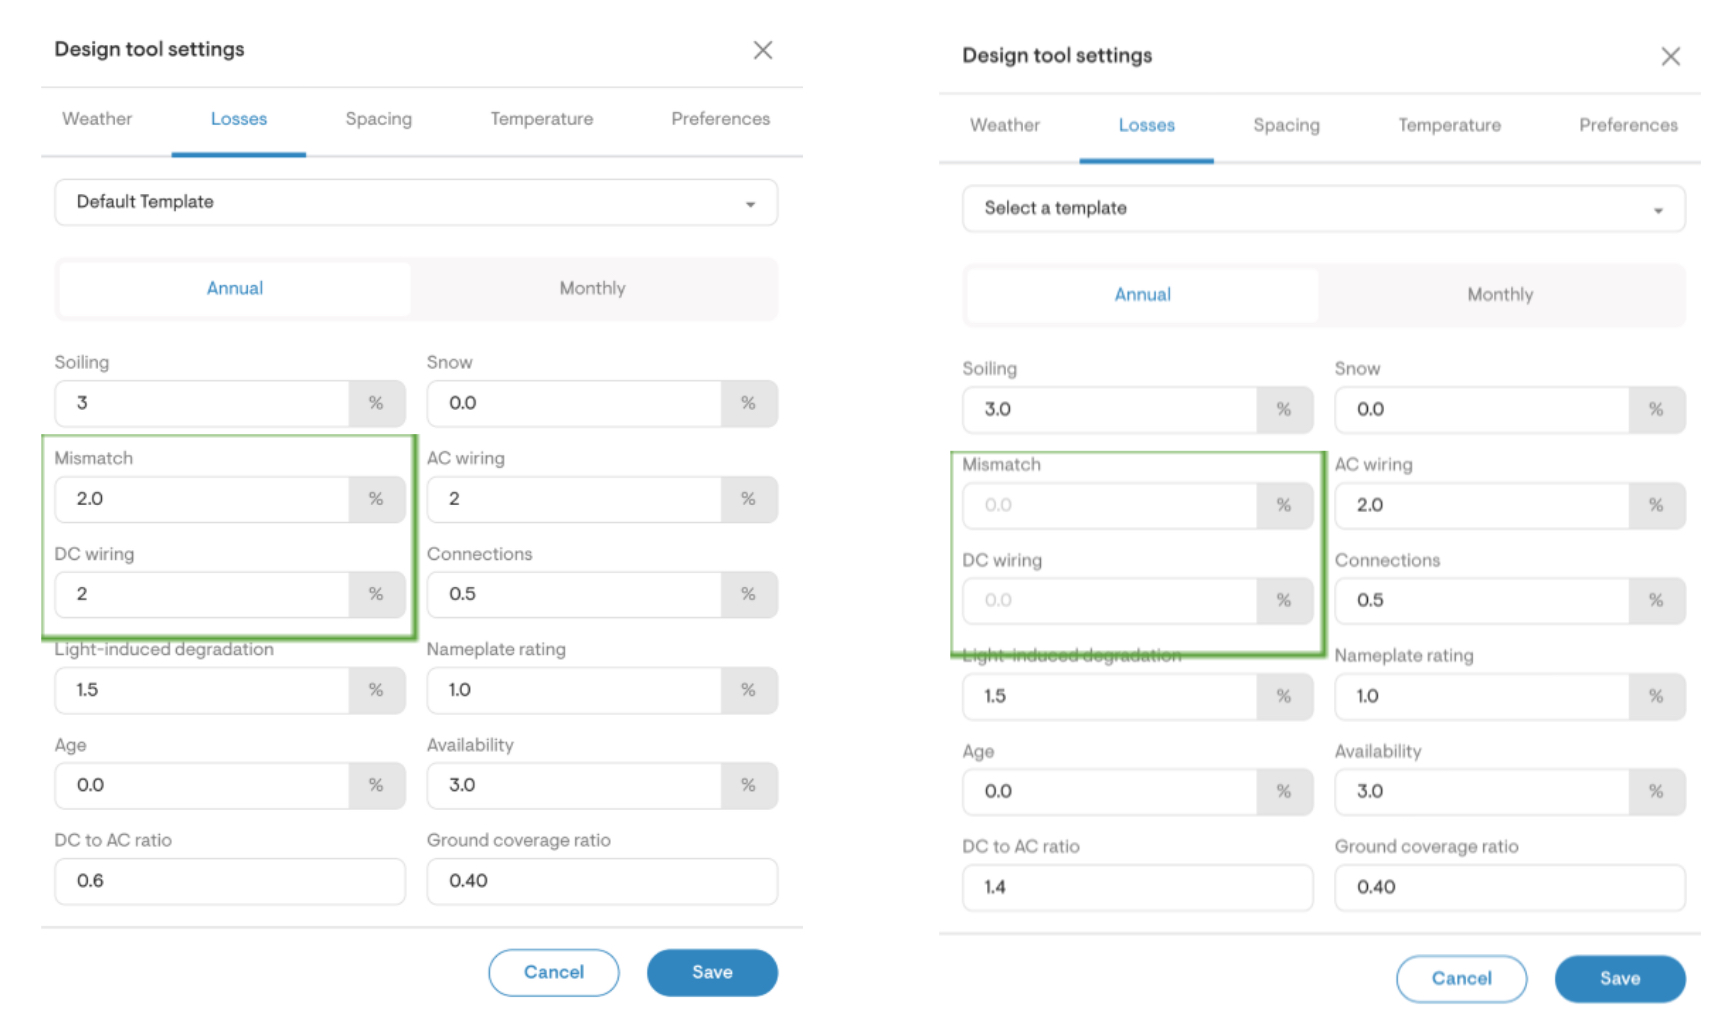
- As a final step, set up the system losses appropriately. Using a hybrid inverter (Powerwall 3) comes with additional mismatch loss and DC wiring loss. Calculate the production and proceed to battery design.
NREL suggests a standard mismatch and DC wiring loss of 2% each for Central/Hybrid inverters (Powerwall 3) and 0% for microinverters respectively. Below is a sample system loss for a Powerwall 3 inverter (left) vs. Microinverter (right).
Battery Design
- Go to the battery design tab on the design tool.
- Select Tesla as the manufacturer and Powerwall 3 battery group.
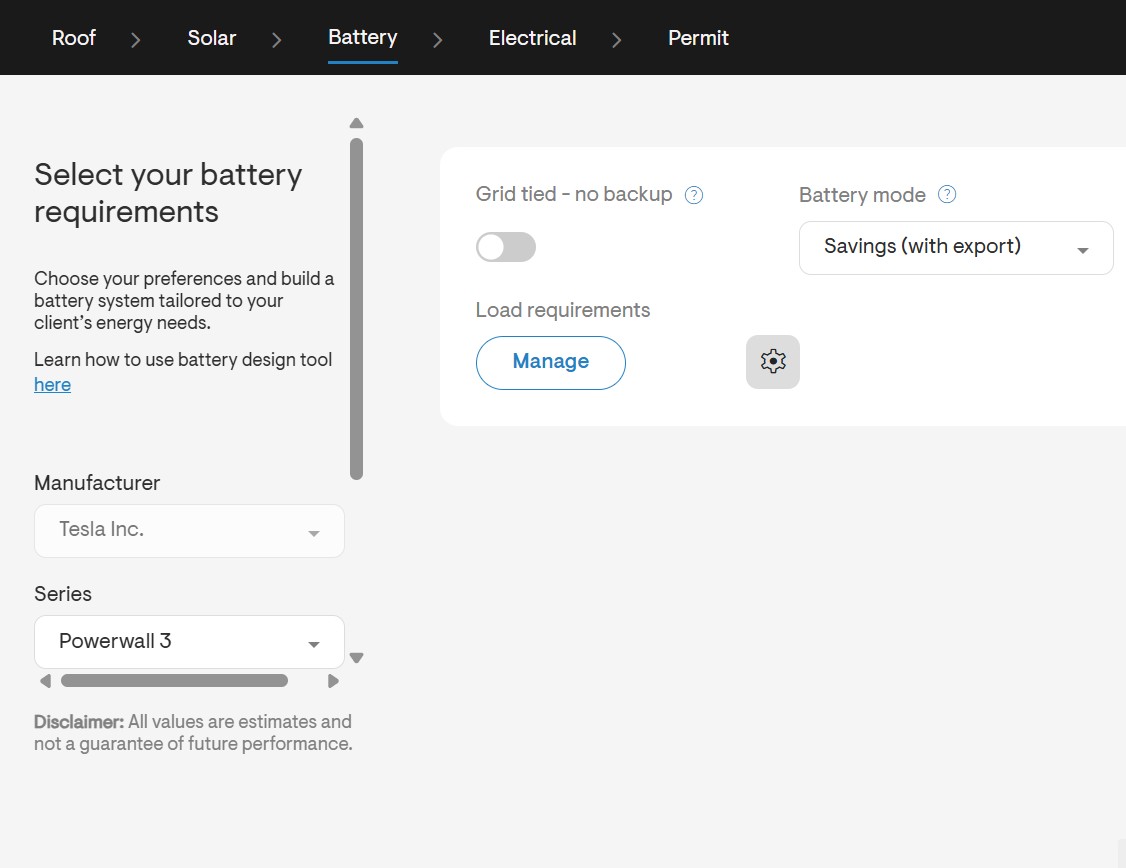
- Input and select the desired battery settings for this project.
- Click the Use recommended size button.
- Select the battery that provides the desired metrics for the homeowner (self-consumption or savings).
Save your changes.
Setup the Pricing and Replacement Costs
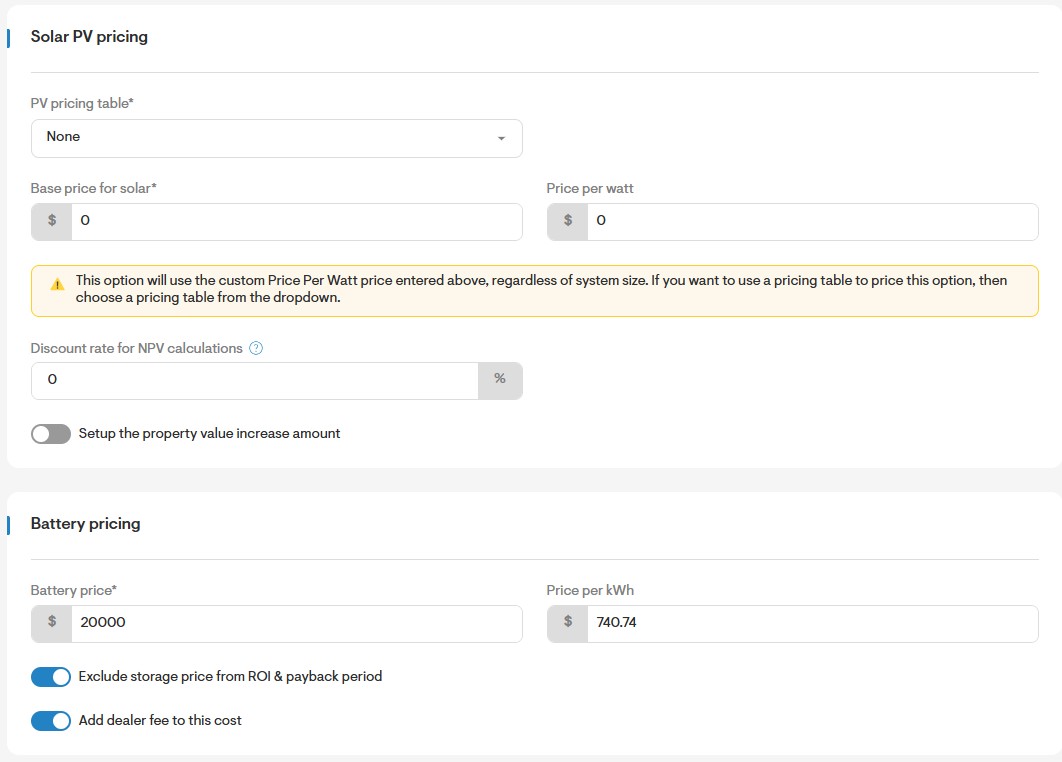
- Go to the Pricing settings and fill out the Solar PV and Battery pricing section of your project in order to set up the system price.
Note:Prices displayed in the screenshots are for illustrative purposes only. Kindly input your quoted prices accordingly.
- Set up the Inverter and Battery replacement costs to show accurate savings to the homeowner.
Note:Solar panels work efficiently with a nominal degradation of 0.5% per year for 25-30 years. Inverters and battery systems with a warranty of only 10 years (e.g., Powerwall 3) might need multiple replacements to function for the entire lifespan of solar panels. Here's how you can set up Powerwall 3 replacement costs:
- Inverter replacement cost: Enter the $/Watt cost for replacing the inverter at the end of each warranty period (inverter life).
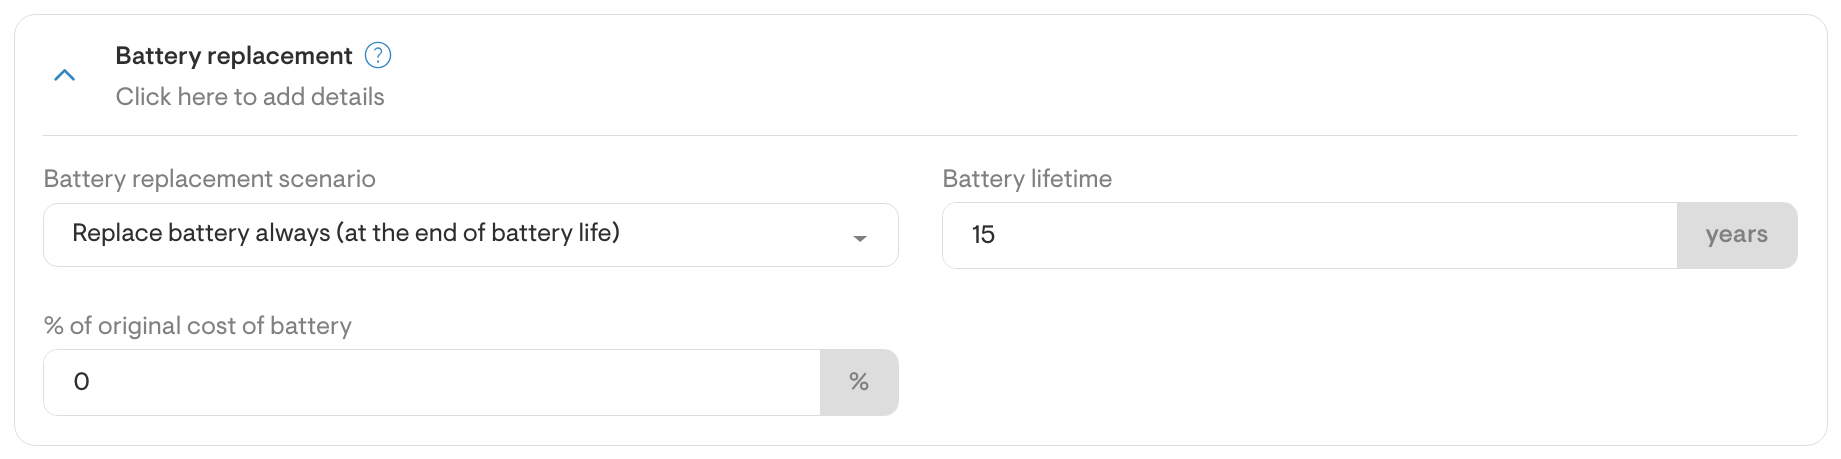
- Battery replacement cost: Select the Battery replacement scenario as Replace battery always (at the end of battery life)and enter the % of original cost of battery to replace the battery at the end of each warranty period (battery lifetime).