Help Center Roof Design
Create a Ground Mount Design
Published on 1 Aug 2023
This article is relevant for users of the guided design experience only. You may enable this in your user preferences, with the toggle labeled "Use guided design experience".
The following guide will walk you through how to create a Ground Mount design in Solargraf.
After creating a new project, users who wish to create a ground mount design without modeling the roof may use the steps outlined in this guide to do so.You may enable this in your user preferences, with the toggle labelled "Use guided design experience".
While modeling the roof is generally recommended - since this gives the user flexibility to create designs that use both the roof and the ground (or easily change the PV system’s location between the roof or ground, per the customer’s feedback) – it is not strictly necessary. Note that for any ground mount placed close to a roof structure, it is important to model the roof, such that its shading impact on the panels can be accounted for.
Feature details
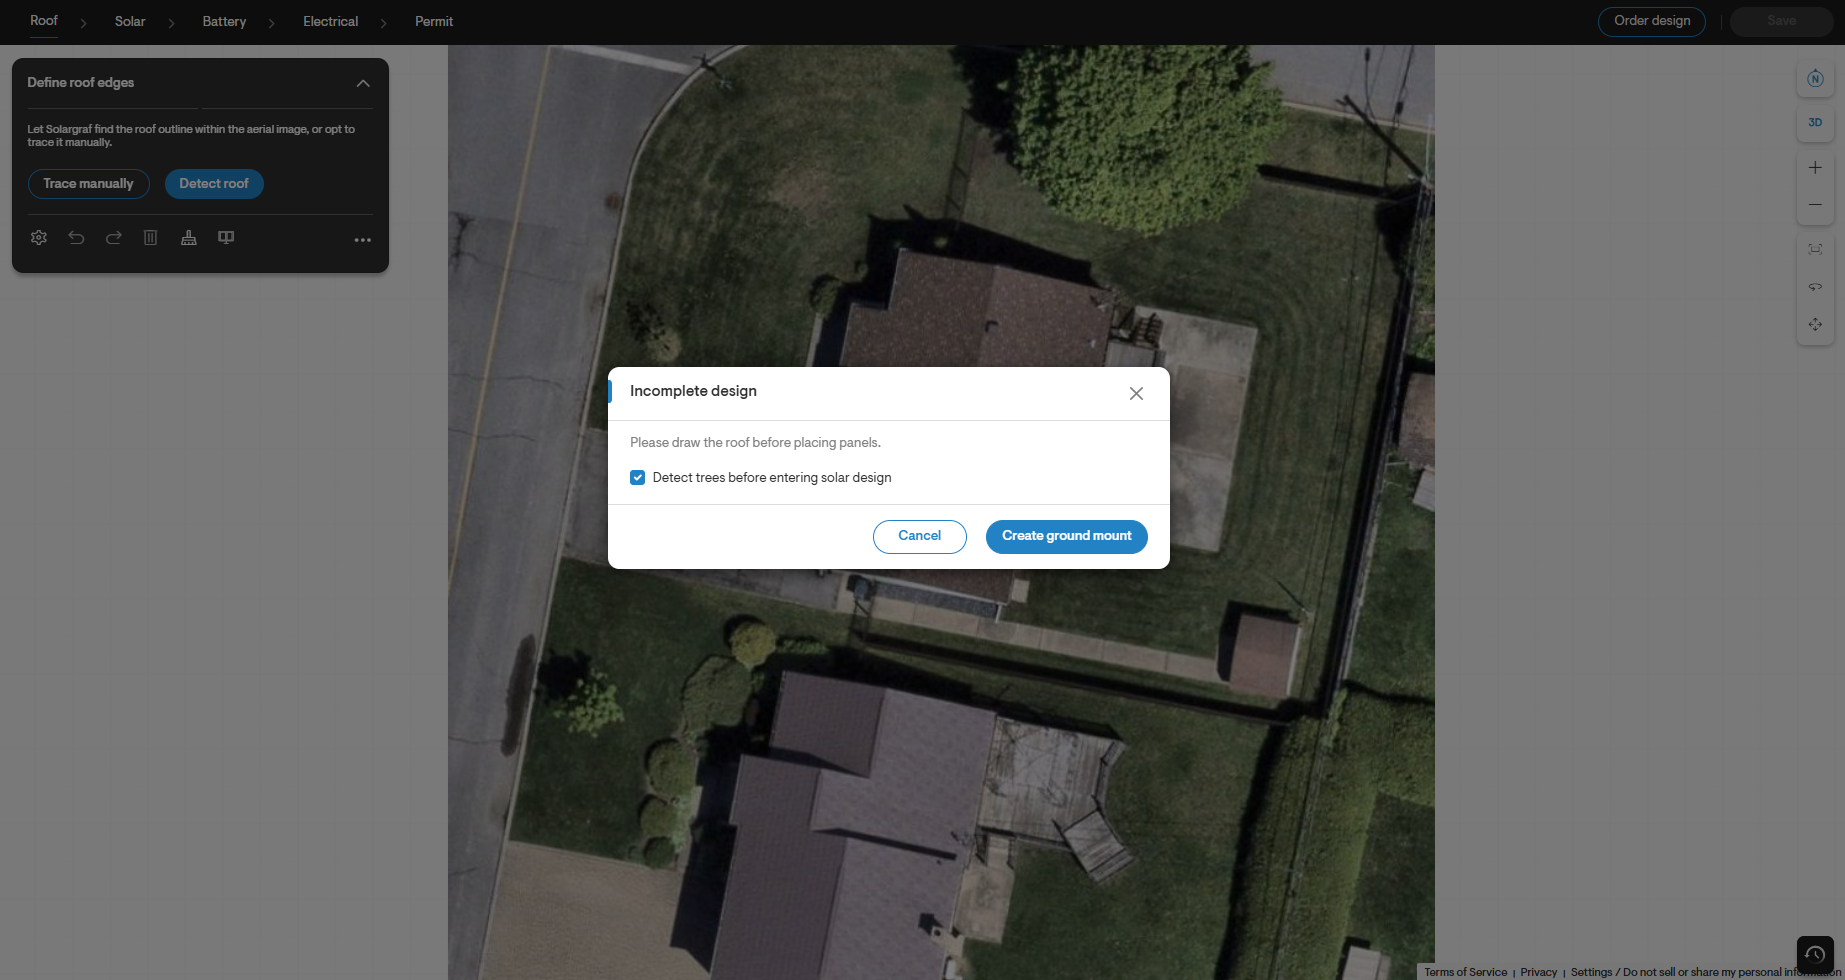
Once the design tool opens, the user may opt to skip roof design by directly selecting the “solar” tab in the top-left corner of the design tool.When doing so, they will be prompted to detect trees. This helps to account for their impact on shade and ensures that no panels are placed on top of a tree.
Once the solar design tab opens, the Create array menu is displayed automatically. The user can choose the panel and microinverter to be used in the design and the desired panel orientation (portrait vs landscape).
The user may also define the array azimuth (in degrees). Leaving this blank will assume an azimuth of 180, where the panels face due south (this is the optimal azimuth to maximize production in the northern hemisphere). The menu also includes fields to define the array’s tilt, the number of stacked panels (vertical rows), row spacing and the array’s height from the ground.
The user may click and drag to define the area on the ground where panels will be placed. Once an array is placed, it can be selected using the Select tool. When the array is selected, the user can edit its properties (hardware, azimuth, tilt, spacing, etc.).
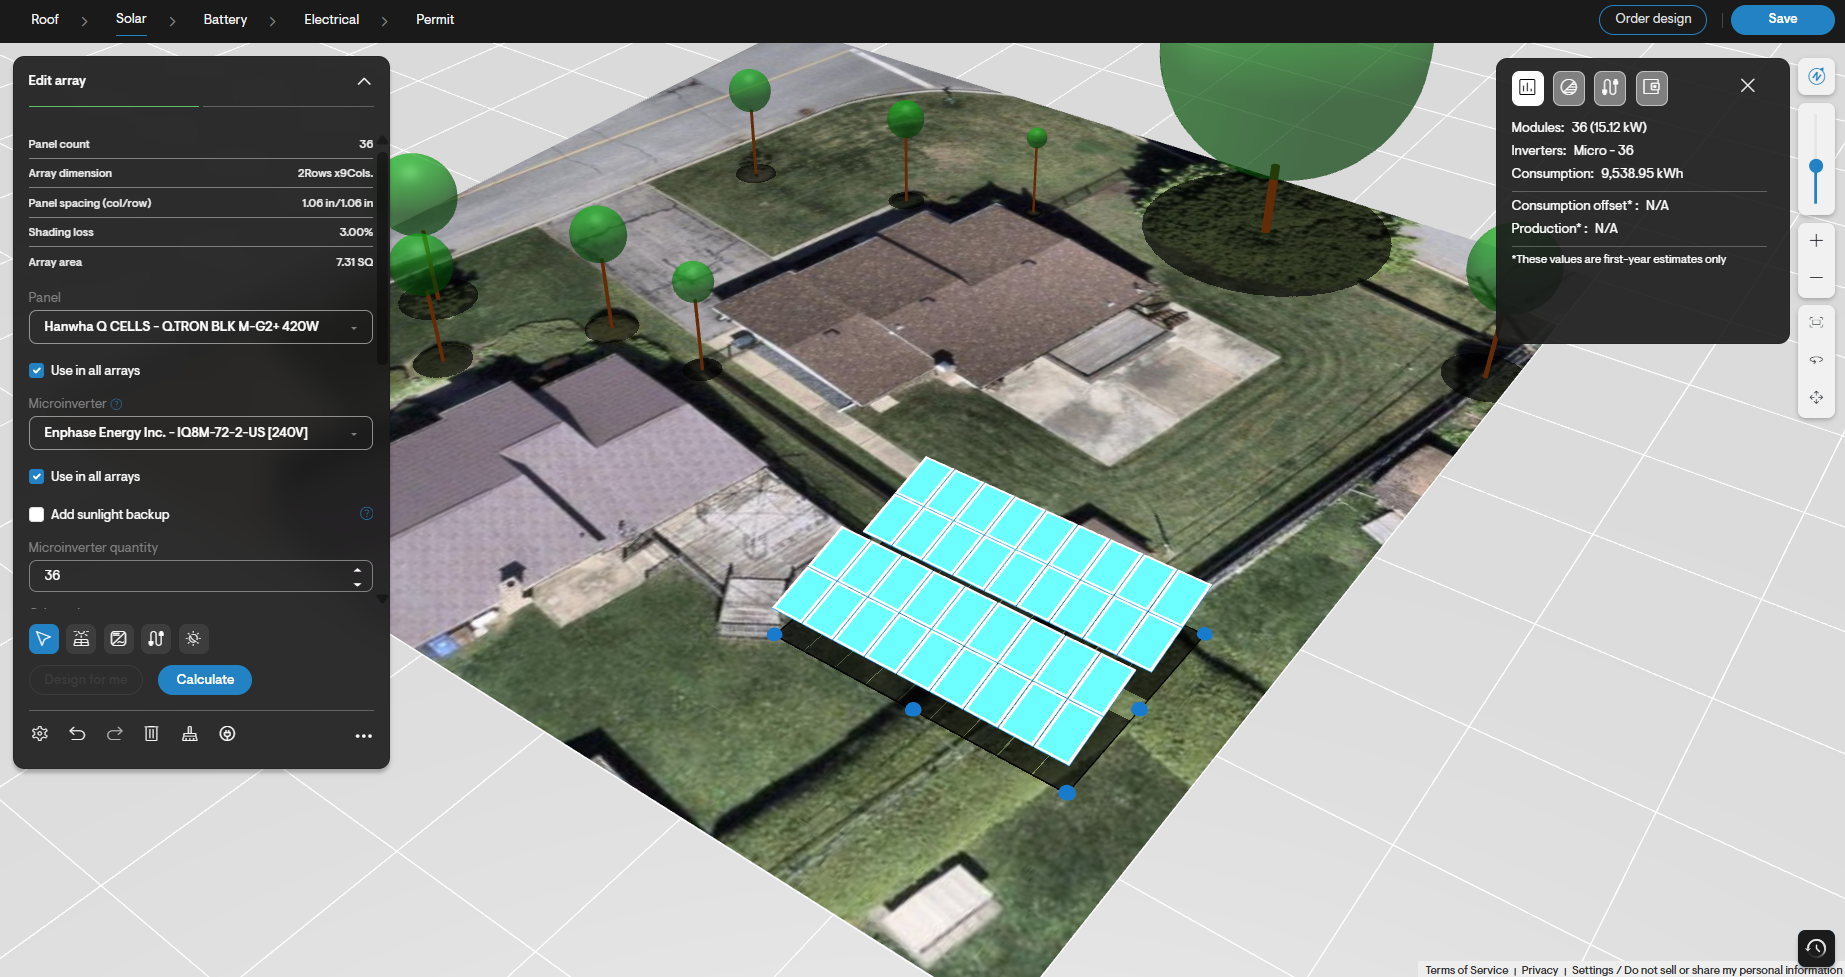
The menu also includes an option to “optimize row spacing”. This considers the tilt and orientation of the panels, as well as the number of rows of panels stacked vertically on top of each other, to determine the minimum row spacing needed to avoid shading from one row of panels on the row behind it, from 10am to 2pm on the winter solstice (shortest day of the year).
Panels can be re-positioned with the Select tool selected, by clicking and dragging any panel. The array can also be re-sized by clicking and dragging any of the blue circles at the perimeter of the array.
At any time, the user can calculate production and compare this with the property’s reported consumption.