Help Center Utility Set up
Consumption Profile
Published on 19 Oct 2022
The following guide will walk you through understanding how to define a consumption profile for your Solargraf project.
Step 1: Set Energy Consumption
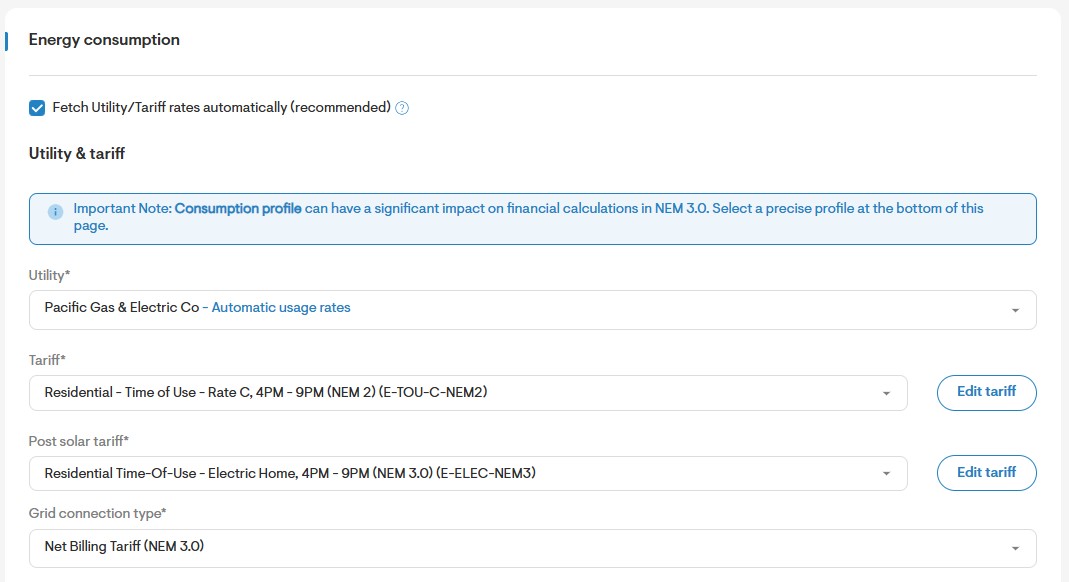
- Begin by choosing whether to Fetch Utility/Tariff rates Automatically or manually enter the buy and sell rates for the selected utility. If you choose the automated option, you will be asked to select the Utility and Tariff for this project. You may also select a post solar tariff.
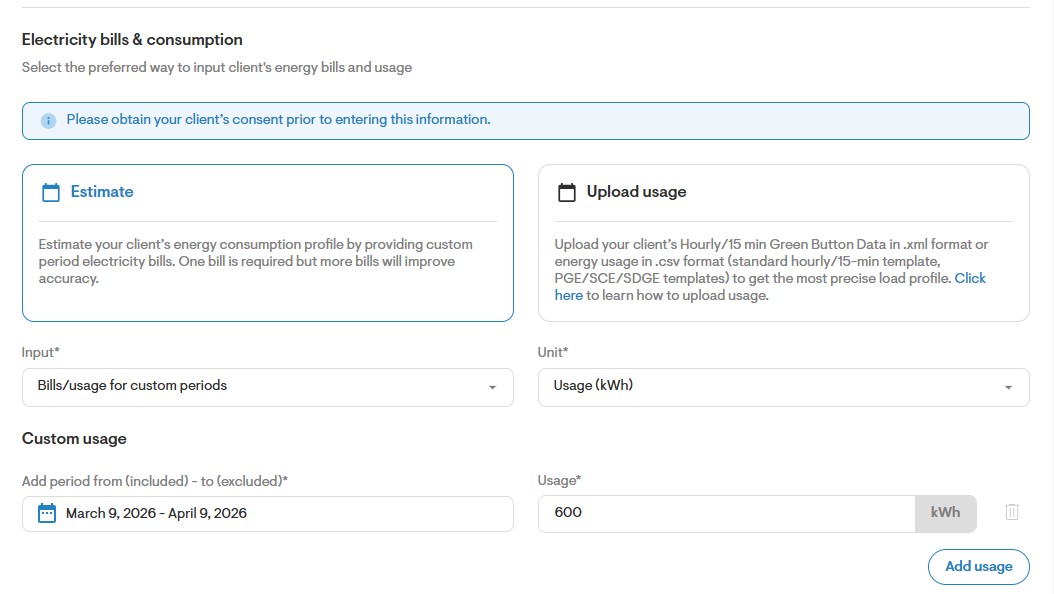
- Next, you'll need to define the Electricity Bills and Consumption. You may enter monthly or annual bills for the project, or upload a Green Button Data file.
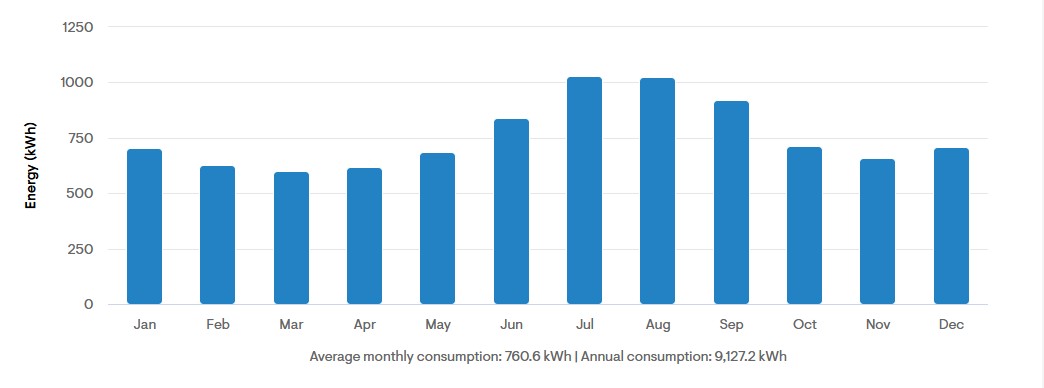
- Once you've entered the consumption, it will be presented in the following graph.
Step 2: Set Consumption Profile
- Finally, define the consumption profile for your project by selecting from the list of available options. This list will vary depending on whether you have a residential or commercial profile selected. The consumption profile will then be modeled in the graph below.
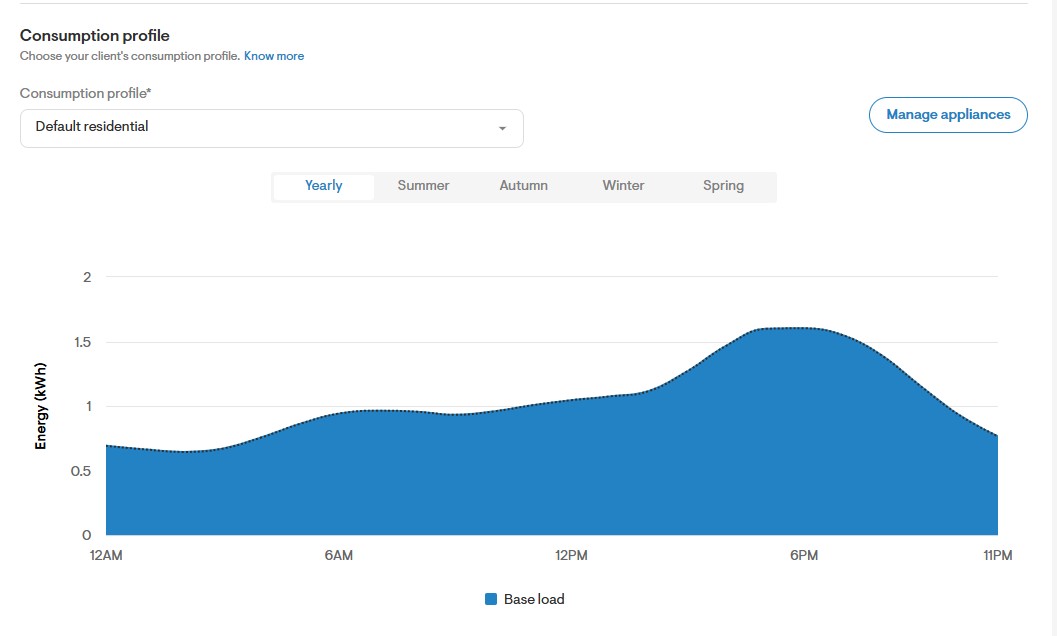
- You may select different seasons of the year to view how consumption varies. Click the Know more text next to "Choose your client's consumption profile" to learn more about the available consumption profiles.
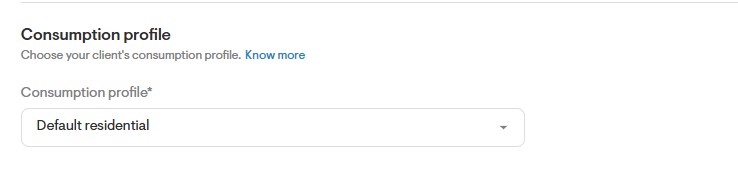
- Additionally, you may choose to build your own custom profile. When this option is selected, you may set the consumption values for either Weekends or Weekdays as well as modify the percentage of consumption during different times of the day.
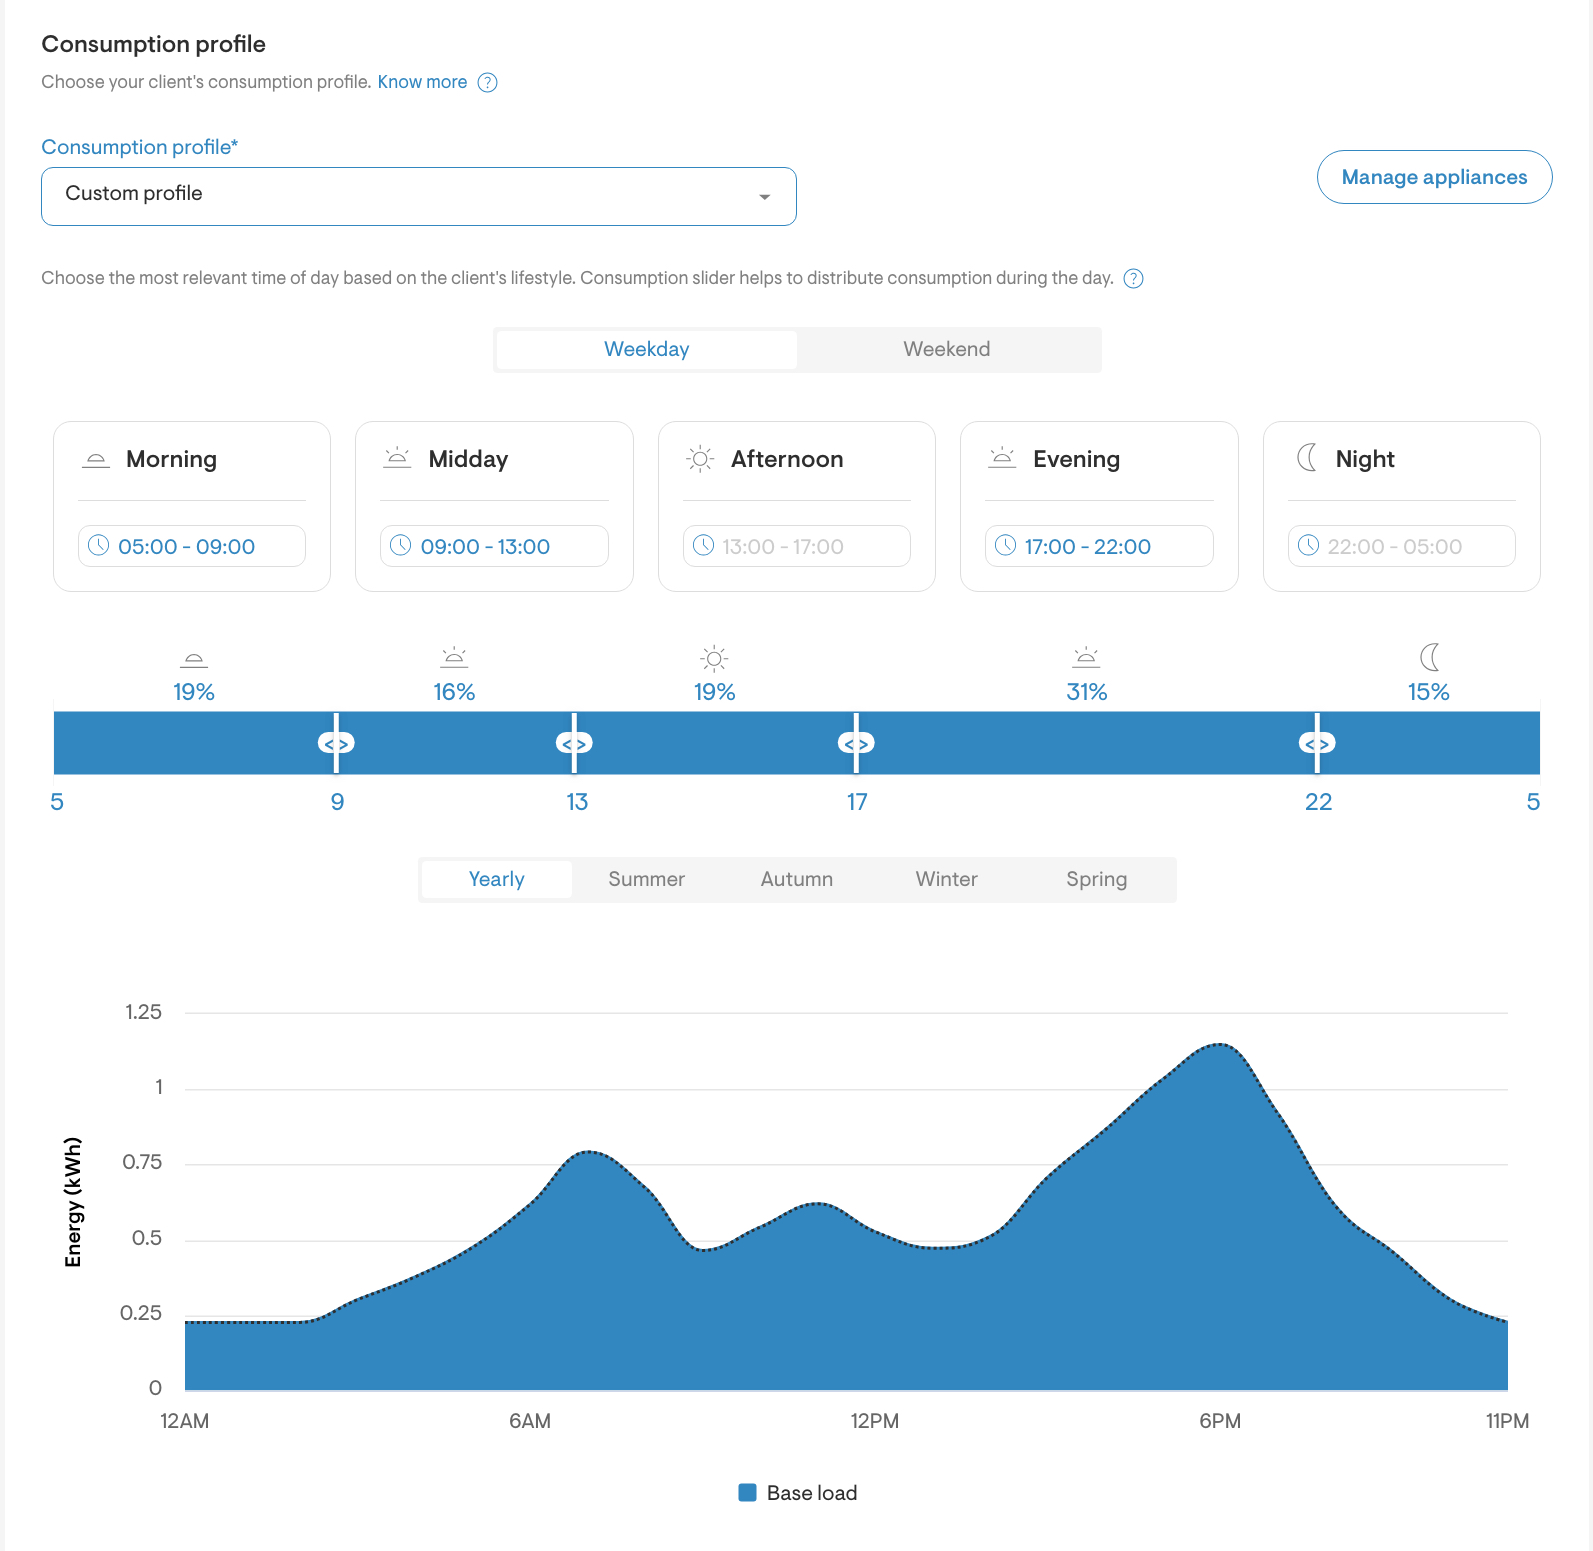
Once you have configured the consumption percentages and times, you will be able to see the simulated consumption profile for the entire year as well as for different seasons of the year.
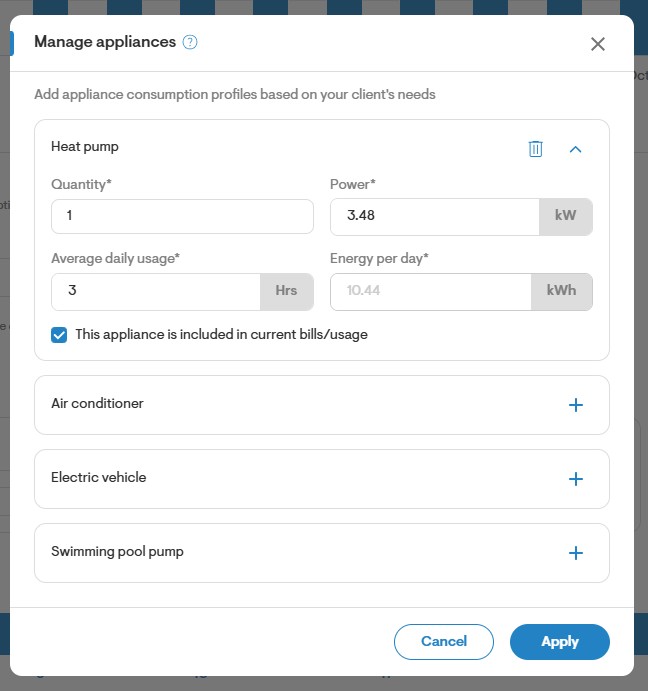
Lastly, add any necessary appliances by clicking on "Manage Appliances" under the same section.
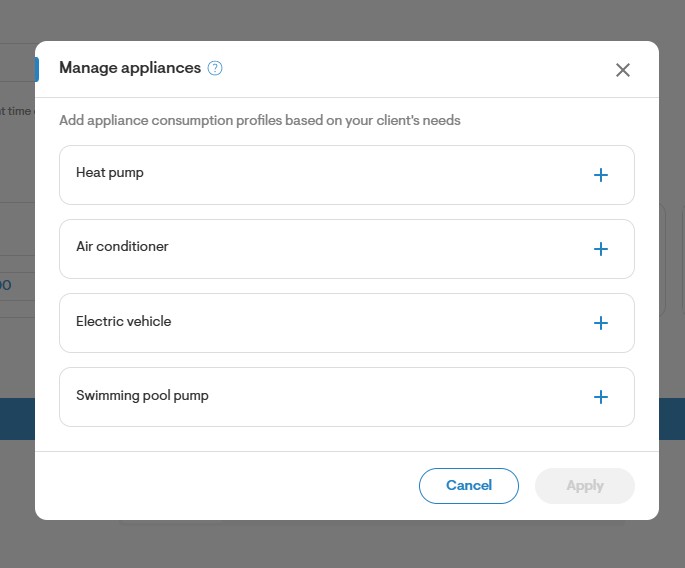
To add an appliance, simply click on the plus icon and the settings will appear. Enter the quantity, power, average daily usage, and specify whether the appliance is included in current bills.